The brief bio below for yours truly tells of HDR (High Dynamic Range) being my first love of photography. That will never change – the creative and artistic flexibility of the process allows a part of my brain that was fairly dormant for years to pop out now and then and say hello. There are also a few instances where HDR just works better (in my humble opinion) than any other processing method, like extreme contrasts in light and bringing out textures. At one time, every time the camera was pointed at something, brackets were collected and run through the tone mapping process, without much thought or consideration – it’s just what I did.
As time has moved on, I find myself moving out of the auto bracketing mode on the camera more often, and even choosing to process a single image out of a bracket set rather than processing all of them through the HDR software. This is likely a natural progression for HDR photographers. Maybe there’s some boredom involved or wanting to save some time, but there’s also other processes out there that I’m finding interesting and fun that produce some pretty cool results. Let’s take a look at an image and go through how the stuff behind my eyes is processing things these days.
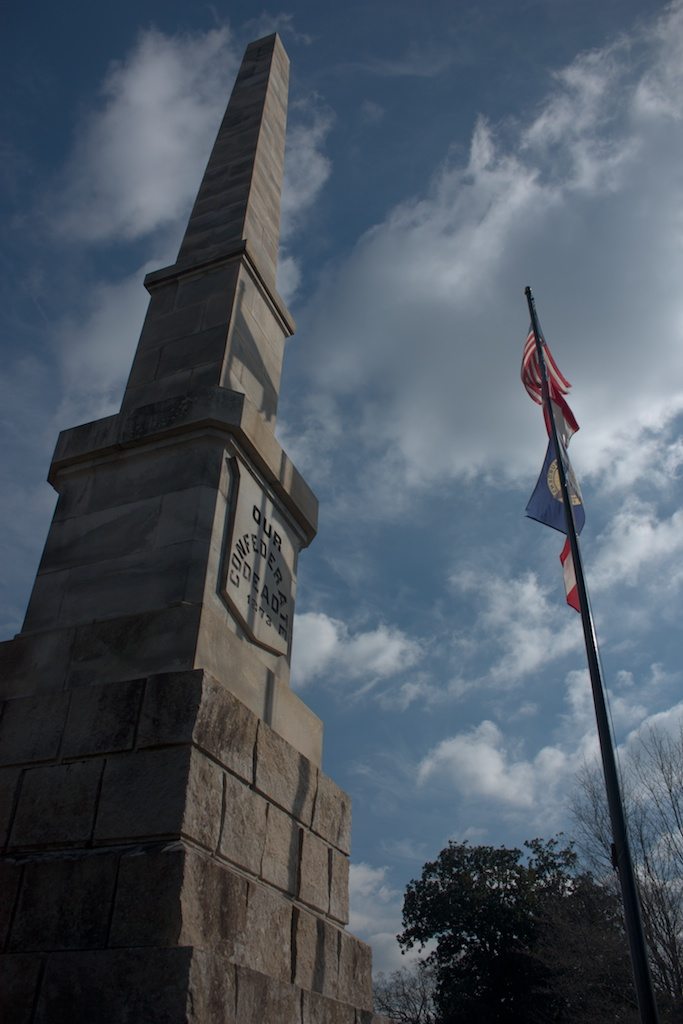
Middle Bracket 0 EV
Take this image above. It’s the middle shot of a bracketed set of 5, ranging from -2 EV to +2 EV at 1 EV increments (this image is 0 EV). It was taken back in February 2010 and is a monument devoted to the Confederate dead buried in the historic Oakland Cemetery in Atlanta, GA. Back in 2010, this set was immediately run through Photomatix and tone mapped. Looking at the stack now, my preferences have changed – here’s why.
The first issue is the movement in the image. As I scrolled from the darkest image to the lightest image, the cloud movement from one frame to the next was significant. Also, the flags on the pole were quite active and the shadows they cast on the monument moved along with them. This kind of obvious movement in a bracketed set will likely create ghosted figures in the merged image (multiple pieces of the moving objects that look like ghosts) which takes some work to fix by layering in pieces of the original set, a process that has grown a little old on me.
Now, HDR software has vastly improved the deghosting process, but in a situation like this, you could still spend quite a bit of time removing these in the software and making them look right, especially the flags and their shadows. For display purposes, I went ahead and loaded the 5 frames into Photomatix and used its auto-deghosting tool. Surprisingly, the software handled the flags and their shadows pretty well, but the clouds are still quite chattered do the movement.
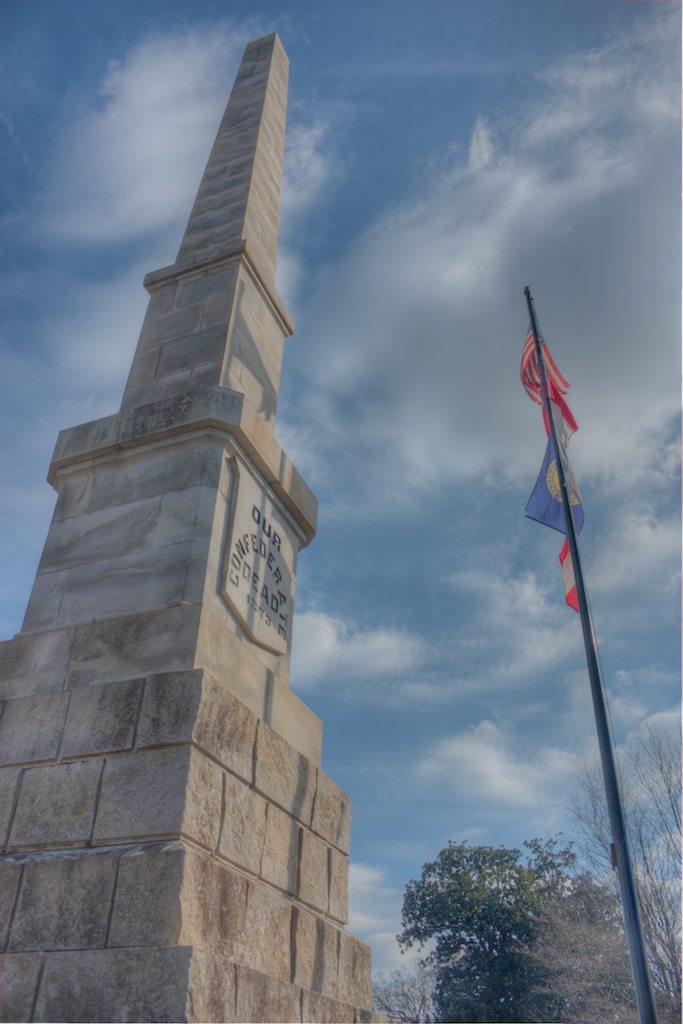
Tonemapped in Photomatix
The histogram is another element to consider, or the overall exposure. Being that there’s not much texture in this image, the main use of HDR would be to capture the tonal range of the composition – exposing the highlights and shadows. If you look at the histogram of the middle frame (below), you’ll see that there are no clipped shadows or highlights, even though it is skewed to the left, or darker, side of the graph. In other words, the tonal range has been captured in the single frame without losing any data.
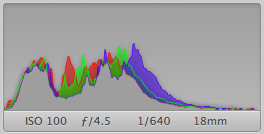
Chances are, if the exposure compensation had been increased to +1/3 or +2/3, this frame would have been perfect (the +1 did have blown highlights). Even if there are some clipped shadows or highlights, where they are located in the picture could also play a part in whether to move forward with tone mapping. In this image, the shadows were heaviest on the backside of the monument and in the background trees. What part of the story of this picture would we lose if they remained in shadow? If anything, the shadow on the backside of the monument yields a bit of dimension, which is pretty cool I think!
The capability of your editing software also comes into play with images like this. The latest updates to both Lightroom and Aperture included improvements in highlight and shadow adjustments, allowing you to pull more detail out of these areas, especially when processing RAW images. Further improvements in noise reduction and selective brush adjustments make them pretty potent editing tools by themselves along with being stellar catalog management systems.
But what about style? Glad you asked! That is another element that has influenced my ‘To HDR, or Not To HDR?’ decision making process. The old film look has totally grown on me, so much so that I’m even considering buying an old film camera to play with – yeah I know, it’s really bad! Until that time comes, I’ve really taken to VSCO Film presets for Aperture, sold by Visual Supply Company. These specific presets give a very real film look to digital images and also come with an editing tool box for customizing that look. The shot below was processed using VSCO Film in Aperture.
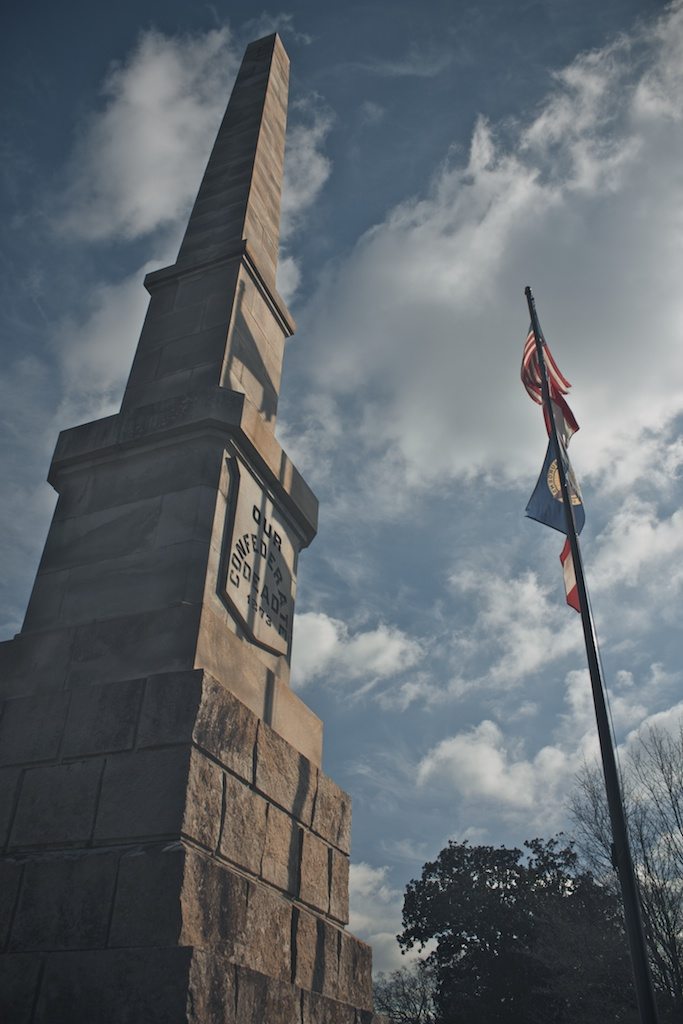
Processed in Aperture using VSCO Film presets-
Another tool I’ve found enjoyable is the Perfect Photo Suite from OnOne Software. The suite contains modules for portraits, masking, layering, photo effects, selective focus/tilt shift effects, frames and resizing and all are really well done. Recently, I loaded two brackets (one for the sky and one for the darker portion of the image) into the Perfect Layers portion and manually blended them together before sending them into Perfect Effects for stylization. Other than pressing the shutter button, the image started and finished within the suite (see below).

When it’s all said and done, how we compose/expose images and the tools/methods we use to process them all come down to what you as an artist are trying to communicate through them. The end product, not the process. So, the tools you use should be the ones that suit your workflow, those you enjoy using and produce the end result you desire. HDR is one of those tools, and one I will continue to use a great deal, but now I see that it has specific areas where it doesn’t necessarily work and may not suit what I’m trying to convey in every image or might be more work than what’s needed. Fortunately, editing tools for photographers continue to get better and better and give us more options so that we can be selective about which we apply and how we apply them.
And it’s not just the editing tools. The camera settings, lenses we select and the composition we choose all contribute to the end result, as well. Before setting the camera up to take a picture, consider your subject and what you want to be communicated about it through the image. Select the lens and camera settings that suit that communication and put items in the frame and/or remove others necessary to produce the composition that best conveys your intention. Press the shutter. Then process the images with the tools that best support the story being told. Sometimes, that may take several tools, others, only one, if any. That, indeed, is up to you and what you see behind your eyes!
*The Current Photographer website contains links to our affiliate partners. Purchasing products and services through these links helps support our efforts to bring you the quality information you love and there’s no additional cost to you.
Landscape and fine art photographer based in Lexington, Tennessee – that’s right, Tennessee! Love of long exposures, black and white and film photography. Social networking junkie and love geeking out about everything photography! Husband to Laura and father to Sam. Well, there’s Doc the dog too!