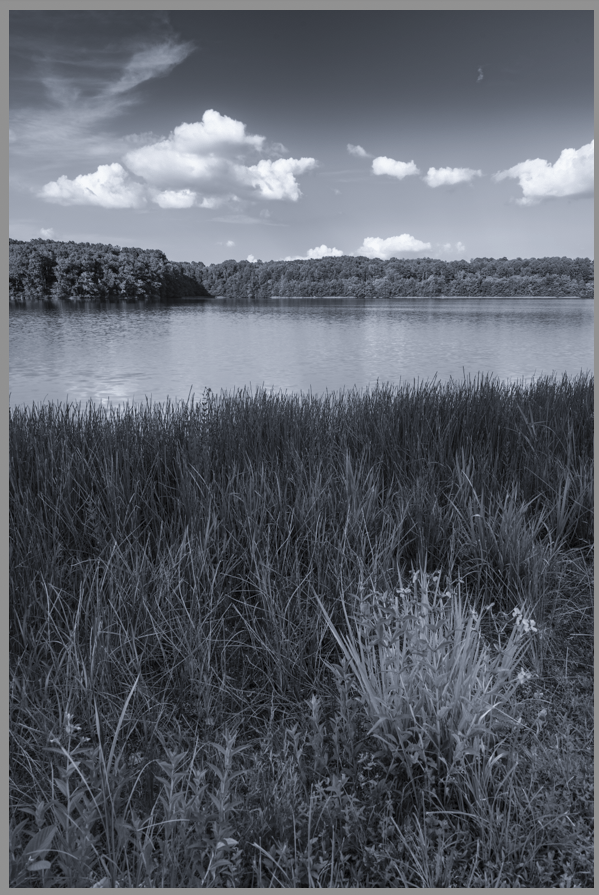
When color does not add to the story, remove it. This is a rule I work with in editing my images and some images, even when seeing them without the camera, you know are going to be black and white. However, just because an image is converted to black and white doesn’t mean color toning can’t be used. Almost every black and white image I make will take on either a warm or cold tone depending on the mood I want the image to take on.
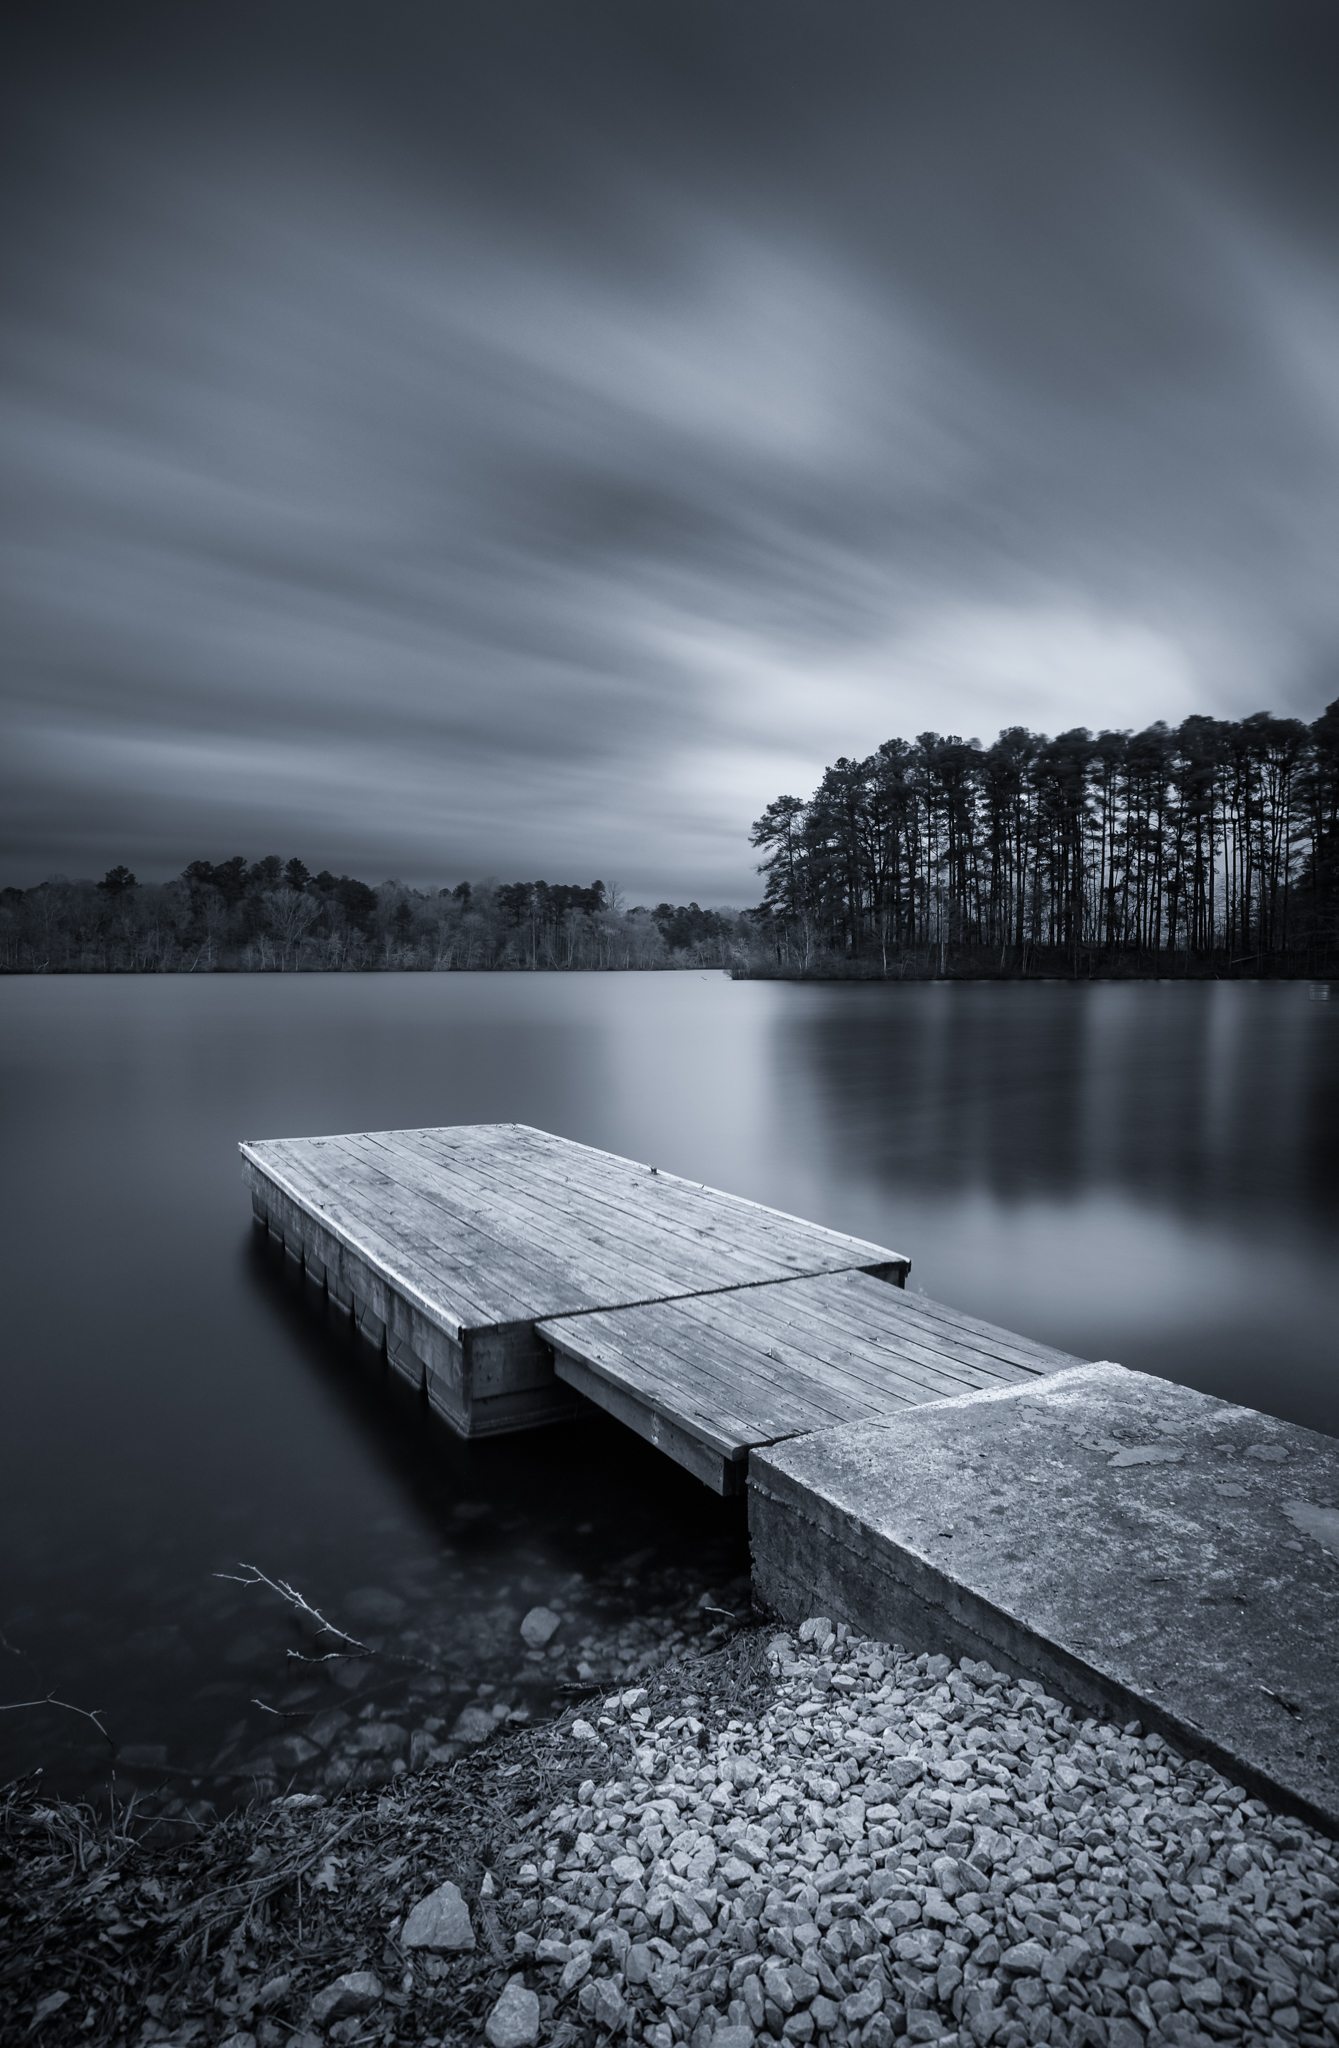
Cold toning of a black and white image
One of the things Lightroom drops the ball on, in my opinion, is black and white conversion. It’s just never produced the image I envisioned when converted there. As result, almost every black and white image I produce has been converted with NIK Silver Efex Pro 2 or using a gradient map in Photoshop. As poor as the black and white conversion in Lightroom is, toning the image after conversion is incredibly easy and efficient in Lightroom, and I use it nearly every time – and that’s where we’re going to go today!

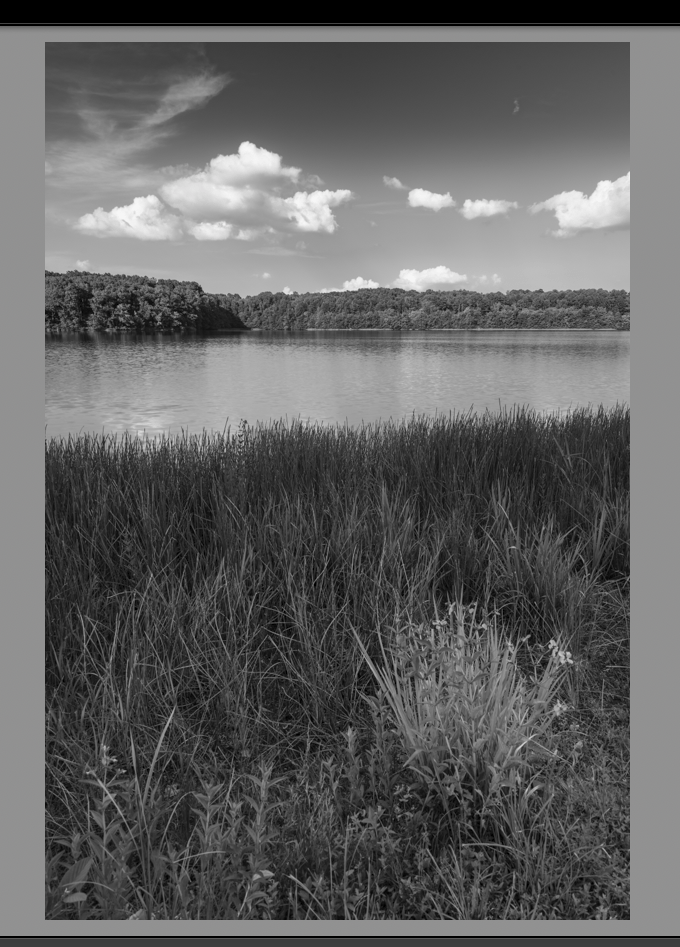
Warm toning of a black and white image
DISCLAIMER
Two things to get out there before we move one. First, I LOVE the VSCO film presets in Lightroom and use them almost exclusively for portraits, color or black and white. It’s really the only time my images are converted to black and white in Lightroom directly. Second, The statements made both previously and later in the article about the Lightroom black and white conversion are based solely on my preference – if you like converting there, go for it! This is not a rule as much as a possible tool set that may help you in toning your images quickly and effectively.
With that said, this method of toning can’t be used in the same manner when conversion is performed in Lightroom, that is unless the image is externally edited afterwards. There are other options prior to exporting and we’ll mention them as we go!
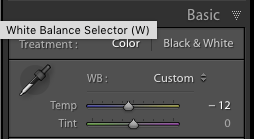
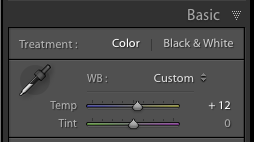
THE TEMPERATURE SLIDER
Ok, so, there’s nothing new about using the temperature slider in Lightroom – it’s a very useful tool in color balance and creative editing, however, it is my GO-TO slider for black and white toning! Let’s look at how it works.
The image below was converted to black and white and edited for selective exposure, contrast and structure in Silver Efex Pro 2, then saved back into Lightroom. It looks good from a tonal balance, light to dark, but let’s say we want to add a cooler tone to the overall. Being that we converted outside of Lightroom, the temperature slider now will apply temperature tones, cold or warm, on top of the image. You can find the temperature slider in the BASIC portion of the Development module.

To add a cooler tone to the image, simply drag the slider to the left, towards the blue part of the slider, until you obtain the desired cooler tone. A -12 setting gives a nice cooler tone without changing everything to blue – see the image below.
Let’s say you would prefer the warmer tones instead. It’s as simple as dragging the slider to the right, towards the yellow color of the slider. See the opposite effect below. As you can see, the warmer image yields a more sepia-like tone.

It’s that simple and pretty much how I tone every black and white image I make! But you might be asking, “What if I want to selectively apply a tone to the image?” Well, that’s pretty easy as well, all you need to do is use the brush tool!
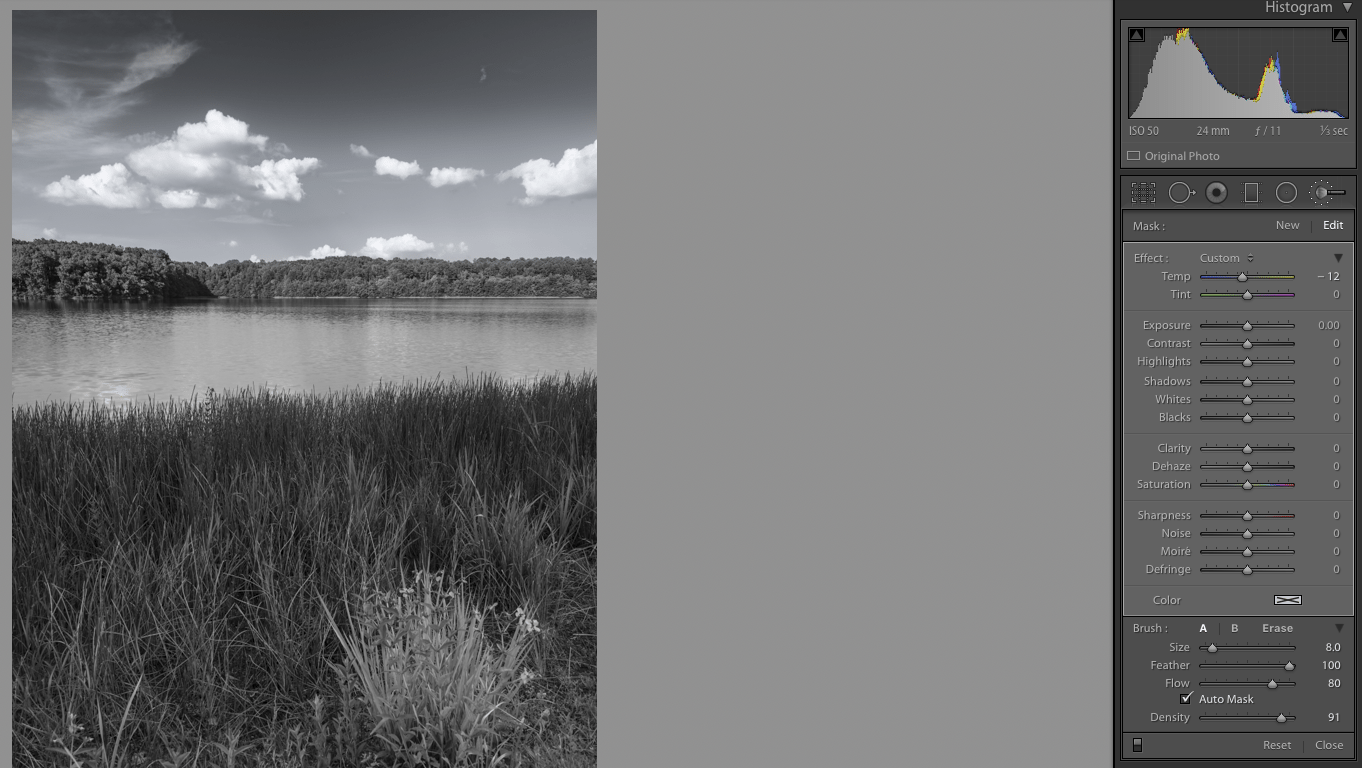
Let’s say we just want to apply a tone to the sky in this image. Click on the brush tool, which is located just above the Basic panel in the Development module – see below.

Brush Tool
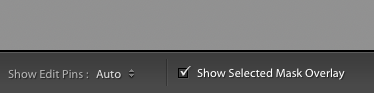
Once you click the brush tool, the above menu opens up. Be sure to double click on ‘Effect:’ to reset all of the sliders in the tool to zero. Then use the brush and drag over the portion of the image you’re wanting to apply the effect to, in this case, the sky. While using the brush tool, you can see a check box in the bottom left hand corner of the interface that says “Show Selected Mask Overlay’ to see where the brush is applying the mask.

Masked area
If there is part of the mask on an area you don’t want apply, on the brush menu, click ‘Erase’, adjust the brush size and drag over the area you want to remove the mask from. Once done, click the ‘A’ so that you can continue applying the mask.
Once you’ve set the area to mask, simply go back to the temperature slider and drag to the desired temperature just as you did before. Once you’ve got your tone, click close. This can be repeated as many times as you like with selective tones applied all over the image!
Sky is converted to a cooler tone

Sky converted to a warmer tone
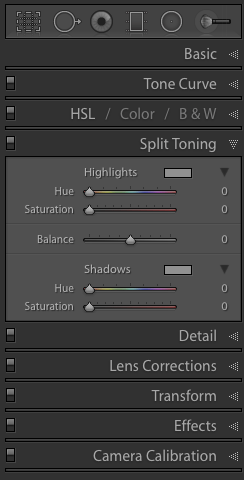
SPLIT TONING
There is another option to applying these tones, and other tones, to your black and white image through the Split-Toning menu in Lightroom. It’s not as selective as you have to apply the tones specifically to highlights and/or shadows and there is no way to brush these tones in, but it can work. It has been used on occasion, but seldom, as I typically prefer simply cooler or warmer tones overall or selectively applied.
TEMPERATURE SLIDER WITH LIGHTROOM B&W CONVERSION
As stated in the disclaimer earlier, if an image is converted to black and white in Lightroom, the temperature slider does not work in the same manner. It has a similar impact as the color B&W adjustments do. The file still knows where the colors are in the image and when converting to black and white, it applies that tone to a similar tone of gray. Let’s say you slide the blue Black & White Mix slider to the right (see pic below), the spots in the image that used to be blue increase in brightness. Sliding it to the left would then darken those tones.
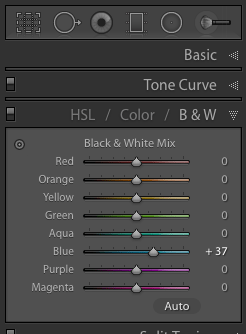
This same thing happens when you slide the temperature slider after black and white conversion in Lightroom. Sliding it to the right, or the warmer color tones, will brighten those undertones of gray. Sliding to the left, or the cooler tones, brightens those tones only. No color tones are applied on top of the black and white conversion, but their gray undertones are adjusted, so you’re not adding a tone as much as adjusting a current one. This is a much different result.
CONCLUSION
No one tool is useful to everyone. Painters like different brushes, paints, canvases, etc. Plumbers use different wrenches, sealants, brands of plumbing fixtures. Each tool fits each artist in a different way, so some work and some don’t. This method of toning a black and white image is one that works for me – it’s quick and impactful, but it does not work if converting to black and white in Lightroom, so it may not be your cup of tea. That’s OK. You may prefer to do your toning in Photoshop, or directly in Silver Efex Pro 2, or (insert plug in here) and that’s OK, too. But you may also find this method as useful as I do, and that’s cool as it makes sharing this info helpful. Just keep in mind, the overall objective is to find the tool, or tools, that works best to produce the image that exists right Behind Your Eyes!
*The Current Photographer website contains links to our affiliate partners. Purchasing products and services through these links helps support our efforts to bring you the quality information you love and there’s no additional cost to you.

Landscape and fine art photographer based in Lexington, Tennessee – that’s right, Tennessee! Love of long exposures, black and white and film photography. Social networking junkie and love geeking out about everything photography! Husband to Laura and father to Sam. Well, there’s Doc the dog too!