When you’re able to capture 2-4 minute exposures in broad daylight, you’re able to open new doors to creativity. The 10 stop B+W ND 3.0 filter is nicknamed “Black Glass”, because it reduces 1000x the light entering the camera. When you first start using it, there are a few things you want to keep in mind. Consider this Black Glass 101.
- Set your camera on a sturdy tripod, and use a shutter release.
- Set a custom white balance, using a grey card or other device.
- Set camera to manual mode, ISO 100, f/22, bulb or time mode for exposure. Also set camera to delay shutter mode.
- Compose your shot with the filter OFF. Make sure it’s the shot you want to wait up to 4 minutes for. You can’t see anything once the Black Glass goes on.
- Focus the scene and turn auto focus OFF.
- Carefully screw the Black Glass filter on the front of the lens.
- Using a stopwatch, open the shutter and test the scene. I will usually test my first shot at around 1:30 seconds. From there I can determine if I need to reduce or add time.
- Always check your histogram. This is your lifeline when using this filter. I aim for exposures that take up about 75 – 100% of the histogram.
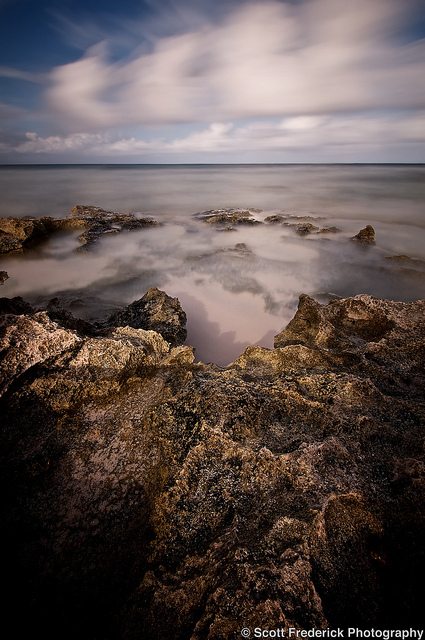
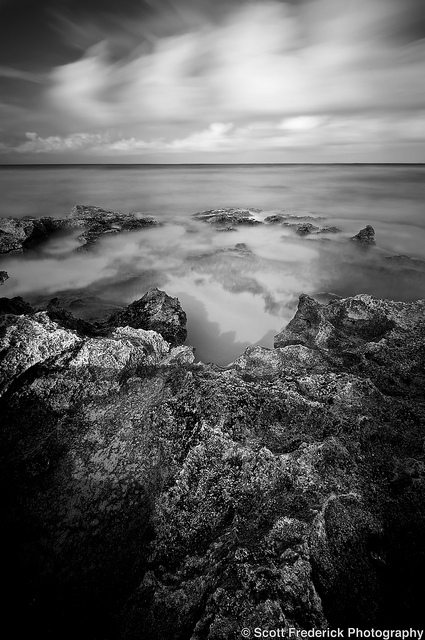
This filter is all about trial and error, experimentation of exposure times. You can set the aperture to f/27 or F/32, if your lens allows to increase the exposure time, or lower it to f/19 or f/16 to reduce the exposure time. Also changing your ISO will play a huge roll in the desired outcome. I find that bulb or time mode and a stopwatch is the best and only way to use this filter. I haven’t processed too many of my ND filter shots as HDRs yet. I’ve been happy with the results thus far, just using the single exposure. I’m also a big fan of converting these shots to black & white.
Have fun with your ND 3.0. Sometimes while using it, I wish I had another DSLR to use while waiting for it to complete one shot. I’ve spent 10 minutes and more just to get one shot. I find the rewards of using this filter outweigh the reduced number of total shots you’ll get. Just remember to be selective in what it is you want to photograph. It’s always best to incorporate moving elements with things that are standing still, because that is where you will get the most impact.
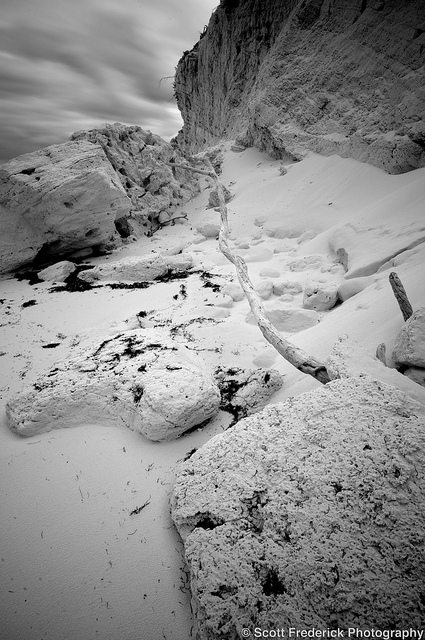
The results with landscapes can be tricky. I found myself using this filter a lot during 25+ mile per hours winds on the North Atlantic. Because of the winds I decided to work with my tripod very low to the ground. This allowed me to compose some shots on the rocks, and the wide angle lens helped add a nice distortion to the scene. Because the water was moving around the rocks, it created a otherworldly effect. Experiment with your subject matter, and bring new life to your work.
*The Current Photographer website contains links to our affiliate partners. Purchasing products and services through these links helps support our efforts to bring you the quality information you love and there’s no additional cost to you.
Scott Frederick is known for his photography of land, city and urban exploration. His styles vary from HDR to fine art black and white including minimalism. When not using his DSLR, he likes to use the iPhone Hipstamatic app for fun. He is an avid blogger and social networker, who strives to inspire everyone to see the world through photography. He’s been awarded Editor’s Pick at HDRSpotting.com and continues to educate himself and others on new tools and techniques. Feel free to ask him any questions you may have about photography.
Outstanding Job Scott Beautiful photos & Love the way you Explained how you took all your Photos
Job well done
Awesome work scott! It was so fun scouting the island with you! Photo dudes!
Thanks for the tips, Scott! My ‘black glass’ should be arriving this week, so I’ll be putting your suggestions to use very soon!
Nice Scott……………..can’t wait to see more of your trip to Eleuthera.
Great location for sure
RT @TrevorCurrent: Landscapes: Black Glass 101 – This is a really cool filter you should definitely check out. https://currentphotographer.com/landscape… # …
Hi
This is and excellent article and the technical descriptions are spot on. Thanks for sharing! I will have to get such a filter. I achieve a similar effect with just a ND and long exposure after sunset, such as this image. Looking forward to more experiments from your insights!
Regards, Erik
http://tinyurl.com/25az5lg
Thanks everyone for your comments on this post. Very much appreciated! 🙂
RT @TrevorCurrent: Landscapes: Black Glass 101. Learn about this really cool ND filter. https://currentphotographer.com/landscape… #photog #togs
RT @TrevorCurrent: Landscapes: Black Glass 101. Learn about this really cool ND filter. https://currentphotographer.com/landscape… #photog #togs
RT @TrevorCurrent: Landscapes: Black Glass 101. Learn about this really cool ND filter. https://currentphotographer.com/landscape… #photog #togs
Great tips for the black glass Scott! My first step needs to be ‘get a 10-stop’. 🙂