One of the latest additions to the last revisions of Lightroom and Aperture is somewhat of a game changer in my book, and that’s the ability to apply a white balance setting selectively. Being an Aperture user, I have not experienced how the Lightroom option works, but based on the many discussions and posts people made when version 4 came out, I’m guessing it’s quite good.
The latest update to Aperture included a few new options for white balance, such as three types pertaining to how you’d like for the temperature of a picture to be adjusted: Natural Gray (new), Skin Tone (new) and Temperature and Tint (previous standard). The two new additions allow you to use a brush to selectively apply the effect.
For most folks, the big reason for using this new tool is when you have competing light sources within the same picture, like having both incandescent and natural window light in the same image. You can shoot for one and apply the other in post, evening out the image. My first experience, however, was from more of a creative need. Let me show you.
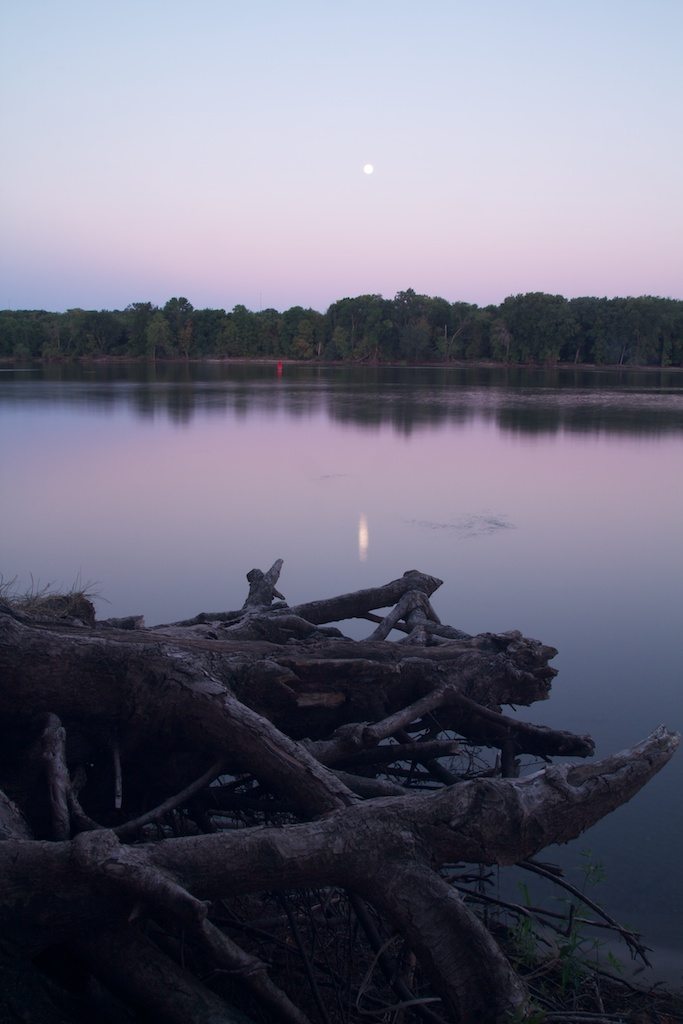
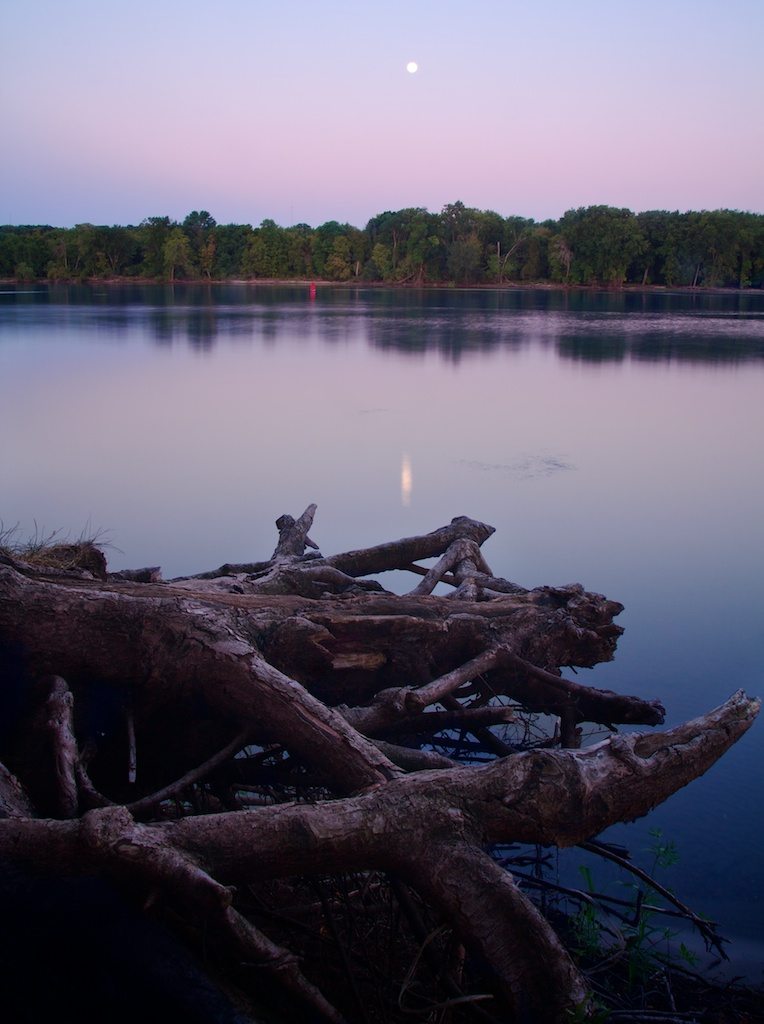
The image below is an 8 second long exposure taken at the Mississippi River in St. Paul Park, MN. That’s the Blue Moon in the sky reflecting off of the river and some rather interesting tree roots sticking out from the bank. There were two things in the image I wanted to make standout, the great blue and magenta tones in the sky (and watert) and the gnarly roots on the bank. I started with the sky colors.
The camera was set for daylight white balance and produced a temperature setting of 5144K and a tint value of 1. The first adjustment (after a crop) was to increase the magenta tint to 6 then cool the image off to below 5000K. On top of that, the saturation and luminance for both blue and magenta were increased. This really made these colors vibrant just like I wanted. Problem was, it cooled off the image so much that the roots had a major blue tint along with the tree line on the opposite bank. See below.
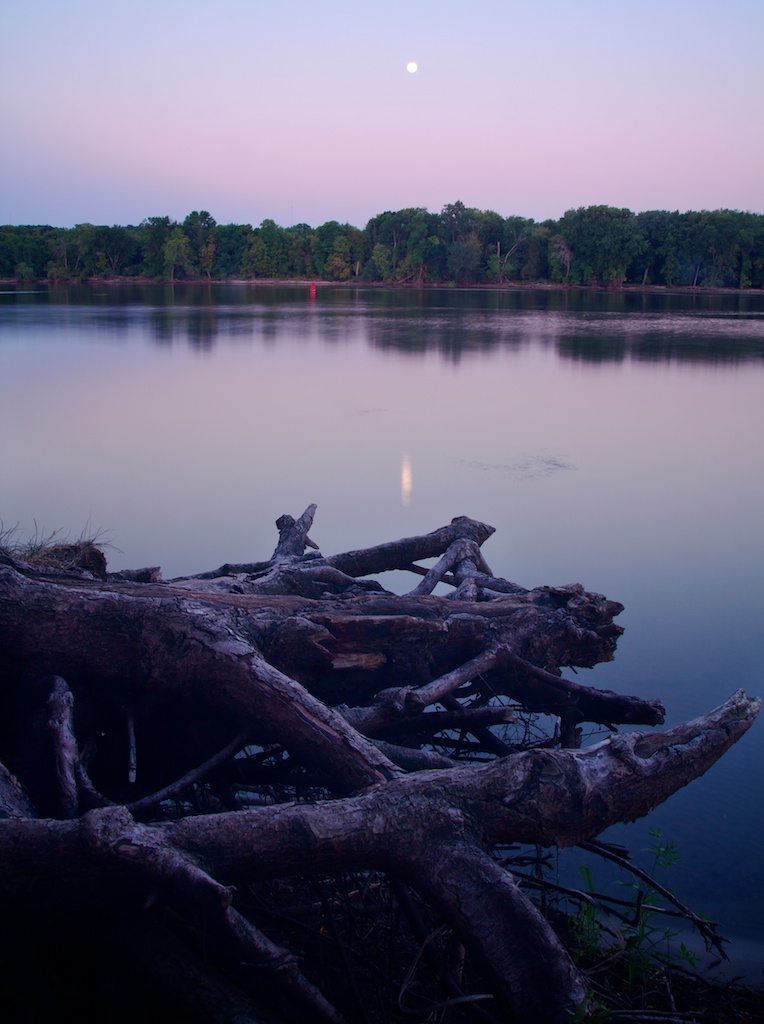
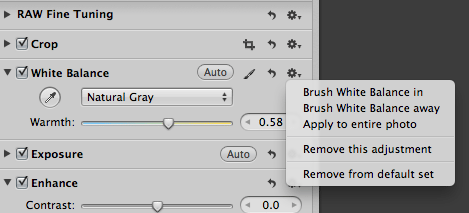
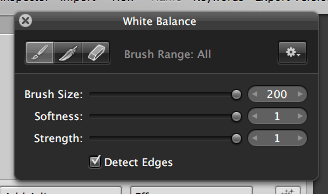
This is where the new white balance brush tool comes in. First, I changed the White Balance type to Natural Gray (see below) then adjusted it until the roots took on a more natural, warmer color. Once the tones were what I liked, the little gear drop down box was clicked and the option ‘Brush White Balance in’ was selected so that I could selectively apply the new warmer tones only to the roots and the tree line on the opposite bank. Another cool option when using Aperture brushes is the little tick box at the bottom of the brush dialog box that says ‘Detect Edges’. Aperture allows you to apply the brush a bit more liberally and it takes care of detecting the edges and not allowing the effect to go outside of them. This really helped in keeping the cooler blue tones in the water and sky while applying the new adjustments to roots and trees.
After applying a few more effects in Aperture and some slight noise reduction in Topaz DeNoise, the finished image combined both increased accent to the colors in the sky as well as the roots on the bank.
You’ve got to tip your hat to both Adobe (Lightroom) and Apple (Aperture) for coming up with this type of editing tool. The flexibility these new tools put at photographers’ fingertips really allow for color correction to be more dynamic, but also allow for greater creativity in the digital darkroom. They may not see action on a regular basis, but when the opportunity arises, it’s great to know they are available and can be used to better suit the image that’s behind your eyes!
*The Current Photographer website contains links to our affiliate partners. Purchasing products and services through these links helps support our efforts to bring you the quality information you love and there’s no additional cost to you.

Landscape and fine art photographer based in Lexington, Tennessee – that’s right, Tennessee! Love of long exposures, black and white and film photography. Social networking junkie and love geeking out about everything photography! Husband to Laura and father to Sam. Well, there’s Doc the dog too!
