Archive for Software

Magic Lantern – Behind My Eyes

Being a fan of High Dynamic Range (HDR) Photography, I’ve become very intimate with the Auto Exposure Bracketing (AEB) function on my Canon camera. What I’ve come to realize is that obtaining the entire tonal range of an image at 1 EV increments can be difficult if your AEB settings will only allow 3 exposures to be produced. Sometimes -2, 0 and +2 are just not enough. If you have an extra $300+, you could purchase a Promote Control which offers amazing bracketing controls, but it’s hard to justify that kind of purchase for some of us.

Then, there’s Magic Lantern. It’s a third party software for Canon cameras (sorry Nikon) that sits on top of the camera’s firmware and adds awesome flexibility to DSLR video shooting, but also gives up to exposures for HDR bracketing and a cool Autodetect feature that takes some of the guesswork out of bracketing. I’ve been flirting with downloading the product onto my 60D for some time, but finally pulled the trigger a couple of weeks ago. The video below will take you through the options for bracketing on the 60D prior to having Magic Lantern, then will show how things have changed with it. Take a look.

Read More→

A Brush of Warmth – Behind My Eyes

One of the latest additions to the last revisions of Lightroom and Aperture is somewhat of a game changer in my book, and that’s the ability to apply a white balance setting selectively. Being an Aperture user, I have not experienced how the Lightroom option works, but based on the many discussions and posts people made when version 4 came out, I’m guessing it’s quite good.

The latest update to Aperture included a few new options for white balance, such as three types pertaining to how you’d like for the temperature of a picture to be adjusted: Natural Gray (new), Skin Tone (new) and Temperature and Tint (previous standard). The two new additions allow you to use a brush to selectively apply the effect.

For most folks, the big reason for using this new tool is when you have competing light sources within the same picture, like having both incandescent and natural window light in the same image. You can shoot for one and apply the other in post, evening out the image. My first experience, however, was from more of a creative need. Let me show you.

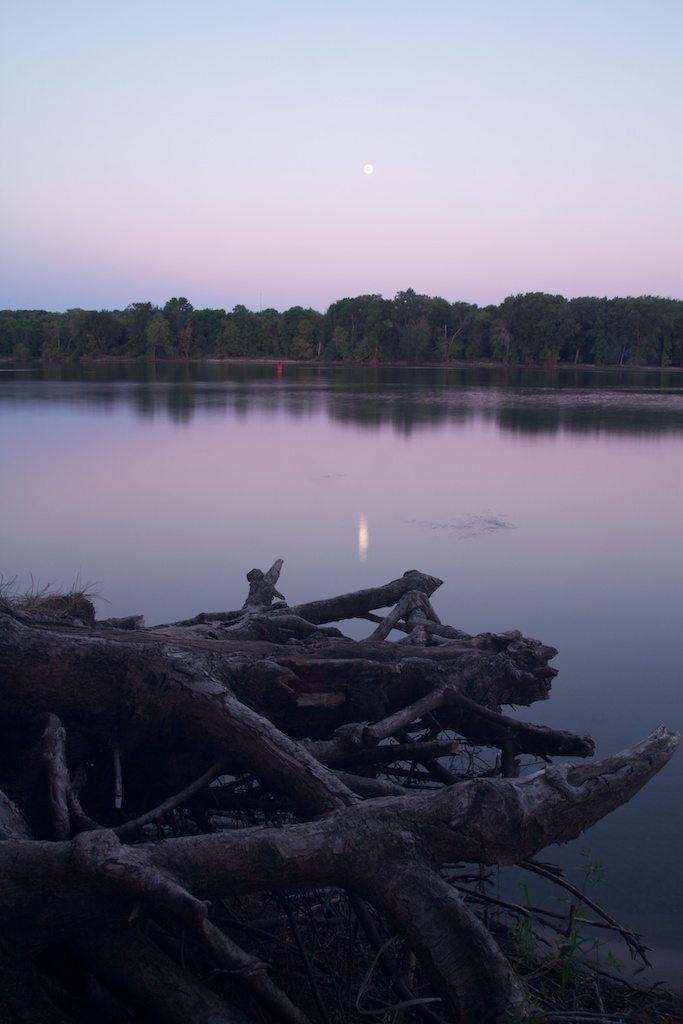
The image below is an 8 second long exposure taken at the Mississippi River in St. Paul Park, MN. That’s the Blue Moon in the sky reflecting off of the river and some rather interesting tree roots sticking out from the bank. There were two things in the image I wanted to make standout, the great blue and magenta tones in the sky (and watert) and the gnarly roots on the bank. I started with the sky colors.

Original Image – f18, ISO100, 8s, 19mm

Read More→

Going Greener – Behind My Eyes

There are numerous tools at our disposal to edit photos and the same effect can be applied with virtually all of these tools. Lightroom, Aperture and Photoshop are some of the more popular ones and the plug ins and presets for each of these programs are great in number. We typically choose these tools for editing based upon how they fit in our workflow and our comfort level for using them.

For me, I use Aperture for managing my library and basic photo editing, then will export images into other tools for specific effect application, with the main program being onOne Software’s Perfect Effects within their Perfect Photo Suite 6. The effects obtained from Perfect Effects can undoubtedly be achieved with other tools, but I go to Perfect Effects because it fits my workflow and comfort level where the other avenues may not.

Below is a video showing how using a couple of presets within Perfect Effects can quickly and easily take a normal image of a flowering plant to one with dark, rich greens and a bit of glow to give a totally different appearance than the original frame. What software would you use to produce this kind of effect? What would you have done to this image? What behind your eyes would drive you in this image?

OSXcellence – CameraBag 2 Review

The original CameraBag was one of the first style and edit apps, not only on Mac, but on iPhone too. It was well built, and performed well, but since then it has been trumped by FX Photo Studio Pro (see my review) in this category. Now, however, the folks at NeverCenter have come back fighting, with their new offering, CameraBag 2.

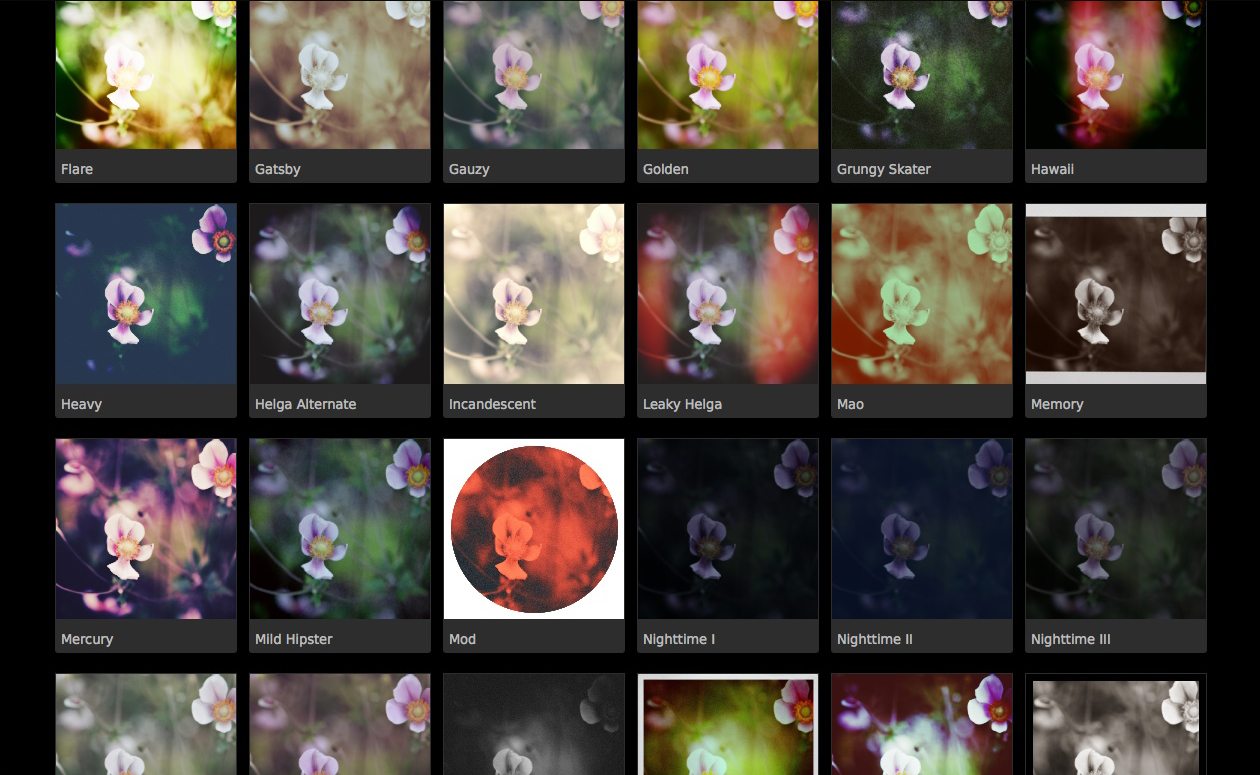
CameraBag 2 is a slick looking app, but pretty looks aren’t the main feature of this app. Editing is conducted using impressive 32-bit processing, RAW is supported, and editing is non-destructive – all high-level features, aimed at the serious photographer. CameraBag 2 includes 100+ filters under the Styles tab, but far more important than this are the editing controls under the Adjust tab. Here you find the standard fare of contrast, saturation, exposure and so on, but additionally, more higher-level controls, such as RGB and luminance curves, selective saturation and grain. When these are used in conjunction with the adjustable inbuilt filters, almost any effect is achievable. What is striking is the quality of manipulated images, thanks to the 32-bit processing; this app produces classy, print quality pictures.

The preset filters that come with CameraBag 2 are very nice, both in terms of quality and quantity. Most are based on various print or film types and techniques, and are (in my opinion) very stylish. Examples include “Cyanotype,” “Leaky Helga” and “Super 1962.”

Read More→

Nevercenter Redesigns Photo Editing With CameraBag 2

February 2, 2012 – PRESS SUMMARY – Nevercenter released CameraBag 2 for Mac and PC, a desktop photo app with a whole new approach to photos. Redesigned from the ground up, CameraBag 2’s new Analog Engine pairs a full suite of photographic tools with the high quality filters and vintage simulations the series is already known for. Its key innovation is a stunningly straightforward approach to layering, rearranging, and endlessly tweaking all of these effects in realtime. The 100+ fully-adjustable filters and 25+ professional controls CameraBag 2 ships with are only the beginning, forming the palette from which users create their own styles.

Read More→

onOne Software Announces Perfect Photo Suite 6 for Photoshop, Lightroom and Aperture

onOne Software Perfect Photo Suite 6September 16, 2011 – PRESS SUMMARY – onOne Software, Inc., announced Perfect Photo Suite 6 along with new products Perfect Effects, Perfect Portrait, Perfect Mask, and an update to Perfect Layers. All products in the Perfect Photo Suite 6 now work as standalone applications in addition to working directly from within Adobe Photoshop Lightroom, Apple Aperture and Adobe Photoshop.

Giving photographers intuitive tools that work where they do, the Perfect Photo Suite 6 now offers solutions for photographic effects, portrait retouching, creating and working with multilayered files, replacing unwanted backgrounds, image resizing, depth of field control, and edge effects, in one affordable package. The Perfect Photo Suite 6 includes Perfect Effects 3, Perfect Portrait 1, Perfect Mask 5, Perfect Layers 2, Perfect Resize 7, FocalPoint 2 and PhotoFrame 4.6.

With this new version of the Perfect Photo Suite 6, photographers can now move effortlessly between individual applications within the Suite and have complete flexibility to use the products where they work. The Perfect Photo Suite 6 now operates not only as a plug-in for Photoshop but also as a standalone application. This additional functionality means that the Suite can be used directly within Lightroom and Aperture without the need for a separate host application as was previously required. Perfect Photo Suite 6 will continue to include full support for Photoshop CS5 and CS4 with many of the products now functioning as Smart Filters.

Read More→