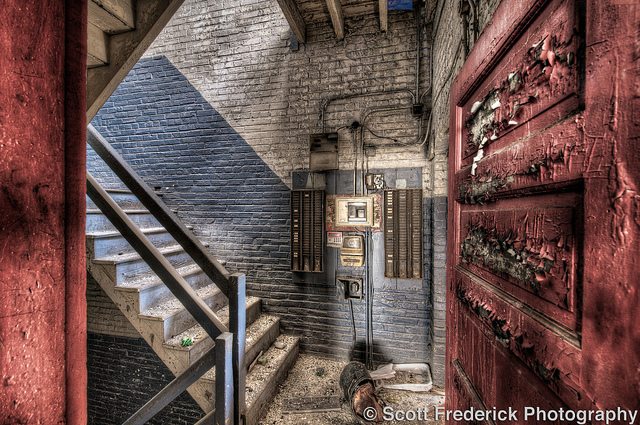
I would like to introduce you to an HDR series, that will hopefully open new doors to help improve your HDR workflow. I’ve been shooting HDR for a little over 14 months. Maybe not a very long time but after pushing sliders around in Photomatix I wasn’t quite satisfied. Eventually I reached that ah-ha moment when introduced to new techniques, so I hope with this series to help you achieve your very own ah-ha moment. Be sure to look for Part 2: Image Management in Aperture 3 and Part 3: HDR Tone-Mapping!
Step #1: Setting up your camera
– Your DSLR should have Auto-Exposure Bracketing (AEB) but if not you can still shoot your brackets by hand.
– I always shoot HDR in RAW (Full Resolution) with my camera in “Manual” mode. You can use “Aperture Priority” mode, but if your bracketing manually like I do then you’ll want to use “Manual” mode.
– Set White Balance to AUTO (unless you have a grey card or color passport)
– If your camera has “Exposure Delay Mode” and your shooting on a tripod then use it! (You can find this setting in your camera’s menu area)
– Set your “EV Steps For Exposure Control” to “1/2 Steps” instead of 1/3 steps. (Also found in your camera’s menu area)
– Now your set up to bracket for HDR, but you’ll will need to decide on how many brackets you need for your scene.
Step #2: Auto-Exposure Bracketing (AEB)
– If your just starting out, I suggest you set your camera’s “Auto Exposure Bracketing” to “2.0 EV” and utilize it’s 3 bracket (or more) AEB capabilities. +2,0,-2
– If your interested in a more precise way of using AEB and utilizing my preferred “9 exposures using a 3 AEB System at 1.0 EV” technique click here:
Step #3: Aperture, Exposure & ISO Settings
– Every lens has it’s sharpest aperture setting, but it’s up to you to decide how much depth you want in your scene. (ex. F/2.8 shallow depth, F/22 maximum depth)
– I never shoot higher than f/16 unless I’m shooting a landscape with incredible depth, this is due to the lens loosing detail at higher f/stops.
– Exposure should to “0” (zero) if in Manual Mode.
– ISO is an interesting subject. Many say to shoot at your camera’s “Lowest” ISO settings to reduce the pixel noise in your Tone-Mapped images. My cameras lowest ISO setting is Lo1, which is ISO 100. I’ve shot at ISO 100 since I purchased my camera, but have been recently using ISO 200 as the lowest. Apparently there have been optimum ISO settings designated for our cameras sensors, each might be slightly different. There is debate over whether going below optimal (which for my camera is about ISO160) is degrading the image. For this I’ve decided to live at ISO 200 for a while and see what happens.
Step #4: Ready, Aim, Fire!
– You’ve got your camera ready to go and have chosen your aperture. ISO is set to 100-200 (make sure Auto ISO is turned OFF)
– Tighten up your tripod, consider weighing the middle down with your camera bag.
– You can look through your viewfinder or at your LCD screen to lock in focus about 1/3 of the way into the frame. (or wherever you want)
– TURN AUTO FOCUS OFF (You don’t want your camera trying to auto focus between your brackets)
– TURN VIBRATION REDUCTION OFF (If your using a tripod which you should, you don’t need VR)
– Be sure to fire with a Remote Release!
Step #5: Final Review
– Reviewing your brackets on the LCD monitor will help you decide if you have all the information. If the brightest bracket is too blown out, then back off your exposure by a 1/2 to 1 full stop and bracket again. So now your ready to capture all the dynamic range in a given scene. If your a bit more advanced with shooting HDR, you may have found Part 1 very basic. Part 2 will cover image management in Aperture 3 and how to prepare your RAW files for HDR processing.
*The Current Photographer website contains links to our affiliate partners. Purchasing products and services through these links helps support our efforts to bring you the quality information you love and there’s no additional cost to you.
Scott Frederick is known for his photography of land, city and urban exploration. His styles vary from HDR to fine art black and white including minimalism. When not using his DSLR, he likes to use the iPhone Hipstamatic app for fun. He is an avid blogger and social networker, who strives to inspire everyone to see the world through photography. He’s been awarded Editor’s Pick at HDRSpotting.com and continues to educate himself and others on new tools and techniques. Feel free to ask him any questions you may have about photography.
