Archive for How To

Tamron Lenses and How-To IOS App Provides a Wealth of Info.

I usually do not review apps that are basically advertisements for a particular company, except when the app contains useful content. Such is the case with the Tamron App. So if you were a lens company what would you include in your app? Don’t waste your time thinking about it because you won’t think of everything that Tamron included. Here’s the rundown:

  • Tamron Products – This is the one you should expect. Select from menus for All-in-One Zooms, Fast Zooms, Wide & Tele Lenses, and Macro Lenses.
  • Local Events – Shows events in which Tamron participates.
  • How To Videos – This section includes a good number of videos regarding shooting with Tamron lenses.
  • How To Articles – Likewise, this section contains a good selection of articles on anything from “Shooting an Outdoor Concert” to “Using Lenses for Video”.
  • Photo Contest – Includes details for any contests that Tamron is running at the time.
  • Get Social – Provides links to Tamron on Facebook, Twitter, Tamron Blog, My Photo Exhibits, and Flickr.
  • Get ENews – Where you can sign up for the Tamron E-News.
  • Find A Dealer – Gives you the opportunity to find a dealer using Google Maps.
  • Rebates – Shows current rebate offers.
  • Scan – This is a surprising one. A QR Code reader is included as part of the app.
  • Read More→

HDR Series – Getting Started, Part 2: Image Management in Aperture 3

So you’ve just walked in the door and put your bag down, now what? How do you get your files ready for HDR? I will describe how I import my brackets into (the best file management program ever) Aperture 3. 🙂

Step #1: Import

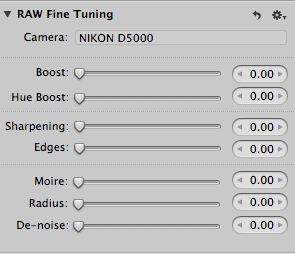
– Fire up Aperture 3. Under the “Adjustments” tab you’ll find “RAW Fine Tuning”. You’ll want to move all 7 sliders to “0” zero and create an hdr preset. (clicking on the gear icon will show the save preset option. More on why this is necessary later)

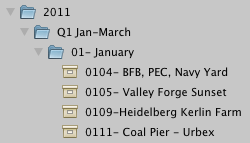
– Under the “Library” tab create a new “Folder” with the Year and another inside that folder with the Month.

– The “Import” tab should pop up and it will look something like this. Read More→

HDR Series – Getting Started, Part 1: Setup

I would like to introduce you to an HDR series, that will hopefully open new doors to help improve your HDR workflow.  I’ve been shooting HDR for a little over 14 months. Maybe not a very long time but after pushing sliders around in Photomatix I wasn’t quite satisfied. Eventually I reached that ah-ha moment when introduced to new techniques, so I hope with this series to help you achieve your very own ah-ha moment. Be sure to look for Part 2: Image Management in Aperture 3 and Part 3: HDR Tone-Mapping!

Step #1: Setting up your camera

– Your DSLR should have Auto-Exposure Bracketing (AEB) but if not you can still shoot your brackets by hand.

– I always shoot HDR in RAW (Full Resolution) with my camera in “Manual” mode.  You can use “Aperture Priority” mode, but if your bracketing manually like I do then you’ll want to use “Manual” mode.

– Set White Balance to AUTO (unless you have a grey card or color passport)

– If your camera has “Exposure Delay Mode” and your shooting on a tripod then use it!  (You can find this setting in your camera’s menu area)

– Set your “EV Steps For Exposure Control” to “1/2 Steps” instead of 1/3 steps. (Also found in your camera’s menu area)

– Now your set up to bracket for HDR, but you’ll will need to decide on how many brackets you need for your scene. Read More→

How To: Auto Bracket 9 Exposures on a 3 AEB System

I’ve been asked this question quite a bit. “How can you bracket 9 exposures on your Nikon D5000 when I can only bracket 3 using AEB”? Well there are two solutions, one is the amazing Promote Control, but I don’t have an extra $350 to invest in this must have piece, so I have an alternate solution.

It is recommended to never touch your camera during your brackets as to not induce camera shake. This is true, but with my solution you will be touching the camera slightly to make adjustments so I recommend this.

  1. A Sturdy tripod (not those cheap flimsy ones)  I’ve been happy with my budget 7300 series tripod from Calumet Photo because its made very well without the high price tag.
  2. Make sure you tighten up all of your adjustments on your tripod after composing, so that your camera stays in place
  3. I always use my camera bag as an anchor to weigh down my tripod.
  4. I always use my wireless shutter release remote
  5. Under camera setting menu set your EV increments to 1/2 instead of 1/3 (this will reduce the amount of wheel click you need to make to change the exposure.)
  6. Set you camera to delayed exposure, this allow the shutter to open before the shot is fired (reduces camera shake)

*Now here is how I go about getting 9 exposures out of a 3 Auto Exposure Bracketing System:*

Read More→