Archive for HDR

OSXcellence – Hydra Pro Review

As a photographer, my main focus is landscapes, and my style is to try to keep my images realistic. Often, this means just using one well-balanced exposure, but at times, I need to use more than one exposure to capture what my eyes saw. Personally, I prefer to blend multiple images in Photoshop, by hand, but other photographers like the effect that HDR brings. For these folks, Photomatix is currently the king of HDR apps; amongst the challengers for Photomatix’s throne is Hydra – but is it regal material?

Hydra comes in two editions – standard and Pro – and the main differences between the two are the number of images which can be blended at one time (3 and 7 respectively), and the fact that Pro comes with Lightroom and Aperture plug-ins.

Loading images into the standalone app is easy – Hydra provides an image browsing window which allows you to view photos in your iPhoto or Aperture library, or on your hard drive. A quick drag-and-drop, and your images are ready for pre-HDR processing. The HDR-preparation process in Hydra is relatively minimal, largely consisting of EV (exposure value) and temperature adjustment, as well as manual image alignment, a crop function, and ghosting reduction controls. And just for the record, these work perfectly well.

The magic – a.k.a. HDR – happens on the develop menu. If you’re in a hurry, you can select from one of 11 presets, these ranging from “photorealistic” to “cyanotype.” For more control you can head to the adjust menu; here are all the standard image controls, which can be applied to the composite image.

There are two additional features, however, that make Hydra stand out from the crowd. The first is the option of “Snapshots.” During the HDR-adjustment process, you can make up to five different copies of your image, the idea being that you can temporarily save up to five different sets of image adjustment, and then compare them easily to choose the one that looks best. The other killer feature is “Probes.” Probes are basically local adjustments to your image, and they work in a similar way to Lightroom’s local adjustments – place a dot, and choose how large the area around it – the area to be adjusted – should be. Read More→

OSXcellence – HDRAW Review

As digital processing techniques go, HDR is a relative new boy – how many of us were using Photomatix 5 or 6 years ago? Now, however, it has spread contagiously amongst photographers, at its best when being harnessed to produce beautiful images, but often being used to produce eye-stingingly garish results. Love it or hate it, though, HDR is here to stay and as a result, there are now numerous apps vying for your tone-mapping attention. One such app is HDRAW, but with its idea of single image HDR creation using a RAW file, is it a realistic contender for the low-contrast crown?

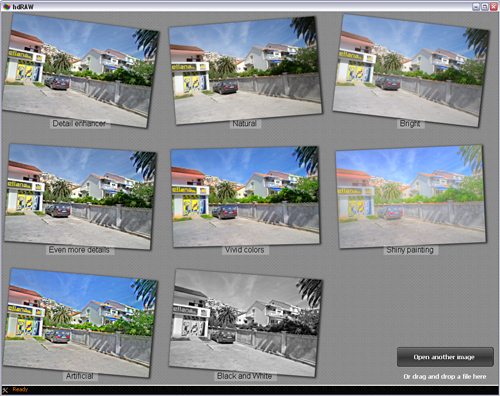
As stated above, the most noticeable feature of HDRAW is its single-image approach to creating an HDR image. This method has both positives and negatives; only having to compute one image file at a time means HDRAW can operate smoothly and quickly – an effect accentuated by HDRAW’s pleasant interface. The downside of HDR using only one image is that you are stretching your picture to its limit, and with this in mind, you won’t want to be using HDRAW for big prints or for stock libraries. I must admit, however, that I was suprised by how much detail HDRAW claimed back from the darkest shadows and lightest highlights.

HDRAW has three methods of achieving high dynamic range, each a different technology, and each producing its own variation. The first is Almalence, which uses the HDR processing method from the company of the same name. Images processed via this method have a smooth colour transition, but look somewhat painterly and unnatural. The second processing option is Reinhard, named after computer brainbox Erik Reinhard, who was one of the original developers of the HDR process. His pet hate is overdone HDR – a subject he speaks and writes about regularly – so as you might imagine, this option in HDRAW is subtle, and favours realism over drawing out the maximum detail from your RAW file. Finally, there is the Fattal option, again named after its inventor, Raanan Fattal, who is another computer-science wizard, and whose paper-writing credentials include “Edge-preserving decompositions for multi-scale tone and detail manipulation” and “Image upsampling via texture hallucination“. It is not surprising, given this light manipulation background, that Fattal’s method is more of an exercise in retrieving ultimate detail from a RAW file, rather than making it look good.

Read More→

To HDR, or Not To HDR – Behind My Eyes

The brief bio below for yours truly tells of HDR (High Dynamic Range) being my first love of photography. That will never change – the creative and artistic flexibility of the process allows a part of my brain that was fairly dormant for years to pop out now and then and say hello. There are also a few instances where HDR just works better (in my humble opinion) than any other processing method, like extreme contrasts in light and bringing out textures. At one time, every time the camera was pointed at something, brackets were collected and run through the tone mapping process, without much thought or consideration – it’s just what I did.

As time has moved on, I find myself moving out of the auto bracketing mode on the camera more often, and even choosing to process a single image out of a bracket set rather than processing all of them through the HDR software. This is likely a natural progression for HDR photographers. Maybe there’s some boredom involved or wanting to save some time, but there’s also other processes out there that I’m finding interesting and fun that produce some pretty cool results. Let’s take a look at an image and go through how the stuff behind my eyes is processing things these days.

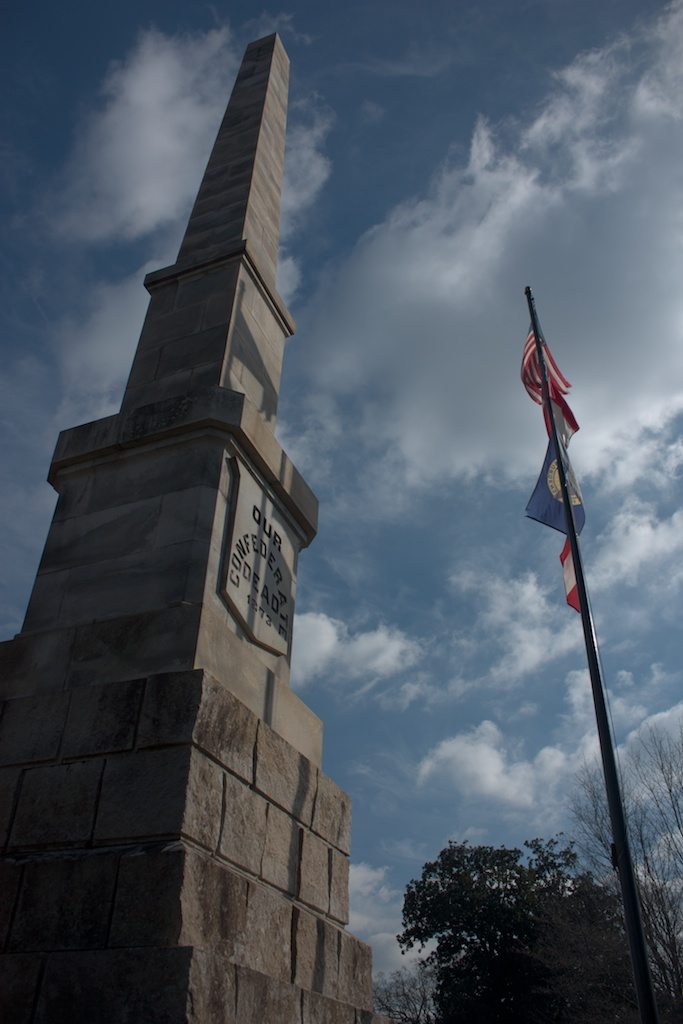
Middle Bracket 0 EV

Take this image above. It’s the middle shot of a bracketed set of 5, ranging from -2 EV to +2 EV at 1 EV increments (this image is 0 EV). It was taken back in February 2010 and is a monument devoted to the Confederate dead buried in the historic Oakland Cemetery in Atlanta, GA. Back in 2010, this set was immediately run through Photomatix and tone mapped. Looking at the stack now, my preferences have changed – here’s why. Read More→

Create HDR-like Effects with HDR FX for iPhone and iPad

HDR FX is a really cool iPhone and iPad app that lets you create some very attractive HDR-like effects. For those of you who are not photography enthusiasts, high dynamic range (HDR) photography involves taking multiple exposures of the same scene using different shutter speeds. If done properly, combining these multiple exposures will result in optimum exposure across the entire photo. This photography process has become so popular that the native iPhone camera now comes with an HDR option.

But HDR FX takes it to another level. While it is not actual HDR, this app does a nice job simulating HDR with filters.

The app is easy to use. The main screen contains only three options: camera, camera roll, and information. The camera option simply opens the existing iPhone camera, and imports the photo you take into the app for processing. If you select the camera roll you have an option to load from the camera roll or from Facebook. Once you select a photo you may use the crop tool in the center and click the check mark to select. From here you are taken into the HDR Lab, which includes 42 options divided into three categories: Scenery, Sky, and Ground. Once you select one, you may make adjustments, including manual adjustments, save to the camera roll, or send the image to other applications.

According to Jellybus, Inc. this $1.99 application has had more than 2 million downloads. I can see why. There are some great filters and it is super easy to use. I hope you enjoy!

All the best…Mike

Scenic Outlook – Balancing the Scene Part 2: Multiple Exposures and HDR Tonemapping

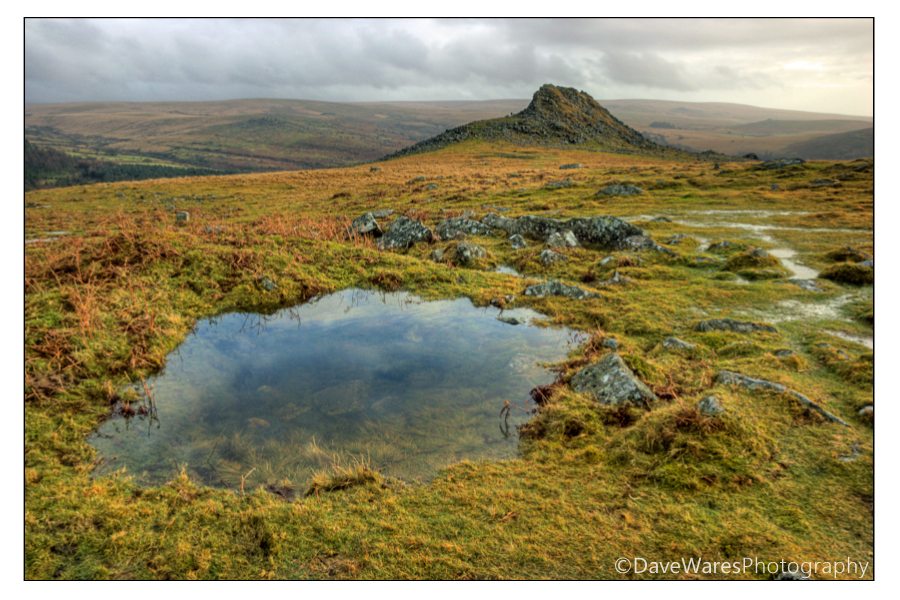
In my last post we looked at how to use graduated ND filters to help balance the scene when the contrast between sky and land is too great for the camera to deal with. This time we are going to look at another two options to help balance the scene that use the same basic idea of taking multiple exposures with the intention of blending them together at the post processing stage. Exposure bracketing or AEB is not a new thing and has been a feature on both digital and film SLRs for years. The idea when using film is to hedge your bets and make exposures either side of the cameras recommended value, thus ensuring at least one slide with a decent exposure when you got your film back from the lab. This idea stayed when digital cameras were introduced, but nowadays we’re using the different exposures to make one good one. This can either replace the idea of using a filter system or can be an alternative when presented with certain situations where a filter may cause more problems. These sorts of situations could include something like a mountain valley or perhaps a city scene, with lots of tall buildings cutting across the skyline. In these situations the filter would not only darken the sky but would also darken your mountain or skyscraper.

So the first option of using multiple exposures would be to take at least two shots, one biased towards the sky and one towards the land with the idea of merging them together on the computer. This is a fairly straight forward process which involves bringing both pictures together as layers then erasing the unwanted parts as necessary, taking care to do it gradually to achieve a seamless result. Once it looks right you can flatten the layers and continue to work on the image as a whole. In reality there in an awful lot of dynamic range within a single RAW file and with the help and careful use of the Highlight/Shadow tool in Photoshop you will be able to achieve great results using just two exposures.

S

Read More→

OSXcellence – HDRtist Review

HDRtist Logo

The technique of using several images to create a high dynamic range (HDR) end picture, so as to maximise the amount of the scene that is neither blown out white or black, is becoming more popular, with many people using it to create photo art. It can be a difficult process to achieve, however, especially if done manually using tone mapping, or even as a result of using professional HDR software, which can have a bewildering number of options.

Whilst many HDR junkies use complex software like Photomatix – which I would recommend if you want to produce HDR images regularly – for those who only wish to dabble or experiment with HDR on occasion, the relatively high price and complex nature of Photomatix makes it off-putting. For these HDR-dabblers, I must recommend they try the app, HDRtist.

Unlike many HDR apps, HDRtist is freeware, and as you might expect, doesn’t come with that many options; this is very much a “plug & play” app.

To create an HDR image, the user first inputs the base images into the app, and the app then processes these to give an HDR preview. The only controls then available to the user are “align” (tries to correct any differences between the multiple pictures, usually unsuccessfully), and the slider in the bottom left-hand corner of the app window – this adjusts the strength of the image blending. Read More→