Archive for Android – Page 2

Droidography – Retro Camera Plus

Retro Camera PlusHello again readers! This week we are going to talk about an app called Retro Camera Plus. I downloaded it as a free app from Amazon, but now it will cost you $2.99. Lets see if the features are worth the price.

First off, once you install and open the app, you will notice an intro screen. You may click anywhere on the screen to start taking pics. In the lower left hand corner you can click on a photo icon which will take you to your Retro Camera Plus Gallery. In the lower right hand corner you will see an icon that will allow you to switch to different types of cameras (more on that later). Lastly, you have a shutter button which allows you to set a self timer of 5, 10, or 20 seconds. Its located just right of camera lens in the app itself.

Once you touch anywhere on the screen to begin taking photos, you may also notice a bubble level which is handy to get those nice and level shots. If you click on the camera type it will bring up a gallery of cameras to choose from. Cameras include: The Barbel, Little Orange Box, Xolaroid 2000, Pinhole Camera, etc. You can learn more about each camera by pressing about this camera below and to the left of it or to use it to take a photo by click use this camera. Once you have selected your camera to use, you also may notice just to the left of the lens a status window saying “ready to shoot” or “busy.” Right below that you will have the option to shoot in colour (color for us Americans) or Black + White.

One thing you will notice is that some cameras will take longer to process the photo than others. For example, The Barbel, took several seconds to process. However, the result is a really cool effect as shown below of a dandelion in my yard, which are currently in great abundance. I’ve included a few more that I took with some other “cameras” in the app.
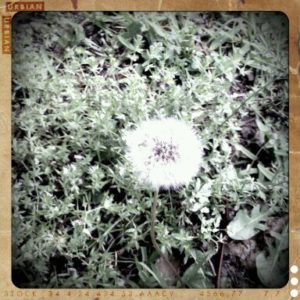
The Barbel

Read More→

Droidography – Pocketbooth

I am really showing my age here, but I can remember as a kid visiting the local mall and seeing the photobooth. Malls these days are only good for one thing, refuge from Zombie Attacks, but I digress. That being said, I have no idea if photobooth’s are still in such abundance. Fortunately, their is a really neat app available called Pocketbooth. Lets talk about it and it’s features.

Once you install and launch the application, you will see a photo window in the center of your screen. In the upper right hand corner you will see an icon of a hammer and a wrench. Clicking on this icon will bring you to the application settings (more on that later). Located below the photo window there is a start button which activates the photo process. Lastly, in the bottom right hand corner of the screen is a button labeled “photo strips” which is where all your pocketbooth filmstrips reside. Also from this section you can share your photos in the standard ways through facebook, email, twitter, etc.

Now, lets take a look at the settings section of the application. Once you open the settings you will notice six different areas to manipulate. The first one is strip size which is either 3 or 4 shots per strip. Secondly, you can click on photo effect which gives you a choice of Color, Black and White (B&W), Sepia, or Antique. Third, you can choose your paper stock of matte or glossy. Fourth, you can choose a border color of black or white. Fifth, chose your time between shots on the strip. Choices range from 1 to 5 seconds. Lastly, the flash setting lets you turn your flash on, off, or you can choose auto. All of these give you a little flexibility in your photo strips. My wife was happy to help me take a few example shots and I will share those next.

Antique Setting

Read More→

Droidography – Photo Illusion

Photo Illusion Android ApplicationLast time, I talked about Camera Illusion. Now we will talk about its companion app called Photo Illusion. As the name implies it works with the photos already on your Droid in your gallery. Its not very large so should fit on your phone just fine…

If you read my post on Camera Illusion, once you install Photo Illusion and open it, you will see the setup is quite similar. There are three buttons on the screen the two on the lower left margin are of a die and a star just like on Camera Illusion. Both also have the same function. The die randomizes the app’s effects. The star allows you to manually select the filters to apply to your photo. You select the photo you want to make into an illusion by clicking on the select photo button. If you press the menu key at the bottom of your Droid touchscreen it will take you to the application menu which allows you to work on some basic settings such as: image resolution, remember previous illusion, hide/show status bar, and choices of storage type for ASCII art(jpg or html).

Well we have talked about the settings lets now talk about what the photos look like and I can show you a few examples. Its probably best that I show you before and after pics so you can see how radical the change can be after using the app.

The original photo used for example
Read More→

Droidography – Camera Illusion

Not all photo apps need to be serious. Some can be for just plain fun. Therefore, we have Camera Illusion and its companion app Photo Illusion. This week I will cover Camera Illusion and the following week I will cover Photo Illusion as both would be to lengthy for one column.

Camera Illusion has a ton of filters, effects, and masks you can use to change photos as you take them. There are so many to choose from, I wont be able to cover them all here in this column. Fortunately for you Camera Illusion is a free download on the Android Market, so you can experiment to your hearts content. If you really like the app you can also purchase the pro version from the marketplace.

When you first launch the application, you will be brought to a view finder screen similar to your camera window screen. You will see a flash button, a dice button, and a star button located on the left side of the screen. The flash button of course turns your flash on and off, the dice button applies a random effect to the photo and the star button allows you to manually change the various filters, effects, and masks. On the right side of the screen you will see a PRO button and a Camera button. Pushing the PRO button allows you to purchase the app, which removes the ads and gives you some additional filters. Of course, pushing the camera button takes a photo. Lets see some examples of what you can expect from this app.

Psychedelic bicycles

Read More→

Droidography – PicSay (Pro Version)

If you have looked on the Android Market you have probably noticed that there are many photo apps out there. Some are free, some are available for a small fee. I lucked out on PicSay and was able to obtain the Pro Version via the Amazon Android Marketplace as a free app of the day a couple weeks back. I have not used it very much but have used the non-pro (read free) version to some extent. The app has a number of cool features, some useful and some just plain fun. Lets talk about a few of them.

PicSay works off of the photo albums already in your phone. It does not take pictures, but allows you to edit and manipulate them in cool and interesting ways. Luckily, we have four cats (thats right!) that are happy to be the subject of many pictures. I can usually catch them doing weird or interesting things just because none of them are alike. They agreed to help me with this article in exchange for catnip and treats…boy are they easy to please.

Read More→

Droidography – PicPlz

Welcome readers! If you are an Android user and need a fun, easy to use app to do photography with, I have the app for you. It is called picplz and not only is it a photo app that allows you to change your photos on the fly, its a complete community on the web. Let’s talk about it and its features.

Once you download the application from the Android Market you will notice it is not too dense. If space is a concern I would move it to the SD card, which will make the app just under 2 Megabytes in size. Of course with just about any app the data it stores might push it up to something like 3.88 Megabytes in size, which is currently how large it is on my phone.

Once you have installed the app and opened it, you will have to create a user account. Once you have created your user id and password, you will now have full access to the app and its linked website. More on the picplz website later.

When you open the picplz app on your phone it has a pretty basic setup. There are six icons in the main window and an additional camera icon in the top right corner. If you want to snap a photo, simply press the camera button and snap your photo. You of course have full access to all the cameras normal functions such as macro, zoom, flash, etc. Once you have taken your picture and are happy with it select it and let the fun begin. A number of filters pop up and allows you to apply these to your photos. All of the filters can be used with or without borders. I am not a fan of borders so I choose to use the filters without borders. I will share some example pictures I took with the application last week at Caddo Lake State Park in Northeast Texas while hiking the trail with my wife.

The first photo that we took was of Prairie Phlox. I choose to use the Enhanced Definition Filter to sharpen the image a bit. Read More→