One challenge photographers continually face is dealing with high contrast scenes.
Typically there are a couple of choices: you can expose for the highlights and let the shadows go black, or you can expose for the shadows and let the highlights blow out. Neither of these options give great results.
I was faced with an extreme version of this challenge during a recent trip to Yosemite Park in California. Going out at sunrise and sunset to catch the sweet light, I found the valley floor in complete darkness unless the sun was high in the sky.
Here is an example of the type of photo you might come home with in these conditions. The sun was setting on Half Dome lighting up the top of the dome and leaving the valley in darkness.
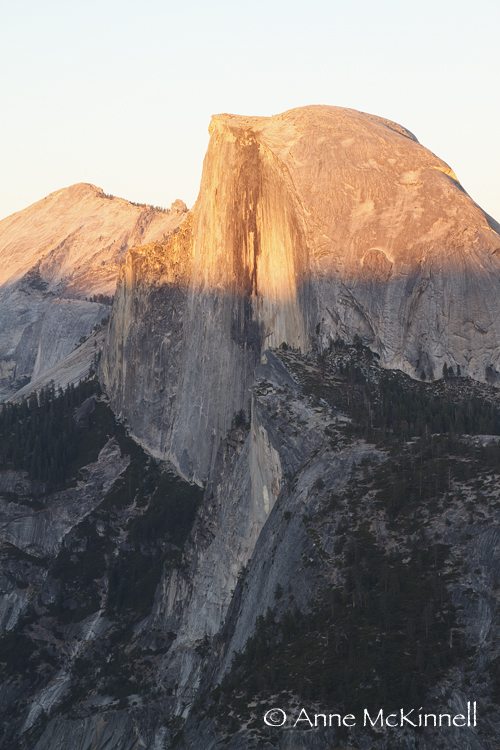
There are two opposite ways of approaching this situation which yield very different results.
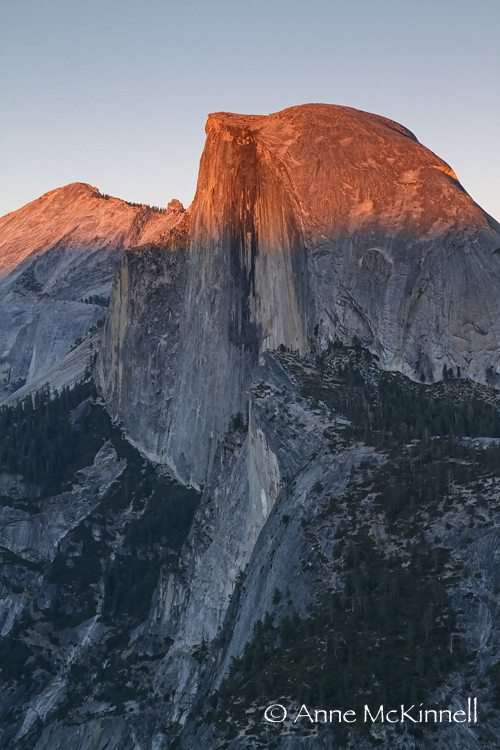
Using Neutral Density Graduated (ND Grad) filters to restrict the light in the highlighted areas of the scene. This method uses less light to even out the exposure.
Taking bracketed exposures and combining them later using software. This method essentially uses more light by retaining all the information in each shot and interpreting that information to even out the exposure.
Let’s look at the ND Grad filters. These are filters you can either attach to, or just hold up, in front of your lens. They have a dark area at the top and gradually fade to clear glass at the bottom. They come in multiple stops of density so you can choose how much light you want to filter out. You can even use multiple filters so if you have a set of 1, 2, and 3 stop filters, you can stack them to get 6 stops of density.
The benefit of using this approach is that it takes minimal effort to hold up the filter when the shutter is open. The downside is that you have to carry them around. Although they do not take up much space.
Here is an example of the same scene as above using the a 3 stop ND Grad filter. All I did was hold up the filter for .6 seconds and then process it normally at home.
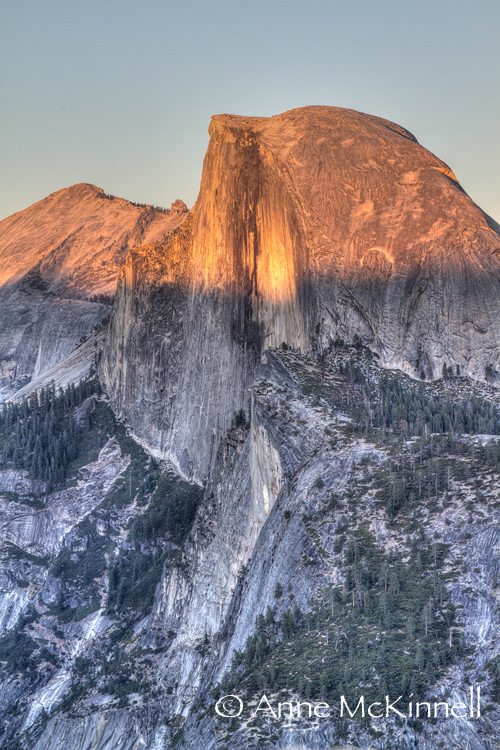
Another alternative is using High Dynamic Range photography or HDR. To use this method, you bracket your exposures by taking one regular shot plus one shot under-exposed to bring out the highlights and one shot over-exposed to bring out the shadows. I usually take three exposures, but you can take as many different exposures as you like. You must ensure you use the same aperture for all the shots for consistent depth of field and only allow the shutter speed to change.
The benefit of using this approach is that you have a great deal of control over how the HDR image ultimately turns out. You can blend the exposures for a natural look, or you can take the method to the extreme and come out with a very unnatural but highly artistic feel. Also you do not need to carry around any extra equipment. The downside is that you require software and you will spend much more time post-processing the image at home.
Here is an example of the same scene as above using 3 bracketed exposures and combining them using Photomatix software. I went for the more natural feel here.
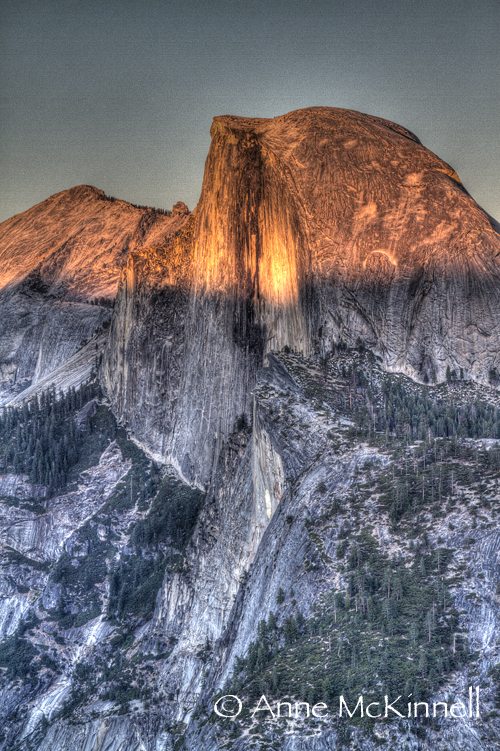
The example below combines the exact same exposures as above but the HDR effect is more extreme. This demonstrates the amount of control you have over the ultimate outcome.
Finally, you have the option of using both tools at your disposal! Below is an example of using the ND Grad filter and taking 3 bracketed exposures and combining them in post-processing. I think this is my favourite of the bunch.
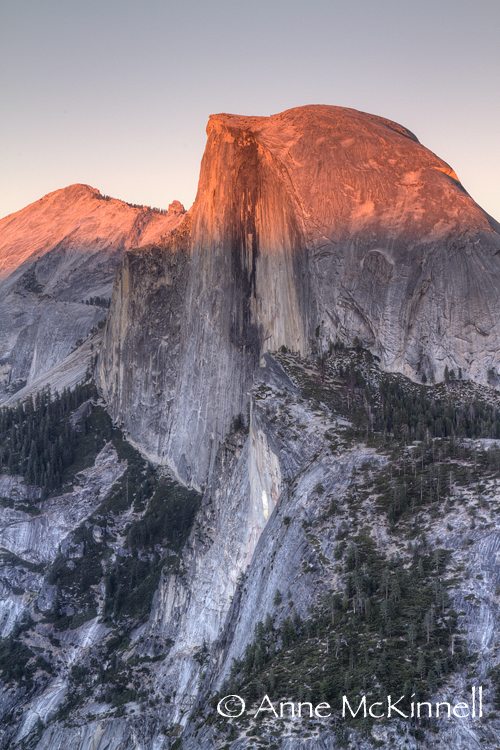
5 variations of the same image. Which one is best? Well that all depends on the subject, the amount of contrast, and how you want the ultimate image to appear. You are the artist, after all.
–
![]()
 Anne McKinnell is an award-winning freelance photographer based in Victoria, BC. She specializes in travel, landscape and abstract photography. Her creative eye inspires unique images that portray her appreciation for the natural world. Her greatest skill is patience, which allows her to consistently capture perfect light.
Company: Anne McKinnell Photography
Phone: 250-475-0053
Email: anne@amckinnell.com
Website: http://amckinnell.redbubble.com
Blog: http://blog.amckinnell.com
Twitter: @annemckinnell
Facebook: http://www.facebook.com/pages/Anne-McKinnell-Photography/127451817313317
Photo Credits: © 2010 Anne McKinnell
Here’s how you can share your tips, techniques and tutorials on CurrentPhotographer.com
–
*The Current Photographer website contains links to our affiliate partners. Purchasing products and services through these links helps support our efforts to bring you the quality information you love and there’s no additional cost to you.
Anne
This is a great article. I like to use ND Filters for sunrises and sunsets, usually a graduated filter so I can control the transition area. Sometimes this is not an option and I use multiexposure HDR. This image under the pier at Huntington Beach called for HDR as there were multiple zones of high and low contrast without any clear boarders. So a ND filter was out of the question.
http://tinyurl.com/28pl6la
Regards, Erik
RT @TrevorCurrent: Two methods for photographing high contrast scenes. https://currentphotographer.com/two-metho… #photog #togs #HDR
RT @TrevorCurrent: Two methods for photographing high contrast scenes. https://currentphotographer.com/two-metho… #photog #togs #HDR
RT @TrevorCurrent: Guest Post: Two Methods for Approaching High Contrast Scenes: by Anne McKinnell https://currentphotographer.com/two-metho… #photog #togs
RT @TrevorCurrent: Guest Post: Two Methods for Approaching High Contrast Scenes: by Anne McKinnell https://currentphotographer.com/two-metho… #photog #togs
Thanks for taking the time to share
RT @TrevorCurrent: Two methods for photographing high contrast scenes. https://currentphotographer.com/two-metho… #photog #togs #HDR
RT @TrevorCurrent: Two methods for photographing high contrast scenes. https://currentphotographer.com/two-metho… #photog #togs #HDR
Great post Anne! Love the detail you included in this thorough post. Well done! 🙂
RT @TrevorCurrent: Two methods for photographing high contrast scenes. https://currentphotographer.com/two-metho… #photog #togs #HDR
Great post! Having spent some time last year taking shots at Yosemite and being a fairly new tog, I completely get this and wish I had this up my sleeve. It’s an incredible place and got some amazing shots but this would have really helped.
RT @TrevorCurrent: Two methods for photographing high contrast scenes. https://currentphotographer.com/two-metho… #photog #togs #HDR
RT @TrevorCurrent: Two methods for photographing high contrast scenes. https://currentphotographer.com/two-metho… #photog #togs #HDR
RT @TrevorCurrent: Guest Post: Two Methods for Approaching High Contrast Scenes: by Anne McKinnell https://currentphotographer.com/two-metho… #photog #togs
RT @TrevorCurrent: Two methods for photographing high contrast scenes. https://currentphotographer.com/two-metho… #photog #togs #HDR
definitely a fan of the hdr method myself, but always nice to know alternatives!