Archive for Portrait Photography

Basic Lighting Setup For Business Portraiture: by Daryl Brown

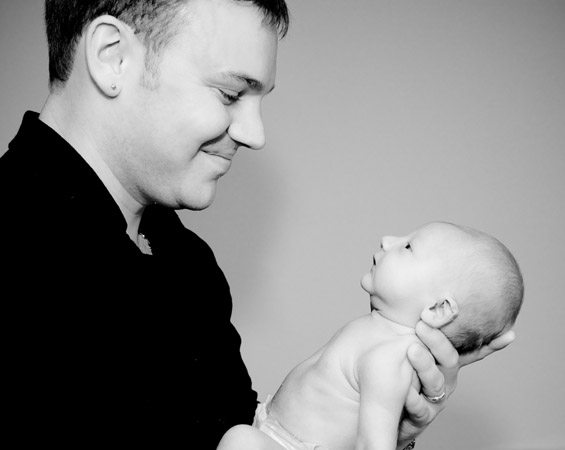
When acquiring a Business Portraiture client it’s always best to know before hand how the client will use the image. Meaning if the client will be using his/her image for web posting or high quality publication it’s best to light for deeper shadows. This is more or less for men especially as deep shadows can indicate Strength and Intelligence (not that women are equally the same) but non the less you’ll see more Business Portraiture for men photographed this way. Now I will say some women like that type of lighting scenario and will occasionally ask for it as in the following images
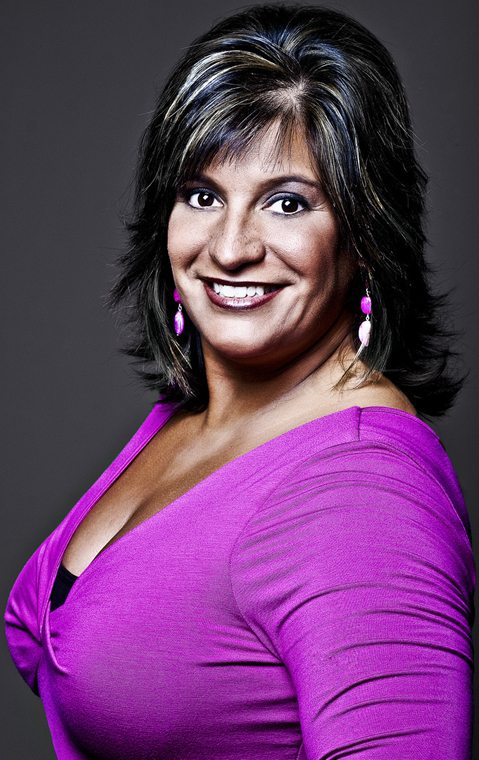
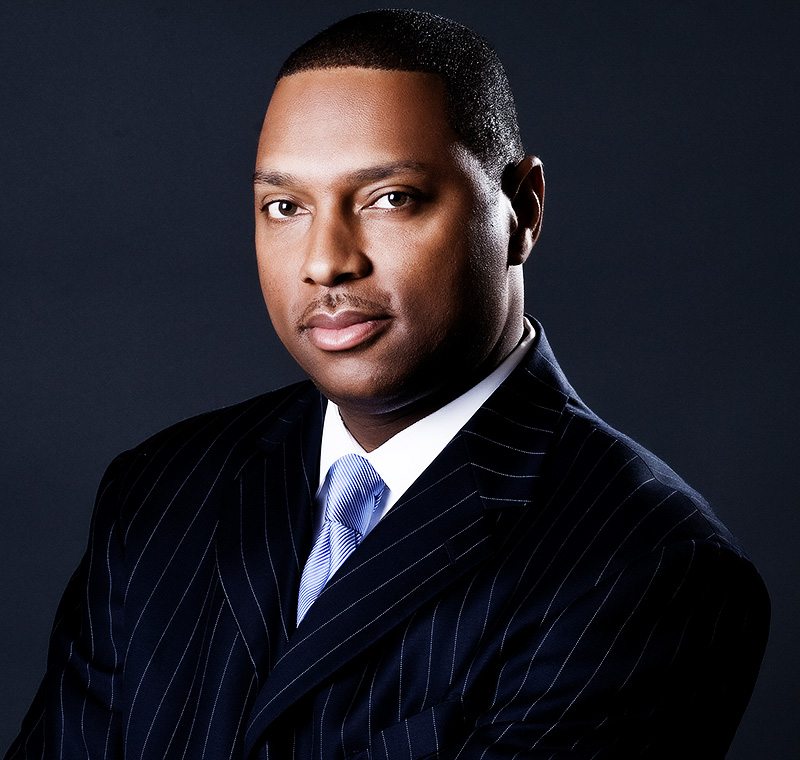
Now if the client is using the image for lets say newspaper paper pre-production or other venues where the image quality is lower, then you should aim to fill in the shadows. The last thing you want in that scenario is poor reproduction that will render darker areas without details. Even if the imagery will be used for general usage, fill in the shadows as a matter of course.

Business PortraitureBusiness Portraiture
The following are two setups that I use in my Business Portraiture session for both men and women.

business portrait for men

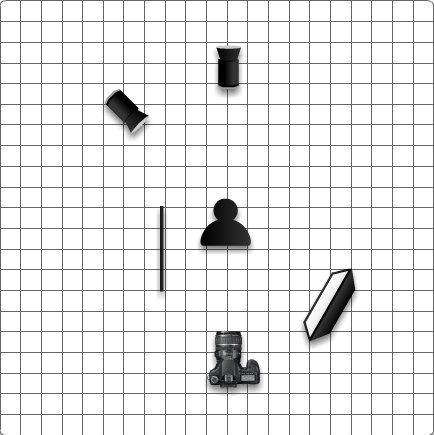
The above diagram is my typical setup for men and women who want deep shadows for the portraits. This is more for men so I suggest again knowing what your client wants well in advance so that you can prepare appropriately. The setup uses three lights, a key light, a hair/rim light and a background light. The gobo or black subtraction panel is optional but I like it to deepend the shadows depending on where you place the panel. Now you can use whatever light modifier you are most in tuned with. For most of my portraits I generally use a large softbox and occasionally I’ll use a medium soft box or an umbrella. The hair/rim light uses a 30 degree grid as well as the background light (play around and try some with the light off you may like the result).

Business PortraitBusiness Portraiture


Business Portraiture for women
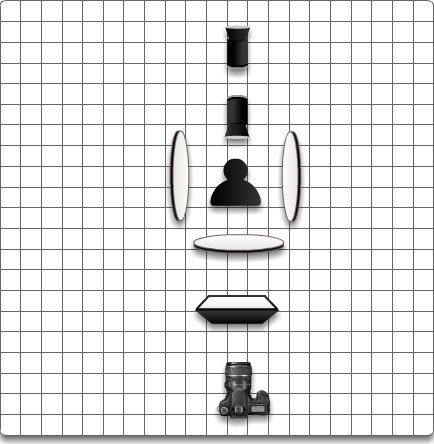
This diagram is what I use for most of my Female Portraits and it also works well for Business Portraits. The setup is three lights; key, hair, background and three white or silver reflectors. Key light is primarily postioned directly in front 4 feet from the subject and about 4 feet above camera height. The reflectors are generally placed two feet from the subject on either side (you can place them closer or further depending on the look you are going for). The third relfector in front is placed chest high underneathe the subject’s chin to fill in those shadows (you can place the reflector closer or lower to the subjects chin depending on the final look). If you have the budget for it or have the space for it add a second light in place of the third reflector. The results will be just as beautiful, but be sure to meter the light one f-stop below your main/key light. The hair light is placed directly above and slightly behind the subject’s head about 6 feet and angled toward the camera and uses a 30 degree grid. The background light uses a 30 degree grid and is generally placed 2 feet behind the subject and aimed at the middle part of the background (white or studio gray) to give it a gradation. The results are always flattering and complimentary for women subjects.

Business PortraitureCasual Business Portrait

These two are just a handful of setups I use for my Business Portraiture. I encourage you to try the setups and practice the lighting schemes until you produce images you and your clients are happy with. In the end the client is who we want to be happy and return again and again and again.
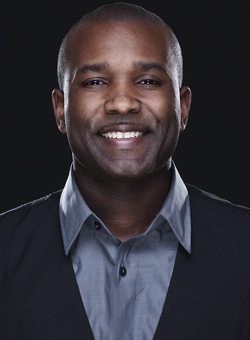

Daryl BrownDaryl Brown is an award winning beauty, fashion, and portrait photographer located in Arlington, VA. Daryl’s career as a photographer has spanned nearly two decades from his start as a news videographer to his work today photographing all types of individuals…from radio and TV personalities to aspiring models to new borns.

Daryl has received the prestigious Edward R. Murrow award and an Emmy award for photojournalism in investigative news.

Daryl is known for his attention to detail from prep to post in all of the images he has produced. His work has appeared in Council Magazine, The Washington Post and an exhibit at Century 21.

Daryl Brown Photography Logo

Company: Daryl Brown Photography
Phone:
571-232-5349
Email: d.brown.photography@gmail.com
Twitter:
@darylbrownphoto
Facebook: https://www.facebook.com/darylbrownphoto/

Photo Credit: © Daryl Brown

Here’s how you can share your tips, techniques and tutorials on CurrentPhotographer.com

–

3 Ways of Connecting with Your Subject

We just returned from our 2011 senior portrait conference (spa) in Palm Springs California. We had our 3rd model winner in a row from across the country and she won the Top Model award! We are so proud of Kristen!

2011 Senior, Kristen

There were some great images out at spa but this year I “observed” a lot more than I have in the past. We followed Kristen and her mom around on day #3 of spa where she has session with other photographers to see them work and teach.

One of the things that spa celebrates is the best of the best in high school senior photography. And the best of the best senior photographers are all there. A consistent theme that I saw with these photographers was the “connection” they made with the subject, the speed at which they connected with them, and the ease in which they did so. This, of course, translated to a an incredible experience for all the seniors chosen to attend, the photographers, and allowed for some gorgeous images to be created. Read More→

What’s Appropriate for Senior Pictures?

I’m a husband, a father to an 18 month old daughter, and a high school senior photographer who makes a living by bringing a camera around 17 year old girls. I am also sensitive (maybe hypersensitive) to the appropriateness of the images I create AND the images we release online.

A few months ago a woman in passing (not a customer but a regular viewer of our website) made a statement to me and my wife that she would NEVER let her daughter take senior pictures in a swimsuit. Now that is fine with us. We don’t ask senior customers to take pictures in their swimsuits nor do we advertise swimsuit sessions for seniors. But she repeated this opinion several times throughout the conversation, and it felt more like an “insult” directed at us. And, yes, having a Masters in Psychology allows me to deduce that from the conversation.

It so happened to that the image she was looking at was from a professional modeling portfolio of a college freshman we had posted last summer. The model  needed swimsuit images for her modeling portfolio that we created for her on location. The customer and her parents were thrilled with the images and released the images themselves on Facebook with our approval. Now I did explain this to the woman who brought up the swimsuit image and obvisouly didn’t read the blog post…but I doubt she cared to understand it.

Anyway living down in the South, on the banks of the Chattahoochee River, a lot of our seniors have grown up on the backwaters every weekend since they were little…skiing, tubing, jet skiing, riding boats and wave runners, grilling out, and laying out in the sun with their friends and families . They also live driving distance to the beach and the Gulf Coast of Florida. This was and is an important part of their summers, their childhood, their lives, and of course their last summer in high school. And some of our seniors AND their parents ask if their child can incorporate this into their senior experience sessions. Some have beautiful homes, pools, and boats up on the backwaters and in Florida where these are shot on location. Read More→

One Light Wonder for Children Portraits: by Daryl Brown

Photographing children can be challenging let alone getting them to sit still for the session. So for me as I’m sure many other portrait photographers, I keep the process simple. I use one large soft box with a strobe and I let the kids be kids. To me thats the true image most parents want unless they are trying to get model agency representation. When I have a child portrait session, I do my best to not have things around that would distract them and I also tidy up the cords and other miscellaneous gear to avoid accidents because we all know kids are adventurous. Its always good to know ahead of time exactly what the clients want as far as background and or location. Most of my clients so far just wanted either a white, dark gray or sometimes black background. That seems to be the standard so my advice  is to keep a roll of each around and present them with options, they’ll appreciate that more. Once you know what type of image the client wants thats where my simple one light setup can come in handy. Read More→

Tools for Your Photography Business – Studio Portrait Photographers

This is the forth in our series looking at essential tools for your photography business. We’re going to be looking at some of the essential tools you’ll need to acquire in at least the first year (if not the first month) of your business.

Other articles in this series –

Part 1 – Software and Online Presence

Part 2 – Financials

Part 3 – Wedding Photographers


Part 4 – Studio Portrait Photographers

We’re going to look at two recommended setups for portrait photographers with the first being a basic studio setup. Next week we’re going to be concentrating on location portrait photographers.

Depending on what you specialise in might change what set-up you have but really only in regards to the props you use. I’m going to concentrate on the things you’ll need for nice and simple family portraits……. that doesn’t mean a white background….. I’ve said it before and I’ll say it again……. it’s not 2005 anymore!

The most basic (and yet extremely versatile) setup I can think of …..

  • 2 lights and a large soft-box
  • Grey paper background
  • 4 stands (x2 for background x2 for lights)
  • Coloured Gels

Obviously you’ll need a camera and some way to trigger the light but this can be done with sync cord if radio triggers are a little out of your budget.

The whole point of this set-up is that it can be assembled anywhere. You don’t have to own a studio to take studio portraits.

A grey background can be changed easily by using the coloured gels (and one of the lights).

Taking it to the next level
Obviously this sort of set-up isn’t one you’ll want to be using forever so we’re going to look at a slightly more advanced set-up (and one I would recommend when consulting with any family portrait studio).

Camera and Lights
To be honest we’re back to the old “it’s what you can afford debate” but when it comes to lighting you get what you pay for. Bowens always leaps to mind but if that is a bit out of your budget then Elinchrom or Interfit both make nice lights.

Cameras, I’d be happy shooting family portraits with a 5DMkII or something similar.

Lenses
Prime lenses are nice to have but if you’re shooting kids then don’t underestimate the usefulness of a 24-70mm zoom!

Backgrounds
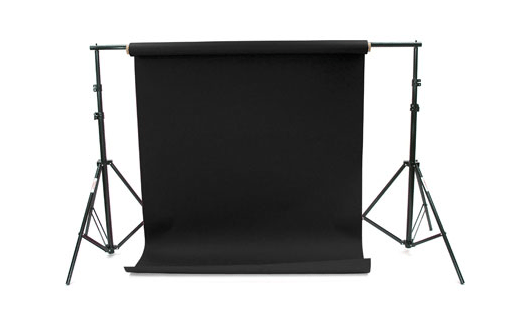
I like paper backgrounds because they’re cheap and come in hundreds of lovely colours! depending on the space you’re working in or what you’re offering you’ll have to decide on whether your backgrounds are going to be wall mounted or free standing the the picture above.

Whatever option you go for don’t skimp of the cost as you don’t want these bad-boys falling on a 2 year old’s head!

The Giotto Background Support Set or Lastolite Heavy Duty Background Support System should do you for a free standing option.

I always like to have plenty of colours but the essential kit would have to be a green chroma key, black, white and grey.

Lighting control
Lots of fun things to buy in this section and you’ll obviously have to buy what fits your kit, but here’s my basic kit recommendation:

  • 2 Umbrellas Silver/White
  • 2 Wide angle reflectors
  • A snoot with grid set
  • A honey comb grid set
  • 2 sets of barn doors
  • 2 backlight reflectors
  • 2 large soft boxes (bigger the better)
  • 2 large reflectors (the 5-1 types offer good value)
  • Coloured Gels

Couple of other things which are nice to have…..

Radio triggers – you don’t need a massive range or ETTL functions if you have a …..

Light meter – to be honest you don’t have to spend hundreds on one of these…. just get one that works!

Adjustable stools – I love ’em!

A set of wooden boxes – very handy

A step ladder – extremely handy

Wind machine – gimmicky but fun

Props

I’ll leave this to you …… 😉


5 Easy Tips to Improve Your Portraits (and they don’t cost a dime)

Often times a portrait photographer does everything right; perfect lighting, great location, correct exposure and flawless composition. However, the photo still comes out flat. Something isn’t right. Smiles are forced, people are uncomfortable and the emotion is just not there. The fact is, if you’re photographing people don’t forget about the most important part – the people. When was the last time you were in front of the camera? Do you remember how that felt? If not, please ask someone to take your photo and come back to this post after you’re done. The bottom line is that being in front of the camera can be rather difficult and stressful for some people and it’s our job as photographers to make them feel at ease so that they in turn will look better in the image. Here are five tips to improve your attitude (and in turn your portraits):

  1. Don’t put the blame on the subject – remember that your attitude is everything and it’s only your attitude that you can control. Consciously or not, people will sense if you are angry, annoyed or uneasy in any way so check the grump factor at the door. If you’re photographing children or pets your attitude is even more important because both of these will immediately sense your frustration and then you might as well pack up and go home.
  2. Take the time to talk to (and listen to) your subject (yes, even works with pets). Show an honest interest in them. If you have serious disdain for whatever you are photographing please consider another line of work before you take on something that will only lead to disappointment. Read More→