Archive for Photography 101 – The Basics – Page 2

Photography 101: Three Tips for Shooting in the Dark Without a Tripod

Shooting in the dark not only brings its own set of unique challenges for the photographer, but the final results of these challenges can be extremely pleasing to look at. Slower shutter speeds due to low light bring on great light-trails, light painting, creative subject lighting techniques, and so much more.

However, having a sturdy tripod is key to many of these techniques. So what do you do if you do not have a tripod on hand to shoot in a low light situation? A few ways to rectify this situation include:

1. Crank up the ISO on your camera. Turning up the ISO on your camera is the first thing you can do to compensate for the lack of light. Bumping up the ISO setting allows your camera sensor to take in more of the available light, thus allowing for faster shutter speeds and smaller apertures. This makes it easier to reduce, if not eliminate, all signs of camera shake in your end photos.

Turning this setting up does come with a bit of caution. The higher you set your ISO, the more noise you will end up with. Cameras continue to get better at reducing the amount of noise at high ISO settings, but it is not perfect. This is particularly noticeable if you are producing an HDR image as the graininess really comes out when you stack multiple exposures. Do some test shots to see what acceptable ISO levels you have on your camera.

If you want that extra bit of light, try opening up your aperture a bit. This may give you a shallower depth of field, but it can sometimes mean the difference in upping your ISO setting just one more notch. This is a preference that you can only determine through testing various combinations and evaluating the end results. Read More→

Photography 101: JPG or RAW

Digital photography provides many choices when it comes to enhancing your unique vision. Everything from cameras, lenses, and post production software play a unique role in producing wonderful images. There is another piece to this puzzle that you need to consider as well. The question of RAW vs. JPG file formats is one that has no right or wrong answer, only what works best for you. Let’s take a look at these two formats and why you may want to use one over the other.

RAW is the native form in which your camera writes files to the memory card. This means Nikon’s RAW files differ from Cannon, Sony, Pentax, and so on. Each camera even puts its own unique file extensions on each photo. However, the differences in RAW files are more complicated than just file extensions and camera brands.

RAW files contain a large amount of information about a photo. This info ranges from the make of camera all the way down to if you fired a flash or not. That information is stored differently in every manufacturer’s RAW file. For example, Nikon may write the info in this order: camera type, iso, shutter, aperture, lens, date, time, and white balance. However, Pentax may write their info as: lens, date, camera, iso, shutter, time, white balance, and aperture. There is no standard for writing info into RAW files.

All of this info brings on a disadvantage when it comes to the ability for the file to be opened by photo viewing/manipulation software. You may have noticed how patches are released for software like Photoshop, Aperture, or Lightroom when new cameras are released. These patches are necessary to read the native files from these new cameras. As you might imagine, this complexity in RAW files can make it a bit difficult to move photos from one piece of software to another at times. This difficulty is often resolved by converting the original photo into another file format such as a DNG, JPG, or TIFF. Read More→

Photography 101: Break Out Some Angles

One of the simplest ways to increase the visual appeal of your photos is with different points of view. Here is what I mean by changing your view points, or angles. We have all seen photos where the subject is straight on, with a relatively generic background. While the scene might be nice, it does not do enough to differentiate itself from the flood of similar types of photos online.

This is where you, your eye, a bit of creativity, and a small bit of work come into play. Prepare to lie on the ground, climb a tree, and generally look like a goon while you try to catch “the shot.” There is a reason why professionals are willing to lay in the dirt, and that is to create an image that is both pleasing to the eye while providing a different view point to set the photo apart.

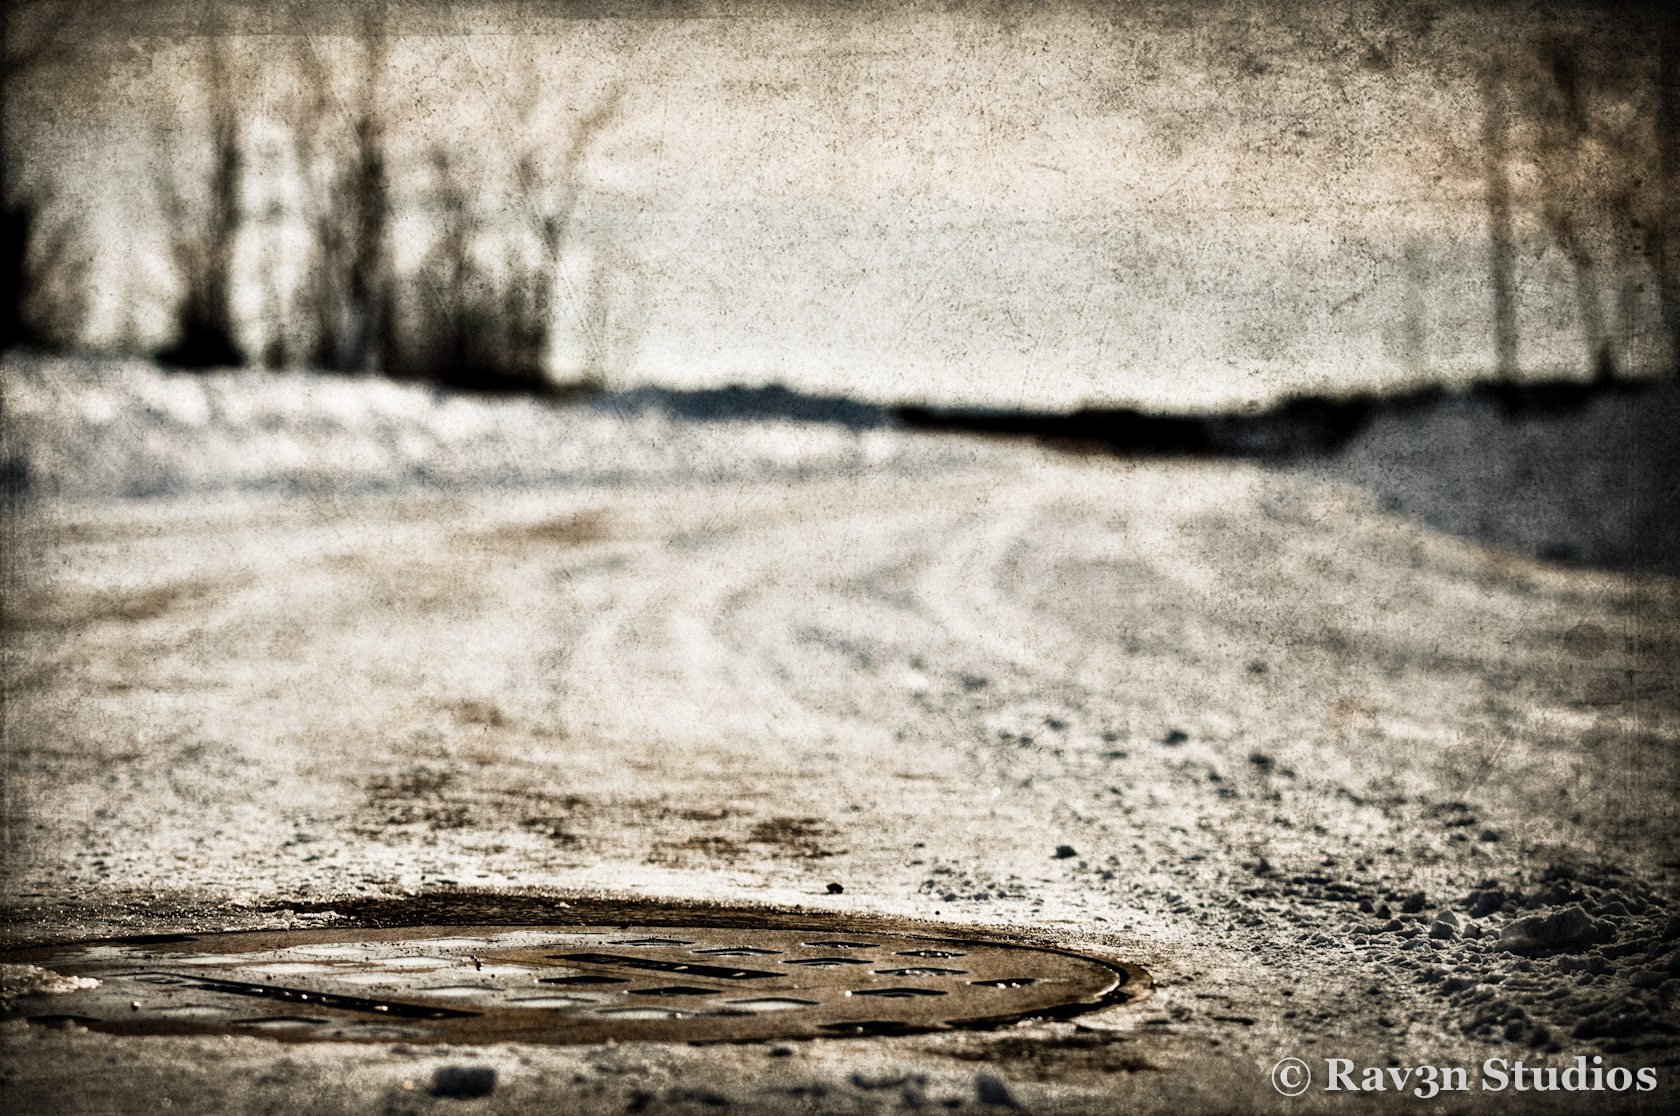
Changing your viewpoint to create something interesting maybe as simple as getting close to the ground. One example of this is in my shot of a manhole cover on a snowy street. You can tell this is a manhole, yet the angle at which the photo is taken obscures this item. The focal point is also shifted to the top of the rusty cover. This setup gives you a different way of seeing an otherwise ordinary subject.

skid-row

Read More→

Photography 101: How To Break The Fear Of Shooting In Public

Photography is a splendid vice. So many things in this world are just begging to be the subject of your camera. Yet, some of those shots require you to shoot in public places. This can be quite nerve racking for quite a few new photographers. How does one break free from this fear? Breaking this fear maybe easier than you think.

Size matters
This might come across as trivial at first. The size of your camera can help immensely. What do you do though? First up would be to grab the biggest lens you have. This might not be the proper lens for the job, but it will be the lens to help you conquer your fear. Put the lens hood on for that extra bit of size as well.

The reason this helps is due to how people perceive you when you have a monstrous camera. The reason a big camera helps is people tend to take you from the tourist category and put you into the professional category. You may not be a professional, but it is amazing how people see big camera and instantly think pro.

Second is the camera itself. Those of you lucky enough to have multiple camera bodies should consider using the largest camera you have. This helps to increase the size and perception you will receive on the street. Remember, we are breaking a fear here, so it might be bulky but it will help you get over your fear. Read More→

Photography 101: 5 Essential Tools For Better Photos

One of the most common responses for obtaining better photos is often to purchase a better lens. There is a ton of truth to this, but there are items you can add to your camera bag that will also help you achieve great photo results. These are not overly expensive items and deserve a home in your camera bag at some point.

1. Get your white balance in order. Correct white balance is crucial in this new digital age. The subject of white balance is a completely new article (taking note for a future piece), but it is essentially how your digital camera views the lighting of the world. Yup, your reading light gives off a different color light than the sun nicely tucked away behind some clouds. This is where correct white balance comes in.

There are a few items you can use to aid you in setting correct white balance. A tool such as the X-Rite ColorChecker not only gives you a target to set white balance to, but you also have an abundance of options for post processing. However, what if you don’t have $100 to blow on this handy device? Have no fear as you can go cheap here. I walked around for a good year with a gray paint chip in my camera bag. You want something as close to an 18% neutral gray as possible here. A quick Google search will help you narrow your choices down for what ever brand of paint chips are available in your area.

Once you have your white balance device you have two options. If your camera has the ability to set white balance off a target, fill the frame with your gray card and fire off a shot. Those who like to set white balance in post processing can take a photo of the gray card and then use that photo to set white balance in your post processing software of choice. This simple device will help you keep colors as true to what you saw as possible. Read More→

Photography 101: Make 2011 Better Than 2010

Here we are sitting on the final week of 2010. I hope that 2010 met you with all sorts of personal growth, new experiences, and an ever-increasing love for photography. As 2010 heads to a distant memory, it is now time to look at 2011 and how to make it a better year than 2010. Just how can you do that? It is not so hard!

1. Don’t leave home without a camera! Yeah, I have said this a lot! It still applies no matter the day, month, or year. Never leave your home without a camera of some sort. You never know when a photo opportunity is going to creep up. Even a simple cell phone picture can tell a novel of a story. Do not end the day wishing you had caught just that one image. Besides, it is a great way to keep your photography skills up to snuff!

2. Network, network, and network some more. It does not matter how experienced or inexperienced you are, networking is the best way to grow your skills, business, and pool of peers. Even if you are just learning the ropes, there are people out there willing to share their knowledge and help you on this fantastic path. Networking also gives you people to just go out to coffee with and discuss why one lens is far superior to another one, or gripe about how cold it is. You know, whatever suits your fancy. The important part is meeting new people, building great friendships, and continuing to learn. Start simple and talk to people on Twitter if that is what it takes!

3. Get critiqued at least once a quarter. If you are honestly looking to get great photos, get a photo critique once every three months. Do not just settle for a “this is a great shot” kind of critique either. Ask what makes it great. Find out how to make it better. If you are told it is a terrible shot, do not get down on yourself. Ask question on why it is bad, how to improve it, what to do differently, or even examples of similar shots. Honest critiques are good for the photographer soul burning inside you. Read More→