Archive for filter

OSXcellence – Snap Art 3 Review

Since the dawn of time – well, of Photoshop, anyway – photographers have taken pictures, loaded them into their photo editor, and then seen the tempting “art” filters, only to be disappointed by them time and time again. As a result, what should be a good idea – artifying photographs – has been a technique to avoid at all costs. Alien Skin’s Snap Art 3 is a plug-in for Photoshop, Elements and Lightroom, which attempts to deliver a better in-computer art experience to photographers. But is it a Caravaggio, or more of a crayon?

Snap Art 3 is accessed via the filters menu, but upon activation, it springs up in a new window of its own. Unlike Photoshop’s built-in art filters, Snap Art 3 comes with a plethora of realistic options. First, you choose your favoured real-world method of putting an image on canvas. Options include pastels, watercolours and pen and ink. Each style has its own set of variables, such as paint thickness, brush stroke length and brush size. The results are very realistic and, to add a unique twist to every picture, Snap Art 3 includes a 4-digit randomisation system, which means the texture of the “canvas” can be one of 9,999 subtle variations.

Once you’ve chosen your style, you then have the option to adjust it selectively, using Snap Art 3’s in-built layer mask system. Unfortunately, this does not include adjustments such as colour or exposure, but it does allow you to change photorealism and brush effects on an area of the image, perhaps increasing the apparent realism of the artwork. Snap Art 3 does, however, include the ability to make standard adjustments to the whole artwork.

Read More→

OSXcellence – CameraBag 2 Review

The original CameraBag was one of the first style and edit apps, not only on Mac, but on iPhone too. It was well built, and performed well, but since then it has been trumped by FX Photo Studio Pro (see my review) in this category. Now, however, the folks at NeverCenter have come back fighting, with their new offering, CameraBag 2.

CameraBag 2 is a slick looking app, but pretty looks aren’t the main feature of this app. Editing is conducted using impressive 32-bit processing, RAW is supported, and editing is non-destructive – all high-level features, aimed at the serious photographer. CameraBag 2 includes 100+ filters under the Styles tab, but far more important than this are the editing controls under the Adjust tab. Here you find the standard fare of contrast, saturation, exposure and so on, but additionally, more higher-level controls, such as RGB and luminance curves, selective saturation and grain. When these are used in conjunction with the adjustable inbuilt filters, almost any effect is achievable. What is striking is the quality of manipulated images, thanks to the 32-bit processing; this app produces classy, print quality pictures.

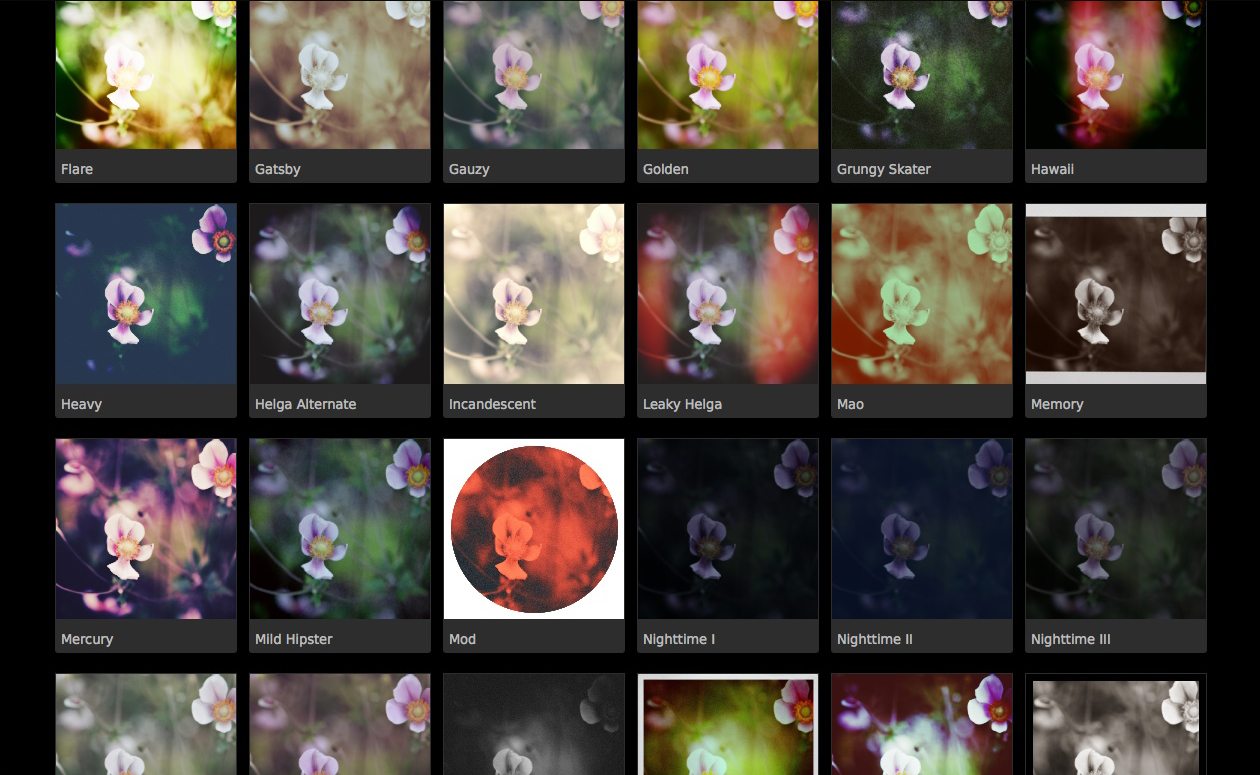
The preset filters that come with CameraBag 2 are very nice, both in terms of quality and quantity. Most are based on various print or film types and techniques, and are (in my opinion) very stylish. Examples include “Cyanotype,” “Leaky Helga” and “Super 1962.”

Read More→

Nevercenter Redesigns Photo Editing With CameraBag 2

February 2, 2012 – PRESS SUMMARY – Nevercenter released CameraBag 2 for Mac and PC, a desktop photo app with a whole new approach to photos. Redesigned from the ground up, CameraBag 2’s new Analog Engine pairs a full suite of photographic tools with the high quality filters and vintage simulations the series is already known for. Its key innovation is a stunningly straightforward approach to layering, rearranging, and endlessly tweaking all of these effects in realtime. The 100+ fully-adjustable filters and 25+ professional controls CameraBag 2 ships with are only the beginning, forming the palette from which users create their own styles.

Read More→

OSXcellence – Pixlr-o-matic

For some time now, I have admired and used Pixlr-o-matic for adding style to my images. Only now, however, can I feature it in this column, as a Mac version has recently been released.

Pixlr-o-matic doesn’t have the largest range of styles; in fact, it has very few in comparison to other more popular filter apps. The reason I believe Pixlr-o-matic stands out from the crowd is due to the attractiveness, and careful selection, of the filters installed. As a result, when I want one-click stylising of an image, I rarely need to venture further than this app.

Pixlr-o-matic’s interface is very simple, with a live preview illustrating the current effects applied. Filters come on a “film-strip” which is dragged sideways to scroll through the options. The simplicity of this app’s system is refreshing, with a maximum of three effects applicable on any single image – a colour/exposure/sharpness layer, a texture/damage/artistic layer, and a frame layer. None is obligatory, and that’s a good thing, considering that most of the middle stage’s filters range from bizarre to ugly to pointless. The other two layers by themselves, however, provide truly stunning results which replicate great film effects of the past.

Read More→

Scenic Outlook – What Gear Do I Need?

So you’ve seen all these amazing landscape shots from various photographers and you think to yourself, “I’d like to do that, but what do I need to get started?”. I’m assuming here that there will probably be people reading this that may be very new to photography and are looking for some sort of guidance. So what I’m going to do is compile a short list of things that you might want to consider getting hold of at some point or another, though there is no need to go out and get it all at once.

The simple answer to that question is a camera and a tripod. Is that it I hear you say. Well yes and no. If you’re a total beginner with only a compact camera who’s looking to delve further into the photography world then yes you can start to get out there with no more than these two items. Something to take the picture with and something to keep the camera as steady as possible. This is all I had when I started and it did me fine until my experience started to grow. I would recommend that you find out where the self timer is and use that to take your landscape pictures as this will prevent you from jogging the camera during the exposure. I will cover camera settings and things like composition in a future post.

As your knowledge begins to grow you’ll find that you start to need more and more bits of equipment. Purchasing a more versatile camera would be the obvious first choice, personally I would skip the bridge cameras and go straight for a DSLR system as this will give you more options in the long term. The standard zoom that ships with most cameras is actually a very good range for the landscape photographer and is in fact the zoom range that I use 90% of the time albeit that I purchased a better quality lens.

Read More→

Photography 101: 5 Essential Tools For Better Photos

One of the most common responses for obtaining better photos is often to purchase a better lens. There is a ton of truth to this, but there are items you can add to your camera bag that will also help you achieve great photo results. These are not overly expensive items and deserve a home in your camera bag at some point.

1. Get your white balance in order. Correct white balance is crucial in this new digital age. The subject of white balance is a completely new article (taking note for a future piece), but it is essentially how your digital camera views the lighting of the world. Yup, your reading light gives off a different color light than the sun nicely tucked away behind some clouds. This is where correct white balance comes in.

There are a few items you can use to aid you in setting correct white balance. A tool such as the X-Rite ColorChecker not only gives you a target to set white balance to, but you also have an abundance of options for post processing. However, what if you don’t have $100 to blow on this handy device? Have no fear as you can go cheap here. I walked around for a good year with a gray paint chip in my camera bag. You want something as close to an 18% neutral gray as possible here. A quick Google search will help you narrow your choices down for what ever brand of paint chips are available in your area.

Once you have your white balance device you have two options. If your camera has the ability to set white balance off a target, fill the frame with your gray card and fire off a shot. Those who like to set white balance in post processing can take a photo of the gray card and then use that photo to set white balance in your post processing software of choice. This simple device will help you keep colors as true to what you saw as possible. Read More→