Archive for Basics

Scenic Outlook – Choosing Your Horizon

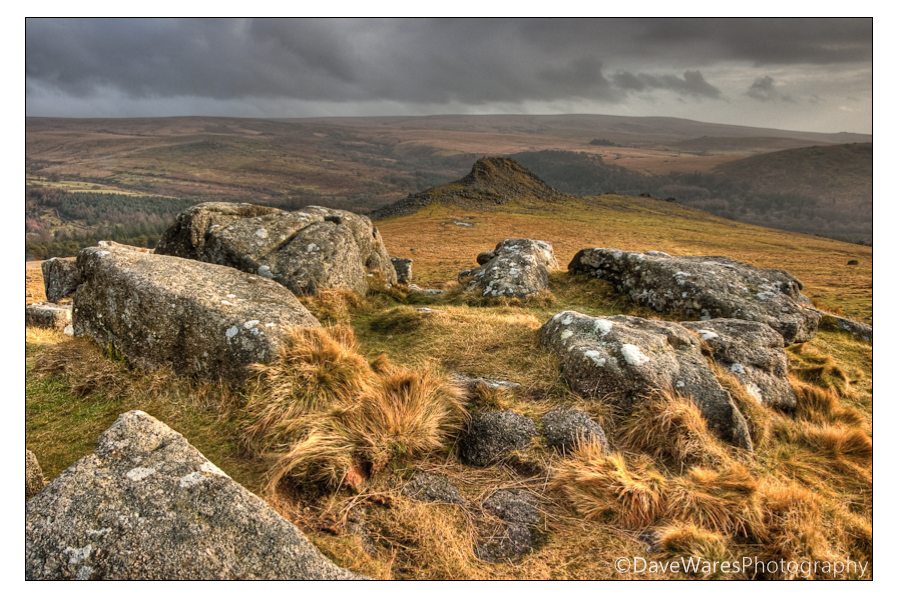
When out in the field and faced with a fabulous scene in front of you, there are three choices to consider when it comes to where you should place your horizon; Top, middle, bottom. Positioning the horizon in one of these three places will dramatically effect the perspective of the picture and will help to give your photographs a more dynamic edge. Generally speaking, the casual snapper and beginner photographer will tend to put their horizons more or less dead centre, as this is the way we usually see the world from a standing perspective. However, this tends to give pictures an unnatural balance with the photograph feeling as if it should be viewed as two halves. There will be times though, that placing your horizon in the middle will work a treat.

Lets look at some examples below.

Top:
Read More→

Photography 101: Lighting Alternatives

When one thinks of lighting and photography, the idea of flashes and strobes probably come racing to mind right away. This maybe true for a vast number of photographers, however there are plenty of other ways to get your lighting on, and they will not even break the bank. Some solutions may even surprise you!

Let’s get the easiest lighting source out of the way right now. That solution is natural lighting, or the sun. The sun never runs out of batteries, won’t blow up in the middle of a shoot, and is not something you will need to worry about getting stolen while you are out doing your work. On the downside, you cannot control the sun, and it may not cooperate with you. There is also having to work around those peak times of shooting in the morning and in the evening. Even with its uncontrollable nature, the burning star in the sky is easily the most reliable light you can use.

So what do you do when the sun is blanketed in clouds. Have no fear, as cloudy weather can provide a big benefit to your lighting needs as well. Overcast skies often reduce harsh shadows. This means if you are shooting flowers, bugs, and whatnot, the need for fill light may not be necessary. Clouds also provide a more interesting sky. Learn to work with Mother Nature as she provides some of the best options around! Read More→

Photography 101: Macro for Beginners

I love macro photography. In a world that continues to get larger, it is wonderful to look at the same surroundings on a much smaller scale. However, viewing the world through tiny eyes does bring on its own challenges outside correct exposure, white balance, and battery life. So, if you are like me and want to see this tiny world, read on!

The first thing you will want to invest in is a good tripod. I have boasted the benefits of tripods before, but a key feature you want to make sure your tripod can handle is getting close to the ground. The reason this is the first item you want to buy is that any movement from yourself, or the subject, is ultimately going to lead to noticeable blur in your photo. It will help if you can find one that allows you to mount your camera on the bottom, the legs fold out wide, and yet provides you a sturdy base for all your work. A good tripod of any kind is well worth the investment!

The next item you want to start considering is a macro lens. Every camera brand comes with a nice range of options here, however this is where you need to sit down and do some thinking. The most important item to consider is what you expect to shoot up close. There is a big difference when it comes to shooting a deadly spider or photographing spare pocket change. Knowing this will help you determine if you can get by with something like a 60mm macro lens, or if you will need a 200mm to put as much distance between you and the eight legged death dealer. Both lenses maybe great, but understanding the nuances of what you want to capture is going to help you budget planning.

Read More→

Photography 101: Stop and Enjoy

This is going to be an unusual post for me, as instead of breaking down some type of technique or photography secret sauce (there is none; incidentally), I am going to tell you to do something completely different. In a world that is connected by glass lines that transmit data at the speed of light and where news happens on a minute by minute basis, I will tell you to stop. When is the last time you put the camera down, and enjoyed the scene outside of shutter speed, correct white balance, and aperture settings?

Hence, my article will be brief this week, spurred on by a recent visit with my in-laws. I see my in-laws a fair amount as they live a little over an hour away. What was different on this visit was the knowledge that they are in the process of moving hundreds of miles away, separating my wife and I from them by two full days of driving. This means that what little time we can easily spend with them now becomes ever more important.

I had packed a bag full of gear and toys with every intention of shooting various spring photos during our visit. The tulips are in full bloom, the Magnolia tree had gorgeous flowers at the ready, and the weather was spot on for some great sunset shots. Yet, I never unloaded my gear or snapped a photo. No, I spent the day enjoying the conversations about things I cannot recall now. I stopped thinking at four frames a second and let one long exposure rule my mind. I had stopped to enjoy the moment. Read More→

Photography 101: JPG or RAW

Digital photography provides many choices when it comes to enhancing your unique vision. Everything from cameras, lenses, and post production software play a unique role in producing wonderful images. There is another piece to this puzzle that you need to consider as well. The question of RAW vs. JPG file formats is one that has no right or wrong answer, only what works best for you. Let’s take a look at these two formats and why you may want to use one over the other.

RAW is the native form in which your camera writes files to the memory card. This means Nikon’s RAW files differ from Cannon, Sony, Pentax, and so on. Each camera even puts its own unique file extensions on each photo. However, the differences in RAW files are more complicated than just file extensions and camera brands.

RAW files contain a large amount of information about a photo. This info ranges from the make of camera all the way down to if you fired a flash or not. That information is stored differently in every manufacturer’s RAW file. For example, Nikon may write the info in this order: camera type, iso, shutter, aperture, lens, date, time, and white balance. However, Pentax may write their info as: lens, date, camera, iso, shutter, time, white balance, and aperture. There is no standard for writing info into RAW files.

All of this info brings on a disadvantage when it comes to the ability for the file to be opened by photo viewing/manipulation software. You may have noticed how patches are released for software like Photoshop, Aperture, or Lightroom when new cameras are released. These patches are necessary to read the native files from these new cameras. As you might imagine, this complexity in RAW files can make it a bit difficult to move photos from one piece of software to another at times. This difficulty is often resolved by converting the original photo into another file format such as a DNG, JPG, or TIFF. Read More→

Photography 101: Break Out Some Angles

One of the simplest ways to increase the visual appeal of your photos is with different points of view. Here is what I mean by changing your view points, or angles. We have all seen photos where the subject is straight on, with a relatively generic background. While the scene might be nice, it does not do enough to differentiate itself from the flood of similar types of photos online.

This is where you, your eye, a bit of creativity, and a small bit of work come into play. Prepare to lie on the ground, climb a tree, and generally look like a goon while you try to catch “the shot.” There is a reason why professionals are willing to lay in the dirt, and that is to create an image that is both pleasing to the eye while providing a different view point to set the photo apart.

Changing your viewpoint to create something interesting maybe as simple as getting close to the ground. One example of this is in my shot of a manhole cover on a snowy street. You can tell this is a manhole, yet the angle at which the photo is taken obscures this item. The focal point is also shifted to the top of the rusty cover. This setup gives you a different way of seeing an otherwise ordinary subject.

skid-row

Read More→