Archive for Shooting – Page 2

Shooting A Wedding Is Like Shooting On The Move

Shooting a wedding is like shooting while you are walking. As a wedding photographer, you are constantly moving, your lighting is constantly changing, your models are not professionals and getting their attention is next to impossible. So with all these obstacles, how do you go about getting those one-of-a-kind beautiful wedding photos? Well in short, you do it quickly.

As a wedding photographer your skills as a professional are never in more need than they are during a wedding. A wedding is a moving photoshoot. From the time that the bride and groom walk down the aisle to the time they are together on the altar the lighting is different. You as a photographer have to be able to adjust for this. You have to know that in the 30 minutes or so after the wedding you have to put together 10 to 30 small portrait sessions when you do the formal portraits of the wedding party. You have to anticipate what your lighting is going to be like when you get to the reception. You have to be ready for anything.

Your first priority is planning. If you have never been to the ceremony location and it is located in the same city you are in I suggest you make a visit prior to the event date. Check the lighting; check out the surroundings and the backgrounds. Scout for the best location to take the formal portraits after the ceremony. Talk with the location event coordinator if possible and ask about rules for photographers during the event. Every location has their own rules and they are all different. If you want to be respected and asked to return I advise that you follow those rules to the best of your ability. I also suggest that you make your client aware of any rules that may impair their perception of how the wedding photography should happen. Read More→

Photography 101: How to Break a Photographic Rut

Hitting a photographic slump can happen to even the best photographer. You shoot the same subject matter, process with the same techniques, fill client requests, and work day in and day out doing the same thing. This maybe great for the bank account, but sometimes that can destroy your creativity. Hitting the creative wall can be detrimental to your mood. However, there are some solutions to help break free from this black hole.

One of the easiest things you can do is try something new. This can be anything from shooting different subject matter, processing a photo with a new technique, or even just changing up your normal shooting times. Simply altering one aspect of your photography can not only inspire you, but it may also open your eyes to a completely new photographic world you may not have considered before. Change can be a very good thing!

While we are on the subject of change, why not change up your style for a week. In fact, why not combine several styles into one photo. There are no rules that say you cannot shoot a black and white HDR macro image of a bottle cap. Maybe you want to shoot some long exposure street photography. Again, you are dabbling in something new and foreign, yet that can lead to new tools and personal styles you draw upon at a later time.

Another thing you can do is start some sort of photography project for yourself. Maybe you want to shoot a self-portrait every day for a year, or maybe you roam around your state taking photos of churches. The key to these projects is to make them something that interests you on some deep personal level. When you start to tire of the everyday normalcy and find you just don’t have it in you to press that shutter button, look at your project list and work on some of your personal projects. Read More→

Photography 101: Five Things I Learned on My First UrbEx Trip

A couple of weekends ago I was able to take a day away from all my moving and packing shenanigans to hit an abandoned hospital for a little bit of photography fun. Urban Exploration photography is something I rather enjoy to look at, so this opportunity to go on my very first UrbEx trip was rather exciting, and nerve racking at the same time. While I had a ball, I learned a few very important lessons from this trip.

Ghostly Lights

Ghostly Lights

Lesson number one was to pack plenty of lighting options. When we (there was a group of 12 of us) started roaming the hospital, we started in the basement. If you had no lights, this would be an extremely dark area to play in. I had a headlamp and four flashlights to use as I saw fit. The issue I had was that all but one of these lighting options was LED lights. When you have an opportunity to get creative with lighting like this, being limited to only the cold blues that LEDs emit was a tad frustrating. The next time I go, I plan to either get various colored gels for my flashlights, or bring a few different lighting options. Read More→

Photography 101: JPG or RAW

Digital photography provides many choices when it comes to enhancing your unique vision. Everything from cameras, lenses, and post production software play a unique role in producing wonderful images. There is another piece to this puzzle that you need to consider as well. The question of RAW vs. JPG file formats is one that has no right or wrong answer, only what works best for you. Let’s take a look at these two formats and why you may want to use one over the other.

RAW is the native form in which your camera writes files to the memory card. This means Nikon’s RAW files differ from Cannon, Sony, Pentax, and so on. Each camera even puts its own unique file extensions on each photo. However, the differences in RAW files are more complicated than just file extensions and camera brands.

RAW files contain a large amount of information about a photo. This info ranges from the make of camera all the way down to if you fired a flash or not. That information is stored differently in every manufacturer’s RAW file. For example, Nikon may write the info in this order: camera type, iso, shutter, aperture, lens, date, time, and white balance. However, Pentax may write their info as: lens, date, camera, iso, shutter, time, white balance, and aperture. There is no standard for writing info into RAW files.

All of this info brings on a disadvantage when it comes to the ability for the file to be opened by photo viewing/manipulation software. You may have noticed how patches are released for software like Photoshop, Aperture, or Lightroom when new cameras are released. These patches are necessary to read the native files from these new cameras. As you might imagine, this complexity in RAW files can make it a bit difficult to move photos from one piece of software to another at times. This difficulty is often resolved by converting the original photo into another file format such as a DNG, JPG, or TIFF. Read More→

Photography 101: Break Out Some Angles

One of the simplest ways to increase the visual appeal of your photos is with different points of view. Here is what I mean by changing your view points, or angles. We have all seen photos where the subject is straight on, with a relatively generic background. While the scene might be nice, it does not do enough to differentiate itself from the flood of similar types of photos online.

This is where you, your eye, a bit of creativity, and a small bit of work come into play. Prepare to lie on the ground, climb a tree, and generally look like a goon while you try to catch “the shot.” There is a reason why professionals are willing to lay in the dirt, and that is to create an image that is both pleasing to the eye while providing a different view point to set the photo apart.

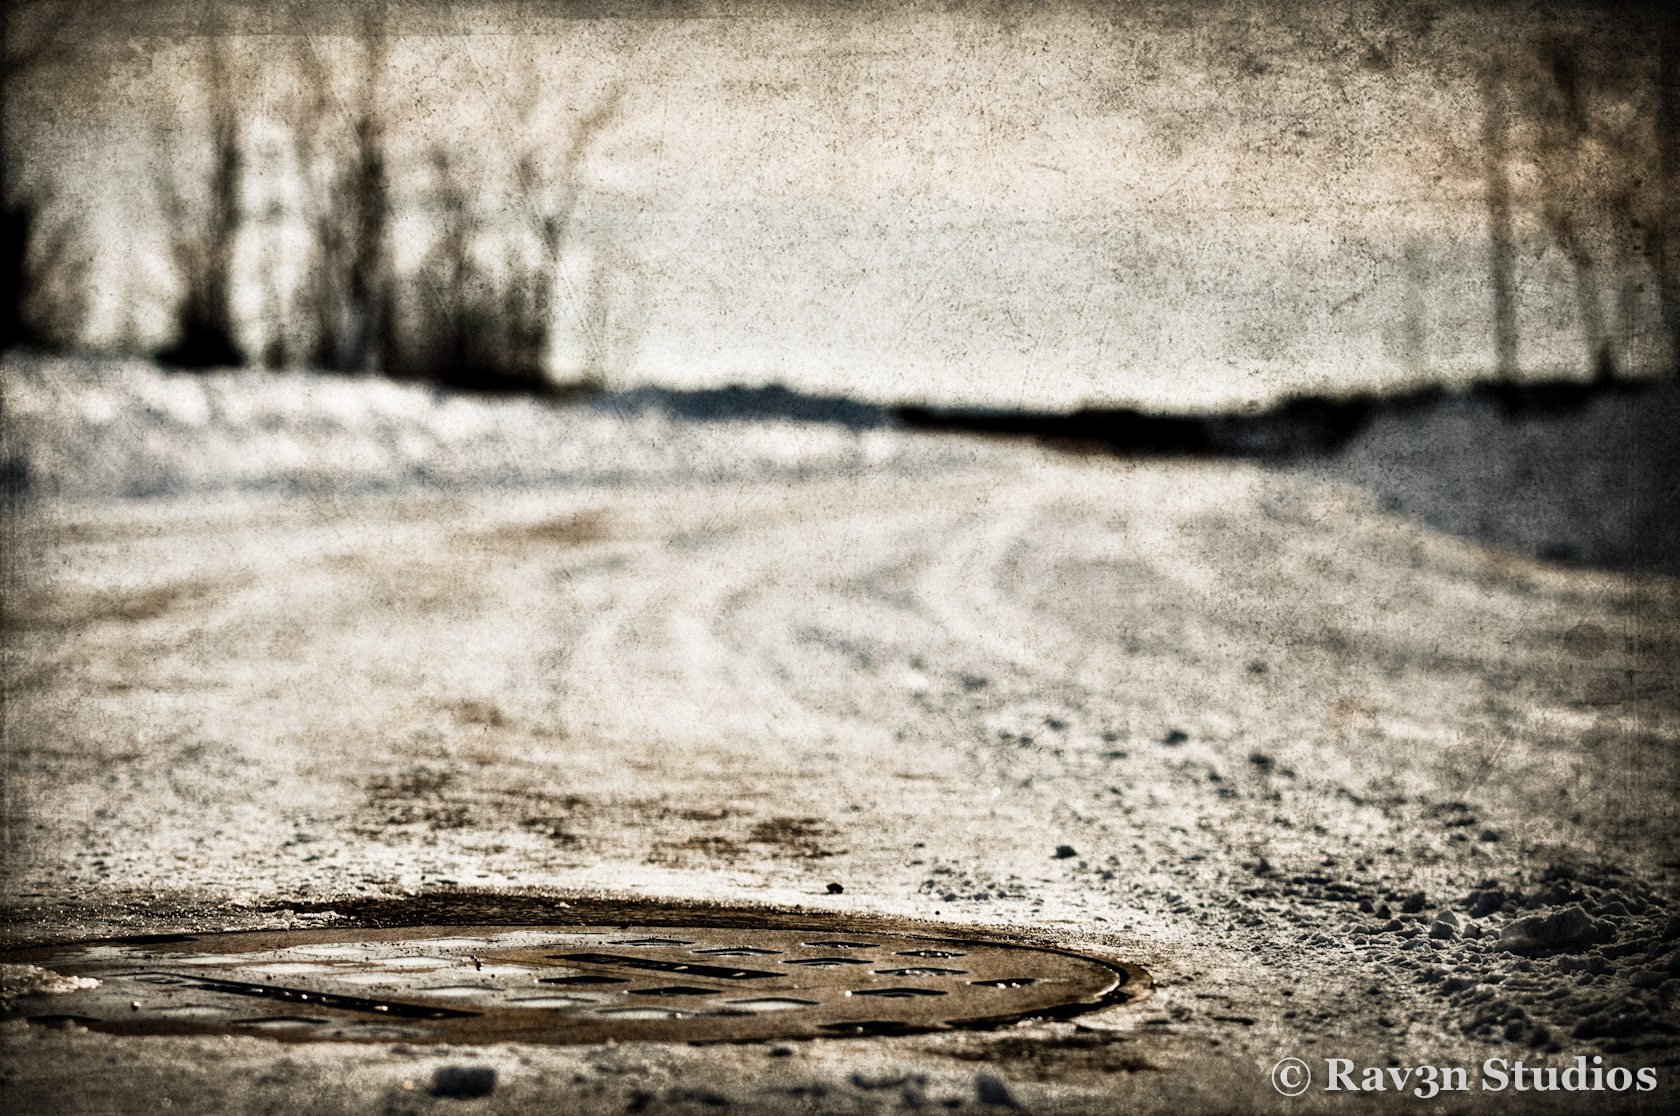
Changing your viewpoint to create something interesting maybe as simple as getting close to the ground. One example of this is in my shot of a manhole cover on a snowy street. You can tell this is a manhole, yet the angle at which the photo is taken obscures this item. The focal point is also shifted to the top of the rusty cover. This setup gives you a different way of seeing an otherwise ordinary subject.

skid-row

Read More→

Creating Abstract Impressions: by Anne McKinnell

Impressionist painters were more concerned with colour than line. Their goal was to leave the viewer with an impression of the scene rather than a literal depiction and their works often included a sense of movement.

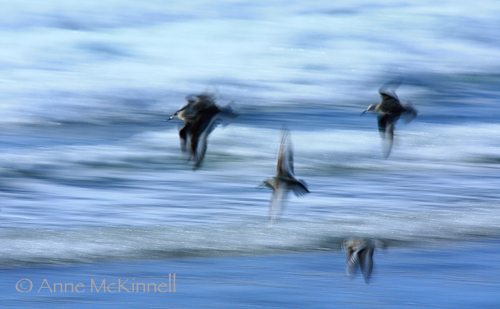
Photographers can also create emotional abstracts that leave only an impression of the original subject by using a slow shutter speed, from 1/50 of a second to 1/2 second, and moving the camera while the shutter is open or allowing a moving subject to pass in front of the camera.

This technique is fun because every frame turns out different. An afternoon can easily slip by as if moving on the waves of colour. There are 3 ways of approaching this technique:

1. Pan with a moving subject
When you move the camera while the shutter is open, it is called panning. With a moving subject, you want to pan at the right speed to keep the subject in the frame. Panning on a moving subject with a very slow shutter speed has a drastically different result than panning with a faster shutter speed. A faster shutter will have more sharpness in the subject and show some blur in the background. A very slow shutter speed is more abstract and allows you to really feel the movement while retaining just enough detail in the subject that you can still tell what it is.

1/50 Second, f/18, ISO 100

Read More→