Archive for gear – Page 3

Photography 101: How To Break The Fear Of Shooting In Public

Photography is a splendid vice. So many things in this world are just begging to be the subject of your camera. Yet, some of those shots require you to shoot in public places. This can be quite nerve racking for quite a few new photographers. How does one break free from this fear? Breaking this fear maybe easier than you think.

Size matters
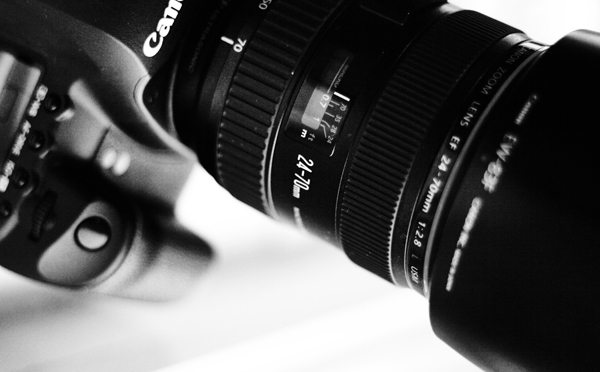
This might come across as trivial at first. The size of your camera can help immensely. What do you do though? First up would be to grab the biggest lens you have. This might not be the proper lens for the job, but it will be the lens to help you conquer your fear. Put the lens hood on for that extra bit of size as well.

The reason this helps is due to how people perceive you when you have a monstrous camera. The reason a big camera helps is people tend to take you from the tourist category and put you into the professional category. You may not be a professional, but it is amazing how people see big camera and instantly think pro.

Second is the camera itself. Those of you lucky enough to have multiple camera bodies should consider using the largest camera you have. This helps to increase the size and perception you will receive on the street. Remember, we are breaking a fear here, so it might be bulky but it will help you get over your fear. Read More→

Photography 101: 5 Essential Tools For Better Photos

One of the most common responses for obtaining better photos is often to purchase a better lens. There is a ton of truth to this, but there are items you can add to your camera bag that will also help you achieve great photo results. These are not overly expensive items and deserve a home in your camera bag at some point.

1. Get your white balance in order. Correct white balance is crucial in this new digital age. The subject of white balance is a completely new article (taking note for a future piece), but it is essentially how your digital camera views the lighting of the world. Yup, your reading light gives off a different color light than the sun nicely tucked away behind some clouds. This is where correct white balance comes in.

There are a few items you can use to aid you in setting correct white balance. A tool such as the X-Rite ColorChecker not only gives you a target to set white balance to, but you also have an abundance of options for post processing. However, what if you don’t have $100 to blow on this handy device? Have no fear as you can go cheap here. I walked around for a good year with a gray paint chip in my camera bag. You want something as close to an 18% neutral gray as possible here. A quick Google search will help you narrow your choices down for what ever brand of paint chips are available in your area.

Once you have your white balance device you have two options. If your camera has the ability to set white balance off a target, fill the frame with your gray card and fire off a shot. Those who like to set white balance in post processing can take a photo of the gray card and then use that photo to set white balance in your post processing software of choice. This simple device will help you keep colors as true to what you saw as possible. Read More→

Making your first HD DSLR Video – Part II – Must-have equipment

In the first part of this series, I covered some places that you could learn some of the fundamentals that you’ll need to shoot video. Now, we’re on to the equipment. The assumption I’m using is that you have a camera body that shoots video and a lens – that’s it. Now, what do you REALLY have to have to improve that basic platform, and what is the BASIC equipment you need to buy. Not the fanciest, most expensive equipment, but what do you REALLY need? The next thing I’m going to consider is – what can you buy that will have a dual purpose – another words, can you use it for stills AND video?

First, everyone ALWAYS starts with a tripod. Let’s face it, you can spend every bit of money you have on one and not get anything else. One clear thing you don’t want to do, is buy a $79 one at Best Buy. It will not cut it for stills OR video. There seems to be two main differences between a stills and video tripod. First, is the weight. If you look on B&H and just search for tripods, you can spend the better part of a day reading about all of them. I was lucky…I had invested in a nice Manfrotto tripod with a ball head many years ago. One of the great things about investing in a GOOD tripod and head up front is that you’ll really never have to replace it. However, in my case, I was very fortunate because that ball head could be replaced with a fluid head for shooting video. Read More→

Tools for Your Photography Business – Location Portrait Photographers

This is the fifth in our series looking at essential tools for your photography business. We’re going to be looking at some of the essential tools you’ll need to acquire in at least the first year (if not the first month) of your business.

Other articles in this series –

Part 1 – Software and Online Presence

Part 2 – Financials

Part 3 – Wedding Photographers

Part 4  – Studio Portrait Photographers
–

Part 5 – Location Portrait Photographers

Location portrait photography surprisingly isn’t about shooting on amazing locations…… it does help having them…..but if you’re a portrait photographer then your main emphasis should always be your subject.

In the same breath, location portraiture isn’t about having an abundance of gear. We’ve all heard the term ‘All the gear no idea’ , this really rings true for many photographers who think they need the latest gadget or lens to produce good work.

The best work is sometimes about simplicity. If you’re new to the business or are looking to expand into location portraiture then simplicity is a good place to start.

There was actually a wedding reception going on the background whilst we were shooting this picture.

Read More→

Tools for Your Photography Business – Wedding Photographers

This is the third in our series looking at essential tools for your photography business. We’re going to be looking at some of the essential tools you’ll need to acquire in at least the first year (if not the first month) of your business.

Other articles in this series –

Part 1 – Software and Online Presence

Part 2 – Financials

Part 3 wedding photographers

There’s no standard kit bag for wedding photographers and generally it’s something that you’ll want to add to over time (unless you have a ton of spare cash lying around).

I’ve shot over 50 weddings with a D70, a SB-800 and a 1GB CF card….. it’s not something I’d recommend so my suggestions here are the bare minimum I’d be happy taking with me today.

First rule – Whatever equipment you have – MAKE SURE YOU HAVE A BACKUP

What is important is buying what you can afford. It’s better to have two lesser camera bodies than one bad boy you had to remortgage your house for.

The hardest thing to accept in the beginning is that the a camera body you just brought that costs more than your first car is probably not going to last as long.

Someone once told me that the easiest way to tell the difference between a professional photographer and an amateur is not what kit they use but how much tape they have holding it all together.


Read More→

Photography 101: Consideration When Purchasing Your First DSLR

Have you been debating on investing in your first DSLR? Maybe you are ready to buy, but you have no idea where to start, or what to spend your mountains of cash on. No worries, this is a big step for many people. With a bit of planning, you can get a great DSLR setup that will help you grow in this wonderful world of photos. Let us look at just how you might want to consider your future shopping endeavor.

Budget setup
The first part to any shopping spree is figuring out a budget. You may think this is as easy as looking at your bank account, jotting down the remaining balance, and running off to the store. Before you speed off to the camera store to spend the remaining balance in your bank account, consider a few things that come with investing in a DSLR. The first thing you want to do is setup a camera budget. This is the amount you will spend on the camera and lens alone. A trick here is to budget a third of the amount for a camera, and the last two thirds on a lens. More on this later.

Outside of the camera budget, setup an accessory budget as well. Remember, the DSLR you are eyeing up may not take the same memory card as your point and shoot camera. Memory cards are relatively cheap in the grand scheme of things, but it is still an additional cost. You may also need to look at getting a sturdier tripod as a DSLR weighs quite a bit more than a point and shoot. Lastly, things like camera books, cleaning cloths, new filters, and even extra batteries need to be considered when deriving a budget.

One last piece of advice on budget setup, leave some wiggle room before you head off to the store. This will allow you to pick up something you may have forgotten to budget, like a new camera bag. The most important part of this budget is to set it up and stick to it. Remember, you will be adding to your gear as time goes on, so it is not necessary to try to grab everything in one trip. Read More→