Archive for Travel Photography

Have Camera, Will Travel – How I Prepare for a Trip: by Andrea Gonzales

You may be wondering how I prepare for a photography trip. Or maybe you aren’t…But I’m going to share anyway. 😉

Most of my travel is to major cities in the US and Canada…this is both good and bad. Good because there is plenty of easily accessible information about major cities on the Internet. Bad because, well, there is nothing “hidden,” or “secret,” or “unknown,” about major cities with plenty of easily accessible information.

Once I have a destination booked, I settle in with a cup of coffee and go down my list of websites:

TripAdvisor
Yelp
Local Convention and Visitors Bureau
Flickr
Google Images

On TripAdvisor I enter the city of choice, then select “Things to Do.” I read through the most recent reviews and take note of anything that piques my interest. I also check out “Restaurants,” and take note of any unique or unusual places to eat.

On Yelp I cross-reference my restaurant suggestions from TripAdvisor. Occasionally restaurant reviews on Yelp will yield further recommendations for places to go or things to do. For example “Restaurant X is the perfect lunch spot after a morning at Museum Y.”

Now that I have a list of restaurants, museums, parks, and other things to do I Google the city’s convention and visitor’s bureau (CVB) or tourist site. Here I can find out about any events that are happening during my stay that may be of interest. Many CVB’s offer a discount pass for local attractions, so this is something I evaluate here as well. Most of these sites have a tab for “Media” or “Journalists.” On this page there are often story ideas, which may give some inspiration for less tourist-y, less well-known places to see or things to do. If available, I also check out “How to Get Around.”

If there are museums or other indoor locations on the list, I check their individual websites for hours of operation, admission and photography guidelines.

On a recent trip to Calgary I decided to visit the Glenbow Museum after learning that photography was permitted in virtually all of their permanent exhibits.


On the other hand, at the National Art Gallery of Canada in Ottawa photography is not permitted in the galleries but it is permitted in the common areas between the galleries.
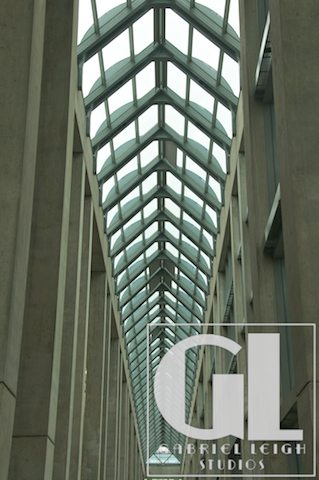
When I was researching the National Art Gallery of Canada I noticed on their website that an exhibit of models, drawings and photographs from the architect who designed their building was beginning on the third day of my trip. I had originally planned to visit this location on the second day of my trip, but delayed so that I could see the architect’s exhibit. I had brought my camera to photograph the exterior and common areas and as I entered the architect’s exhibit I made a concerted effort to turn it off, put the lens cap on and sling the camera behind my back so I wouldn’t get in any trouble. A security guard actually stopped me and explained that for this particular exhibit I was not only welcome but encouraged to photograph. This was completely unexpected but a great surprise!

Finally, after I have my list of places I want to visit I head to Flickr and Google Images. I search for images of both the city itself and the individual locations I am interested in. This way I can be sure I get the “iconic” images and I can also begin to plan how I can make more unique images. I also sometimes search on iStock to see what kind of images may be saleable.

Once I have a pretty good idea of where I want to go, I save all of the relevant websites to a folder labeled with the name of the city. I also save information regarding public transportation (route maps, schedules, fares).



Andrea GonzalesGabriel Leigh Studios was established in 2009 as a photography studio specializing in travel and commercial stock photography.

Andrea Gonzales has been in love with photography and travel for as long as she can remember.  After several years of hard work she was able to leave the daily 9-5 grind in July 2010 and now travels as often as possible.

Gabriel Leigh StudiosCompany: Gabriel Leigh Studios
Website: http://www.gabrielleighstudios.com
Facebook:
 https://www.facebook.com/AndreaGonzalesPhotography/


Here’s how you can share your tips, techniques and tutorials on CurrentPhotographer.com

–

Have Camera, Will Travel – Bucket List: Red Rock vs. Valley of Fire: by Andrea Gonzales

I had the opportunity to visit Las Vegas for the first time. I had heard of Red Rock Conservation Area, just outside of Las Vegas, from friends who had visited in the past and knew that it was a priority to visit. During my pre-trip research I also read about Valley of Fire State Park. Red Rock is less than an hour’s drive west of Las Vegas and Valley of Fire is about an hour’s drive northeast of Las Vegas. Both places intrigued me, so I planned a big day trip to visit both.

One comment on TripAdvisor really caught my attention. The reviewer said that if you were going to visit both Red Rock and Valley of Fire that you should go to Red Rock first. The reviewer felt that Red Rock would be disappointing if you saw Valley of Fire first. So I planned my trip based on this recommendation and headed to Red Rock at sunrise.

There are a lot of options for visiting Red Rock, but since my trip was short and I was planning to see Red Rock and Valley of Fire in the same day I opted for the simple 13 mile scenic loop drive through the park. There are multiple points on this loop to park and get out of the car. Unfortunately I didn’t have time to venture much past the parking areas at these stops. In hindsight I should have given myself an entire day to explore the park, but driving the loop was a nice sampler to start with.

The first thing I noticed was how quiet it was. I used to consider where I live to be relatively quiet, but its amazing how much noise is in the background of every day life – traffic passing by, the hum of my computer, the air conditioner or refrigerator running. Even the background buzz of electrical wires outside. But at Red Rock it was soooo quiet. I literally stood there and heard NOTHING. Not even a bird chirp. Not even the wind rustling through the trees.

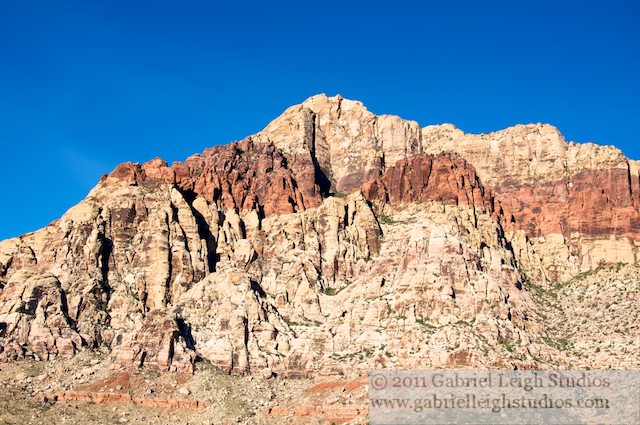
At the first parking point I looked out at the mountains. I grew up in Florida, so this kind of landscape was completely foreign to me. I couldn’t understand why someone would say Red Rock would be disappointing if I saw Valley of Fire first. It was just so beautiful and unspoiled…there wasn’t even a hint that Sin City was less than an hour away, on the other side of the mountain.

After I finished the driving loop through Red Rock it was time to head to Valley of Fire. I decided to take a small detour to see the Hoover Dam and then drive through Lake Mead Recreational Area. Its amazing to see these places after reading about them in books all through school. The size and scope is just incredible. And the drive around Lake Mead to Valley of Fire feels like a journey to another planet. I seriously felt like I was on Mars.

Before I even arrived at the entrance to Valley of Fire I began to understand the recommendation to see Red Rock first. Red Rock was beautiful and maybe I just didn’t explore it enough, but it was smaller and felt more like I was still close to civilization. Valley of Fire was just…vast…alien. And on top of that, Valley of Fire has petroglyphs! One area, called Mouse’s Tank, has a half-mile trail through a small canyon that is filled with petroglyphs. Some of these pieces of art are so easily accessible you can walk right up and put your hand on them (which I did). It was hard to imagine that another human stood in that same spot as much as 2300 years ago and drew on the rocks. If only I had a time machine!

I visited in early December, which was (to me) ideal. The sky was clear and the temperature during the day was in the 60’s. I wish I had spent a full day at each park, but I’m also glad I got to see both places. I will definitely plan another trip and will take more time to explore these two parks. I think visiting a place like this should be on every photographer’s bucket list – especially if you live on the East Coast. I know its cliche’ but the pictures really don’t do it justice.


Andrea GonzalesGabriel Leigh Studios was established in 2009 as a photography studio specializing in travel and commercial stock photography.

Andrea Gonzales has been in love with photography and travel for as long as she can remember.  After several years of hard work she was able to leave the daily 9-5 grind in July 2010 and now travels as often as possible.

Gabriel Leigh StudiosCompany: Gabriel Leigh Studios
Website: http://www.gabrielleighstudios.com
Facebook:
 https://www.facebook.com/AndreaGonzalesPhotography/


Here’s how you can share your tips, techniques and tutorials on CurrentPhotographer.com

–

Scenic Outlook – Go Portrait

When it comes to landscape photography it may seem perfectly logical that you should keep your camera in a horizontal/landscape position, usually we are confronted by sweeping vistas and sometimes even the widest of lenses just doesn’t seem to be enough to fit it all in. However, turning your camera to a vertical/portrait position can be equally rewarding and in fact may help to improve your pictures in certain situations.

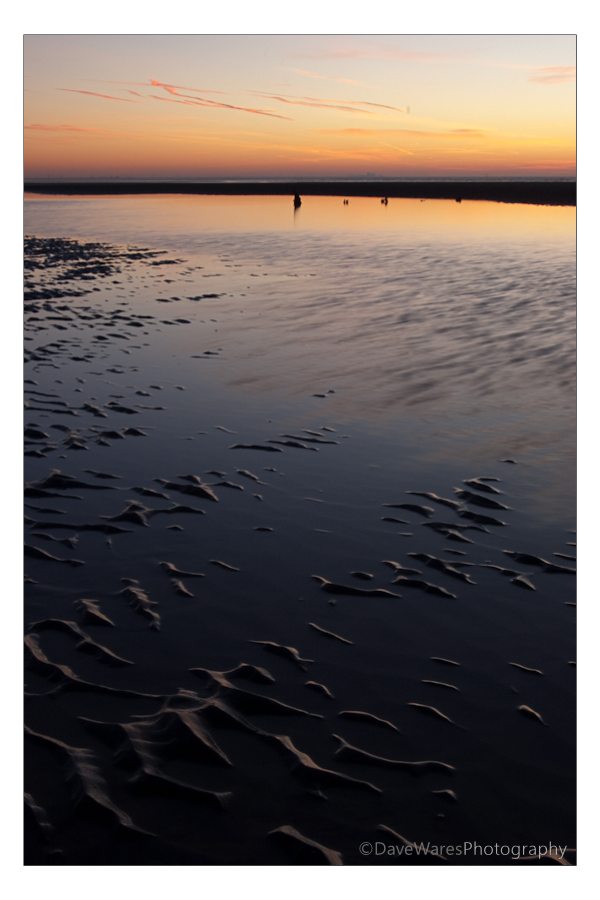
The strength of any picture will always be partly down to how you choose to compose the frame. I always take a few moments to have a good look at what’s in front of me, deciding what elements are available to help draw the viewers eye through the scene. Take a look at the picture below.

Read More→

Getting Ready to Fly… Should You Ship Your Camera Gear Ahead or Check it? by Charlie MacPherson

It’s no secret that travel is becoming increasingly difficult. Airports haven’t been much fun for the last 20 years or so anyway. But with the increased security following 9/11 and the more recent attempted shoe and underwear bombers, air travel has easily become the most unpleasant part of any trip.

But normally, the best photography sites in the country are not in our back yards. That means travel – often, by air.

So that raises a question.

Should you trust thousands of dollars in camera gear to the tender mercies of the TSA and airline baggage handlers? Or should you ship your gear ahead of you?

There are pros and cons to either. But first, some full disclosure. In addition to my work as a photographer, I own a retail shipping store (similar to a UPS Store) called Postal Center USA in Randolph, MA.

Not that I expect photographers to flock to me to ship camera gear, but I think it’s worth being up-front. It also means that I can speak with some real expertise on the matter.

First, if you can safely carry your gear on board the aircraft, that’s the best option. Your gear stays within your control (except during the TSA “experience”). But my advice is to select seats in the back of the aircraft so you can board earlier. And place your gear in an overhead bin *in front* of you so you can see it.

Check with the airline. Ask what type of aircraft will be used and what the maximum dimensions in the overhead bins are. The only caution is that the aircraft type can change at the last minute.

If you suddenly find yourself unable to use the overhead bins for any reason, politely insist that you “gate check” your gear due to fragility and high cost. That means that you hand it to the baggage handler at the gate, and they bring it back to you at the jetway. There’s a lot less handling that way.

But if you’re like me and have too much gear to fit in that overhead bin, consider shipping it with FedEx or UPS. You can do this safely if you follow a few precautions:

1. Be sure your gear is insured. Check with your homeowner’s or renter’s insurance. And a note of caution – if you shoot anything for pay, these policies will not cover you. In any case, contact your insurance broker and ask about an “inland marine policy”, which covers for replacement value – not depreciated value. I buy mine through PPA (www.ppa.com)

2. Record the model and serial numbers of every piece of gear – just in case.

3. Be sure you have a reputable place to receive your gear. A national chain hotel should be OK. I’d be cautious about one that doesn’t have a big company name behind it. A Hampton Inn is fine. Joe’s Bedbugs & Breakfast Motor Lodge? Not so much.

Consider contacting a shipping store to see whether they will receive and store your gear for a small fee.

4. Ship your gear with either FedEx or UPS so that it arrives at least one business day early. Just in case. And track the shipment early in the process for the best chance of catching any problems.

But unless you have big stacks of money to burn, leave yourself enough lead time so that you can ship via ground. Air shipping gets a lot more expensive!

5. Padlock your bags – even a small padlock through the zipper handles is a deterrent.

I find that even without my “storeowner’s discount”, the cost is well worth it.

I don’t pay for the additional checked bags, I don’t have to carry them, and I even ship my clothing so I can breeze through the airport.

One last hint – remember to carry your GPS with you. If you ship it ahead in your luggage and need directions to find it, well…just remember to keep it with you!

Follow these precautions and enjoy your next flight a lot more. Shipping your gear ahead makes the whole airport experience a lot less stressful, and that’s a luxury well worth paying for.


–

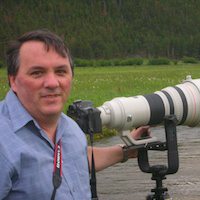
Charlie MacPhersonCharles MacPherson is an award-winning wildlife photographer and resident of Scituate, Massachusetts.

He has been behind a camera since 1973 when shortly after picking up his Dad’s “Argus Brick”, he was inspired to buy his first SLR – a Canon TLb.

His decades-long love affair with photography morphed into an obsession with wildlife photography and a specialty in birds.

He conducts photo-tours around the country as well as workshops and classes in the Boston area and writes two weekly blogs: www.TheAmazingImage.com which covers general photography topics and www.TheWildInFocus.com, focused on wildlife photography and is a blogger for B&H Photo.

Company: The Amazing Image
Phone:
781-470-9111
Email: charlie@TheAmazingImage.com
Twitter: @TheAmazingImage
Facebook:
https://www.facebook.com/charlie.macpherson.1

Photo Credit: Š Charles MacPherson

Here’s how you can share your tips, techniques and tutorials on CurrentPhotographer.com

–