Archive for OSXcellence – Page 4

OSXcellence – ACDSee Photo Flash Review

ACDSee Photo Flash

Many of the apps I review in this column are stacked full of features  and, seemingly, developers seem to think that more really is more. ACDSee Photo Flash is as far from these do-it-all apps as it’s possible to be, but will the traditional adage of “less is more” ring true for this minimalist app?

The one-and-only function of Photo Flash is image brightening, the claim being that this app is an in-Mac flashgun. My initial thought was, “Why can’t I just use the exposure slider in Aperture/iPhoto?” ACDSee claim, however, that their special “Lighting and Contrast Enhancement (LCE)” technology is a superior option. This function is adjustable, using Flash Photo’s only control – a percentage slider.

After studying images outputted from Photo Flash, I would say that the exposure adjustment which this app provides is tempered by highlight reduction and shadow lifting. The images, as a result, have a slight HDR feel, but nothing too garish, or even noticeable. I have to admit, though, that the effect is quite similar to the illumination that flash gives.

Read More→

OSXcellence – cf/x photo Review

I have reviewed a number of simple editing apps in this column, many of which are effects-based. But suppose you don’t want to make your picture look like a badly exposed polaroid, yet still would like the simple operation that apps like CameraBag 2 have? Today’s app is cf/x photo, which aims to fit just this description – but will it fill the niche?

I hadn’t heard of this app, or its makers – cf/x software – before stumbling upon photo in the Mac App Store. On initial inspection, photo seems to follow the trend of sleek and simple effects/edit apps. Unlike the standard formula in this genre, however, photo is not about messing around with your pictures (even though a few basic effects filters are included). The aim of this app is summed-up nicely by its makers: “CROP. TWEAK. ENJOY.” As a result, the focus in photo is practical functions, like cropping and watermarking. You can also create classy frames of any colour you desire, and put text onto the image as well.

The crop function includes a number of aspect ratios, as well as the ability to crop at an angle. Given that you have a Mac (on which photo runs), you automatically have iPhoto, which can perform these crop functions itself. The need for such a cropping function in photo, then, is somewhat lacking.

The effects palette is very modest in photo, and to be honest, you’d do better to download a free specialist app if you want to style your image (like Pixlr-o-matic). Hidden within this menu is access to basic exposure and colour editing tools, although again, iPhoto would probably do this job better.The frame options in photo, whilst being basic, are very useful, allowing the easy addition of a coloured border, with one or two-colour options available. The width of the frame is adjustable, but unfortunately, making the frame wider makes it encroach on your image more, rather than expand outwards – a disappointing feature.

Text can be added in one of three segments of the image – top, middle and bottom – although the text actually sits somewhere near the top of each of these segments. The placing of these is strange, and makes this tool useless in comparison to the Mac’s inbuilt app, Preview, in terms of annotation. Read More→

OSXcellence – Big Aperture Review

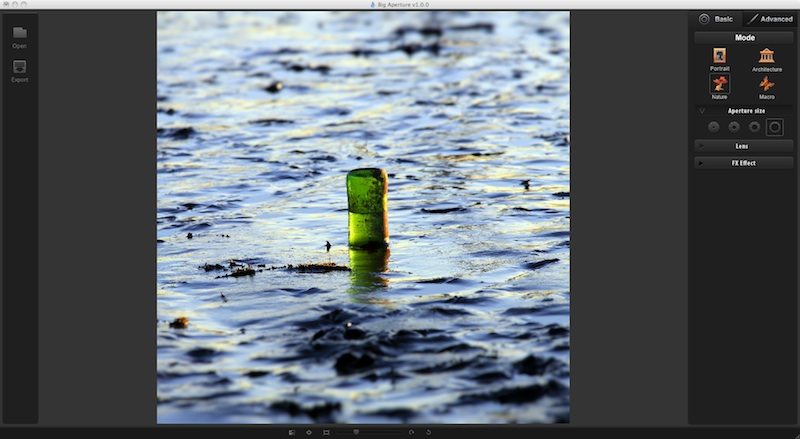
Look in the Mac App Store photography section, and you’ll see a number of tilt-shift apps (see one of my previous reviews) but not so many dedicated to standard blurring of fore- and backgrounds. Perhaps this is because of the relative complexity involved in making depth-of-field blur look realistic in software. Can Big Aperture for Mac (from Everimaging software) be the go-to app for this task?

Big Aperture isn’t stacked full of controls, not least because the task it is set up to perform doesn’t require a vast set of menus. This provides the benefit of an uncluttered interface, which is already enhanced by Big Aperture’s classy, darkroom-style presentation.

There are two main control menus – Basic and Advanced. The Basic control menu – which I actually found the more useful – edits each image in what is, essentially, a four-step process. First, you select a blur “mode”; the selectable options are Nature, Portrait, Macro and Architecture, all of which act as presets. Their true function, however, is the selection of blur type; whether there is a sharp spot in the centre, with blur increasing outwards, or whether the blur is depth-based, with a horizontal plane of focus across the image, and blur increasing above and below this plane.

Read More→

OSXcellence – Inpaint Review

“DAMN!” – you’ve taken a world-beating image, but just as you’re about to Google “Wanderlust photo competition,” a terrible reality dawns on you. There is some pesky passer-by’s blurred head in the bottom corner. What are you going to do?

Teorex, the makers of Inpaint, would no doubt suggest that you head for their app.

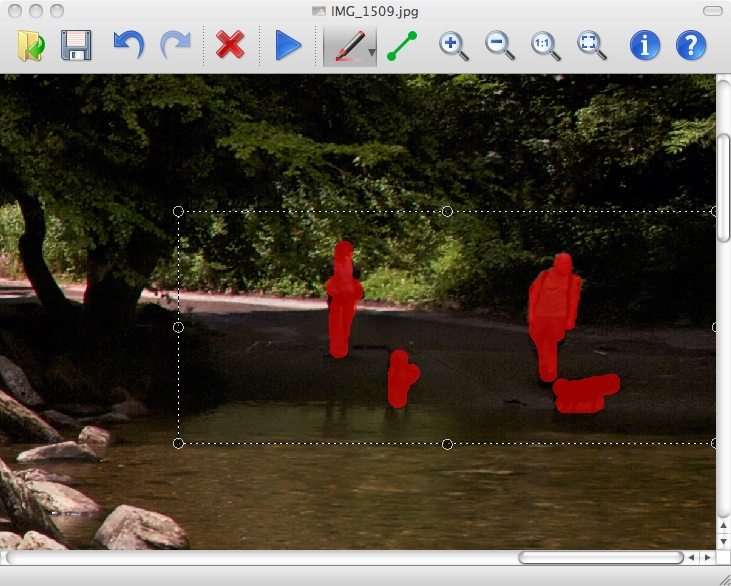
Inpaint (temporarily on special offer at £0.69/$0.99) is an app specialising in removing unwanted objects from your image.

The name implies Inpaint’s method of operation – paint a red overlay onto the objects you wish to remove, and hit the “Inpaint” button to get the app working. The cloning is reasonably snappy, only taking 20 seconds or so, and the results, at first glance, are respectable. Areas in the image around the objects to be cloned are copied, in a manner not unlike Photoshop’s dust cloning tool.

Read More→

OSXcellence – Pixlr-o-matic

For some time now, I have admired and used Pixlr-o-matic for adding style to my images. Only now, however, can I feature it in this column, as a Mac version has recently been released.

Pixlr-o-matic doesn’t have the largest range of styles; in fact, it has very few in comparison to other more popular filter apps. The reason I believe Pixlr-o-matic stands out from the crowd is due to the attractiveness, and careful selection, of the filters installed. As a result, when I want one-click stylising of an image, I rarely need to venture further than this app.

Pixlr-o-matic’s interface is very simple, with a live preview illustrating the current effects applied. Filters come on a “film-strip” which is dragged sideways to scroll through the options. The simplicity of this app’s system is refreshing, with a maximum of three effects applicable on any single image – a colour/exposure/sharpness layer, a texture/damage/artistic layer, and a frame layer. None is obligatory, and that’s a good thing, considering that most of the middle stage’s filters range from bizarre to ugly to pointless. The other two layers by themselves, however, provide truly stunning results which replicate great film effects of the past.

Read More→

OSXcellence – SnapHeal Review

MacPhun have been pretty prolific recently, and not to the detriment of app quality – FX Photo Studio and Color Splash Studio were both highly polished releases. Now, they have a new offering, SnapHeal.

SnapHeal’s work consists of erasing (healing), cloning and retouching. These functions work in a similar way to their Photoshop equivalents, and all the brushes have detailed controls. In the case of the eraser, unwanted objects can be selected (and deselected), Color Splash style, using a brush, and there are three eraser modes, each of which uses a different method of copying surrounding areas onto the unwanted object. Then, all that is needed is one click of the Erase button, and that crisp packet in the bottom-left of your otherwise stunning image is banished. This process isn’t immediate, but 20 seconds is usually the upper limit of waiting time.

And the results are worth the wait; the finished erase is clean, and usually blends seamlessly. This is a pleasant surprise, given what a mess many other photo editors make of the healing process.

The Clone/Stamp tool works in exactly the same way as Photoshop’s equivalent, and seems to work just as well. Read More→