Archive for exposure

OSXcellence – ACDSee Photo Flash Review

ACDSee Photo Flash

Many of the apps I review in this column are stacked full of features  and, seemingly, developers seem to think that more really is more. ACDSee Photo Flash is as far from these do-it-all apps as it’s possible to be, but will the traditional adage of “less is more” ring true for this minimalist app?

The one-and-only function of Photo Flash is image brightening, the claim being that this app is an in-Mac flashgun. My initial thought was, “Why can’t I just use the exposure slider in Aperture/iPhoto?” ACDSee claim, however, that their special “Lighting and Contrast Enhancement (LCE)” technology is a superior option. This function is adjustable, using Flash Photo’s only control – a percentage slider.

After studying images outputted from Photo Flash, I would say that the exposure adjustment which this app provides is tempered by highlight reduction and shadow lifting. The images, as a result, have a slight HDR feel, but nothing too garish, or even noticeable. I have to admit, though, that the effect is quite similar to the illumination that flash gives.

Read More→

Scenic Outlook – Embrace Manual Mode

Modern cameras are truly wonderful devices, every time a new one comes out it’s seems to be packed with more and more cool stuff to temp you into parting with your cash. Of course many of these features can be quite useful in certain situations but for the most part a good proportion of functions will rarely be used. This is very true for the landscape photographer. Sturdy build, good glass, a decent viewfinder, a reliable light meter and the ability to alter the aperture and shutter speed separately is all it needs to do. The question of resolution/pixel count really comes down to what it is that you’re going to be doing with your images, and if you never print larger than A4, a 6MP DSLR will do the job just fine. 12MP seems to be a good amount for the majority of folks but even the lower end cameras are now offering more resolution than this; cool if you want huge prints or to aggressively crop your images, but most of us just won’t utilize the full resolution of our cameras.

So, your camera will come with a number of exposure modes; Program, Shutter priority, aperture priority, Auto, Manual and in addition to this there will be a selection of scene modes to choose from. I only ever use two of these modes; Aperture priority and Manual. Aperture priority is great in situations where you have to work fast; you get to choose the aperture and thus the depth of field, and the camera selects an appropriate shutter speed to get a good exposure, or at least what it deems to be a good exposure.

Read More→

Scenic Outlook – Balancing the Scene Part 2: Multiple Exposures and HDR Tonemapping

In my last post we looked at how to use graduated ND filters to help balance the scene when the contrast between sky and land is too great for the camera to deal with. This time we are going to look at another two options to help balance the scene that use the same basic idea of taking multiple exposures with the intention of blending them together at the post processing stage. Exposure bracketing or AEB is not a new thing and has been a feature on both digital and film SLRs for years. The idea when using film is to hedge your bets and make exposures either side of the cameras recommended value, thus ensuring at least one slide with a decent exposure when you got your film back from the lab. This idea stayed when digital cameras were introduced, but nowadays we’re using the different exposures to make one good one. This can either replace the idea of using a filter system or can be an alternative when presented with certain situations where a filter may cause more problems. These sorts of situations could include something like a mountain valley or perhaps a city scene, with lots of tall buildings cutting across the skyline. In these situations the filter would not only darken the sky but would also darken your mountain or skyscraper.

So the first option of using multiple exposures would be to take at least two shots, one biased towards the sky and one towards the land with the idea of merging them together on the computer. This is a fairly straight forward process which involves bringing both pictures together as layers then erasing the unwanted parts as necessary, taking care to do it gradually to achieve a seamless result. Once it looks right you can flatten the layers and continue to work on the image as a whole. In reality there in an awful lot of dynamic range within a single RAW file and with the help and careful use of the Highlight/Shadow tool in Photoshop you will be able to achieve great results using just two exposures.

S

Read More→

Scenic Outlook – Balancing the Scene Part 1: Graduated Filters

As a landscape photographer one of the big difficulties you’ll face will be trying to achieve a balance between the land and the sky. During normal daytime hours this won’t be an issue but as we know the best times to be out is during the golden hours either end of the day. At these times the sky will be much brighter than the land and although our eyes adjust pretty well to this kind of scenario our cameras just won’t be able to cope with the huge difference in contrast. This means you will have to compromise by either metering mainly for the sky which would result in a dark landmass, or metering for the land which would more than likely result in over exposing the sky. To overcome this there are a few ways in which we can tackle this problem and the one we are going to look at today is by the use of filtration.

Read More→

Think More, Shoot Less: by William Petruzzo

I think that photography as an art has taken a pretty big hit since the widespread acceptance of digital cameras. Hipstematic takes an arbitrary picture of a coffee cup taken with an iPhone and turns it into “art”. Bigger memory cards mean there is less and less risk in pressing that shutter button. Like never before, “art” in photography is largely an accident. But is it art at all? I think not.

I define art, not by what is produced, but by what the artist’s mind was doing when it was produced. By that definition, art must be intentional. You cannot simply fire off 10,000 pictures to find those 2 works of “art”. What you found wouldn’t be art at all, it would be a series interesting coincidences. Think about it this way—imagine that you could record everything your eye sees in brilliant high definition and at any point, pull out a single frame and publish it to Flickr. You probably wouldn’t consider that art. Yet this is often what digital photographers do. They point their camera in a thousand directions and find a few images that are interesting enough to share. Anyone can do that.

So, as digital photographers, how do we find our status as an artist? I submit that we find that status by learning to be intentional; by making calculated decisions about the things we photograph; by refusing to press the shutter down before we’re sure that what we’re about it capture is what we intend to capture.

Now, before I move on, let me interject briefly. Photography has a great history of accidentally capturing incredible moments. In fact, some of history’s iconic photos were total accidents.  And that’s okay. Because at that time in history, skilled photographers routinely and intentionally captured beautiful images. And sometimes, they caught beautiful accidents. But it was the exception, not the rule. And that’s part of what made those photos so remarkable. Today, it’s often the other way around. So, while there is a place for incredible coincidences in photography, as photographers we should once again aim to make them the exception, not the rule.

So, in the interest of learning to become true artists, here are six techniques to stretch our intentionality in the creation of our images and heighten the artistic integrity of our work. It’s all about thinking more, and shooting less. Read More→

Finding Your Feet: The Special Three: by Jacob Lucas

Thanks for diving into this third part in my “Finding Your Feet” series. In case you need a re-cap,

– Part One: Getting Started In Photography
– Part Two: Choosing Your Camera

This post is going to cover three crucial camera settings that you’ll need to know to start photographing effectively to meet your vision. Often referred to as the exposure triangle, these settings are ISO, Aperture, and Shutter Speed. At first glance, they appear quite technical but once I took the time to read about them and understand them they actually became almost second nature to me – just like breathing or blinking. These three settings relate to one another very much in an almost symbiotic circle – what happens to one impacts the other in some fashion.

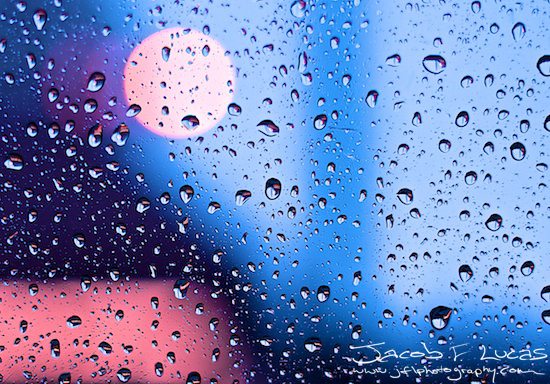
JFL_4687

ISO 200, f/2, 1/250th of a second

Read More→