Archive for Tips – Page 5

Working with Videographers During a Wedding

Many times in our still photography profession we encounter instances where during an event, such as a wedding, we are competing for time and attention with guests, amateur photographers and the videographer. I have been fortunate enough to have worked alongside some great videographers both professional and amateur who work with me so that we can make both of our jobs easier.

Video and still photography are worlds apart in the sense of setup, lighting, and position. I had a comment on a previous post about a still photographer who had a very hard time with a videographer especially during the cake cutting ceremony. The videographers light created unwanted effects on the still photographer’s photos and videographer basically ran away with the positioning.

Here are some suggestions I have to try and make your joint work effort easier.

  1. Talk to the videographer before the event starts. Get a game plan. Make sure you both are on the same page and see how you can work around each other. The last thing you want is him getting in the way of your photos and the last thing he wants is you right in the middle of his video.
  2. Take turns. When I am doing the formals I always make sure that they are getting what they need to and they reciprocate. Usually if you extend the olive branch they are more than willing to work with you. Get your positioning, take your shot and then make sure they have time to get what they need before moving on.
  3. Ask for what you need. If they are doing something that is impeding your performance then simply talk to them about it. If their light is too bright, explain the situation and perhaps take turns or dare I say, recreate the moment again with the couple so that you get a beautiful shot. It’s going to take some fancy footwork on your part but being a wedding photographer means being versatile. We cant control very much in our environment and we have very little time to control what we can. Work with what you can and create what you cant. Read More→

How To: Auto Bracket 9 Exposures on a 3 AEB System

I’ve been asked this question quite a bit. “How can you bracket 9 exposures on your Nikon D5000 when I can only bracket 3 using AEB”? Well there are two solutions, one is the amazing Promote Control, but I don’t have an extra $350 to invest in this must have piece, so I have an alternate solution.

It is recommended to never touch your camera during your brackets as to not induce camera shake. This is true, but with my solution you will be touching the camera slightly to make adjustments so I recommend this.

  1. A Sturdy tripod (not those cheap flimsy ones)  I’ve been happy with my budget 7300 series tripod from Calumet Photo because its made very well without the high price tag.
  2. Make sure you tighten up all of your adjustments on your tripod after composing, so that your camera stays in place
  3. I always use my camera bag as an anchor to weigh down my tripod.
  4. I always use my wireless shutter release remote
  5. Under camera setting menu set your EV increments to 1/2 instead of 1/3 (this will reduce the amount of wheel click you need to make to change the exposure.)
  6. Set you camera to delayed exposure, this allow the shutter to open before the shot is fired (reduces camera shake)

*Now here is how I go about getting 9 exposures out of a 3 Auto Exposure Bracketing System:*

Read More→

Photography 101: ISO With A Side Of Light

We are finally onto the last, and hopefully easiest, part of the exposure triangle. By now, you have played with shutter speeds and fiddled with aperture settings. One last building block is still missing from all of this. That building block is your camera’s ISO setting.

ISO (or International Standards Organization) is how we control cameras sensitivity to light. This is the equivalent of film speed, but without the need to lug around six different rolls of film for shooting in various lighting conditions. I know that in prior articles I have used light and detail as interchangeable terms. For this article, light will stick to meaning brightness.

ISO has a wide range of values depending on your camera, what the manufacturer is capable of producing, and the demand for higher ISO settings. Common ISO numbers range from ISO 100 to ISO 6400, but these are just common settings and not the full gamut of ISO setting available on the market. What does this range have to do with you, and ultimately the exposure triangle? Well, quite a bit actually.

Let us say you set your camera to an ISO of 100. This is common for a fair amount of photographers when shooting in bright light, outdoors, and other brightly lit conditions. An ISO of 100 means your camera sensor is not super sensitive to light. Think of ISO 100 has having sunglasses on you camera sensor. It takes in light, but it is not sucking in copious amounts of light. Setting a low ISO means we can now use larger apertures, or slightly slower shutter speeds as we have the camera sensor set to a low light sensitivity.

An example for using a low ISO is shooting during the middle of the day while the sun is brightly shinning. There is so much light flooding your scene that you will want to take in detail before the light over exposes the scene. Setting an ISO of 100 makes it so the sensor does not become overwhelmed by light before the detail can take hold.

Example photo: This is shot in the late morning hours when the sun was bright. A low ISO allows for more detail to come through before the light causes over exposure:

Shutter: 1/180
Aperture: f/11
ISO: 200
White Balance: Daylight Preset

Read More→

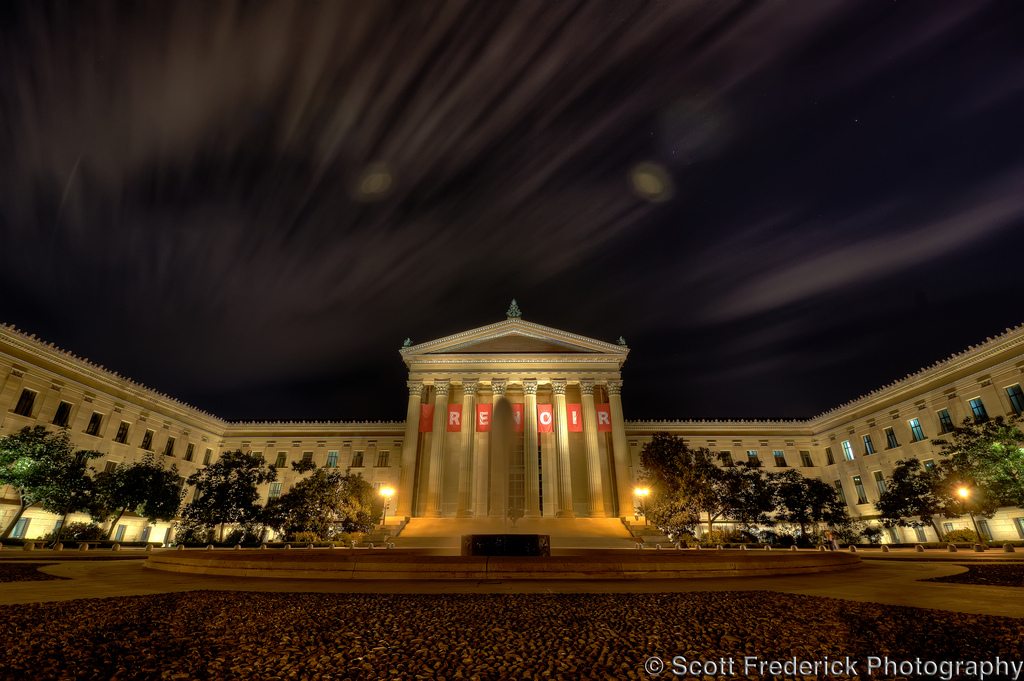
Cityscapes: After Dark

Allow me to introduce myself. I am known as an HDR photographer of cityscapes, landscapes, and urban exploration. About a year ago I decided to take photography very seriously. Some of the questions I had asked myself were, what did I want to photograph? What exactly were my intentions behind the camera? I thought Philadelphia would make a beautiful canvas to start my photography journey, and so it began. Most of the available time I had to shoot was during the evening, so I first set out with a tripod and cable release to capture non HDR long exposures after dark. I think any photographer beginning today with an interest in HDR can benefit from this structured workflow. Long exposures at night can teach you the discipline in which HDR photography revolves around.

philadelphia-museum-of-art

One of the hardest things about shooting after dark, is being able to see thru your viewfinder. These conditions also make it difficult to focus your lens. It’s always best before composing your shot, to zoom in and focus on an area that has available light. I can’t tell you how many times I’ve composed first, to discover that I can’t lock in my focus point. Once you have locked in your focus point, turn off autofocus. You don’t want your camera to refocus before the shutter opens. Read More→

Building Your Photography Support Network

This is more of a continuation of my last post It’s Good to Talk (to Other Photographers) where I touched on the idea of meeting and networking with our fellow professionals (and beginners).

What is a photography support network?

It doesn’t have to be anything terribly formal, in fact it can be anything from a small group of friends to a international organisation. The essence of a support network is having a group of photographers that you can call upon for advice or assistance (and vice versa). What’s more important is the social element…… you want to be in a group with people you actually get on with! Read More→

Photography 101: Shutter Speed Fun

Shutter speed might be less complicated than aperture, but the effects of this setting can play a big role in your photographs. The shutter is your cameras barrier to the world. When the shutter is open, the world is flowing onto your camera sensor, or film. Knowing how long to let this detail past your shutter is what makes shutter speed an intricate part of the exposure triangle.

Before we dive into this article, I will only be talking about shutter speed. There are more nuances to this mechanic that play a role in choosing a shutter speed. For now though, we will look at what shutter speed does, and why you would play with this aspect of photography. I also want to note that I use light and detail as interchangeable terms.

There are two main reasons many people will want to play with shutter speeds. The first is to portray motion in a still image, while the second is to control the flow of light. Let’s dive into each of these setups and look at their use and why you might consider one shutter speed over another.

Starting off, the control of motion is quite possibly the most widely used trick for shutter speed manipulation. Shutter speeds come in measurements of time. For example, you might see a photos metadata listing a shutter speed of 1/125. This means the photo was captured at 125th of a second. Shutter speeds can range from hours, to fractions of a second as quickly as 1/8000th of a second. Read More→