Archive for Make Better Photographs – Page 34

Photography 101: Five Tips For Dealing With The Cold Weather

As much as it may pain many of us who live in northern climates, the cold weather is finally settling in for the long haul. This time often comes with great opportunities to capture gorgeous snow and ice photos. It also means a little extra care needs to be taken with your camera while you are out in these freezing temperatures. Before you embark on trudging through giant snowdrifts for that perfect pine tree photo, follow a few items to help keep your camera happy.

1. Batteries despise the cold. Batteries may provide you power, but they tend to go on strike in the cold. If you do not have extra batteries for your camera, now is the perfect time to invest in one spare at the minimum. The cold is hard on batteries. You can loose as much as 50% of your normal shooting life while shooting in the frigid temperatures.

There are a few things you can do to help extend battery life while out in the cold. The first is to keep your spare batteries close to your body. This at least keeps them close to body temperature. The second thing you can do is use those hand warming packs and wrap them around your batter compartment. This has a side benefit of helping to keep your camera warm. You are not looking to get things sweltering hot, but any bit of warmth is going to be beneficial when it is -10 outside.

2. LCD screens also despise the cold. As the temperatures drop, so does the functionality of your LCD. Your LCD screens can become extremely slow, inaccurate in color, or just not function all together when you are out in the cold. This means you have to account for a few things. Know approximately what setting you will be shooting with, and then set them before you leave the warmth of your car/home. LCDs going on strike in the cold also mean they may not show colors correctly. Read More→

How to Hire a Qualified 2nd Shooter for a Wedding

Guest Blogger Robert Hillis wrote a great article titled “Key Reasons to Bring Along a 2nd Shooter to a Wedding”. One of our awesome Facebook fans Sarah Higdon-Lopez commented on Robert’s post and that lead to the question of how do you find a photographer to be a 2nd shooter and how much should you pay them?

When you commit to photographing a couple’s wedding, you’re taking on a huge responsibility. Having a 2nd shooter there is a great way to make sure you capture all of those special moments. They’re also a great backup incase you miss a shot or have an equipment failure. Sarah’s husband has shot with her in the past but if you don’t have a spouse with the “skills to pay the bills” how do you find a quality photographer to help you out?

The first thing you need to do is to be honest with yourself and evaluate your skills and experience level. Sarah is a new photographer to the scene so it might be a good idea to try and find someone that has a little more experience shooting weddings. Start by contacting other local photographers. Search online or look in your Yellow Pages for photographers specializing in weddings and contact them to discuss your needs. Some may not want to get involved because of the whole “competition thing” but I’m sure you’ll find many who are happy to help out, especially if they’re not busy on the dates you need them. Read More→

How To Photograph A Dead Car

There are certain things that attract people to grunge photography; they are mainly abandoned places, forgotten objects, and of course, dead cars. In this post, I’ll show you how to properly photograph a dead car, or at the very least, the methods I use to photograph one.

If you are looking for inspiration, there is a fantastic group on Flickr dedicated to dead vehicles appropriately called Found on Roadside Dead.

Dead Car (1 of 6)
I came across this old abandoned car while visiting a close friend. Although this car is currently sitting on private property, with buildings nearby, the angle of this shot gives the illusion that the car is in the middle of absolutely nowhere. The negative open space gives the feeling of isolation. Read More→

One Light Wonder for Children Portraits: by Daryl Brown

Photographing children can be challenging let alone getting them to sit still for the session. So for me as I’m sure many other portrait photographers, I keep the process simple. I use one large soft box with a strobe and I let the kids be kids. To me thats the true image most parents want unless they are trying to get model agency representation. When I have a child portrait session, I do my best to not have things around that would distract them and I also tidy up the cords and other miscellaneous gear to avoid accidents because we all know kids are adventurous. Its always good to know ahead of time exactly what the clients want as far as background and or location. Most of my clients so far just wanted either a white, dark gray or sometimes black background. That seems to be the standard so my advice  is to keep a roll of each around and present them with options, they’ll appreciate that more. Once you know what type of image the client wants thats where my simple one light setup can come in handy. Read More→

Photography 101: The Lens Game

The hardest part of moving into the SLR/DSLR arena is what to get for a lens. There are so many choices, each crammed with numbers and abbreviations to cause more confusion than reading a Sun Tzu book. Let’s dive into what makes a lens a Fast Super Zoom Image Stabilized piece of work worthy of your money.

Wide-angle Lenses – These lenses take in great amounts of subject matter. Wide-angle lenses often come in the small millimeter ranges. Think anything from 1mm – 50mm. You may use a wide-angle lens to capture a vast amount of beachfront, or capture a whole city skyline. These lenses are also great for close-up shots in which you want to bring in a lot of surrounding details. Like a doorbell surrounded by grungy brickwork.

Standard Lenses – This lens type still takes in a vast amount of detail, but this amount is much less than a wide-angle. The focal length on these types of lenses often sits in the 50mm – 55mm range. Keep in mind that standard lenses are more a term you heard back in the film days, these lenses are still usable, and enjoyed, today.

Telephoto Lenses – Telephoto lenses are like having a small telescope mounted to your camera. These lenses usually start at the 70mm range and can work all the way up to a 1200mm lens that looks like a small cannon (ironically Cannon is the one that made this 1200mm beast). Telephoto lenses take in less subject matter, but are great for bringing far away objects up close. Many wildlife and sports photographers use this type of lenses.

Prime Lenses – Prime lenses are one set focal point lens. If you want a good workout, then this is the lens for you. A prime is often denoted by a simple focal length like 50mm. These are great lenses as they can provide super sharp, detail rich photos, but the focusing mechanism is your body. If you are willing to move around, these lenses are a great addition to your bag of gear. Read More→

City & Land : Black & White

5183674982_41dd337154_z

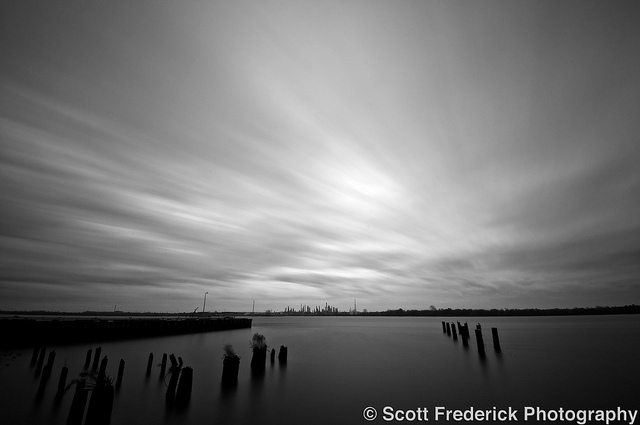
Black & white photography, is a fairly new medium for me.  I knew I wanted to incorporate it into my workflow, but I didn’t know how.  I think shooting B&W has it’s place, and lately I have found some interesting ways to work with it. One of the tools I think is a must have for any photographer, is the ND filter. I swear by the B+W brand, and am addicted to the ND 10 stop filter.  During the day it’s an amazing tool, and 75% or more of the time I will convert these images to B&W.  If there are heavy clouds and moving elements, it will give you an incredible effect.

You can view my article on CurrentPhotographer.com called “Black Glass 101” to better understand this filter. Read More→