A few weeks ago I received an email from John, one of our community members. John enjoys sports photography and asked how much should he charge for prints of his images?
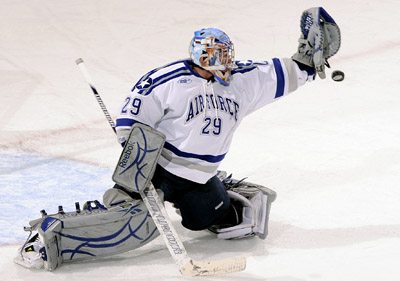
I’m trying to start selling some of my hockey pictures and I was trying to figure out if anyone or anything tracks the average price people are charging for a sports related 4×6, 5×7, 8×10, etc. My intention is not to undercut someone else but I definitely want to be competitive. So far I have found a couple of different sites and they vary widely in price. For example, I found the following prices for 8×10; $6, $19, $7 and $22.
Below is my response to John and I thought I would share it with the rest of our community. While some of my suggestions and comments are specific to John’s sports photography, they can be applied to any type of fine art photography.
There really aren’t publicized databases of what people are selling photos for. In fact most of what you’ll find online is either opinion, best guess or an average taken from several sources. The best way to determine pricing for your prints is to figure out your costs and determine what the market can bear.
Here are a few thoughts that will help to determine the cost of your time and materials needed to create your prints:
1. You already did some research and found varying prices for similar photos to what you’re creating. These numbers are good to know because they are your competition and if a consumer is looking for hockey photos most likely they’ll do similar research and stumble across the same sites.
 2. Now you need to determine the “cost” of creating your prints. How much time do you put into the creation of your images?
+ Prep Time
+ Game Time
+ Post Game Time
+ Travel Time
+ Processing/Retouching Time
+ Printing Time
+ Matting/Framing Time
____________________________________
= Total Time spent to create your final product
Figure out a realistic hourly rate that you think your time is worth for each one of these tasks. Now break this number down into a per print cost. Keep in mind, you may shoot a couple hundred images while you’re at a game but most likely only a handful will actually be good enough to sell. For example, if out of 200 images you only have 10 that are good enough to sell, then take your total time and divide by 10 and that is your cost of time per salable image.
3. Since you’re just starting out selling your images it’s going to be hard to determine, but you need to figure in how much time you’ll spend marketing and promoting your photos and also the time involved with fulfilling the orders (processing credit card transactions, creating mailing labels, packaging the products, dropping packages at the post office/UPS/FedEx, etc.). Again figure out a realistic hourly rate for each one of these tasks, then you’ll want to break that down into a per print cost.
Note: You as the “artist” can command a higher hourly rate. So the time it takes you to create the final print should be figured out at that higher rate. Other than the marketing and promotion time, the fulfillment time should be figured out at a lower hourly rate. The reason being is, you are the only “artist” and theoretically the only one who is able to create your “art”. The time spent fulfilling the orders can be done by someone else for a much lower hourly rate. If you get so busy that you have to hire someone to fulfill your orders, you would be calculating their time at that lower rate. In the beginning you most likely will be doing everything yourself so you should plan on less per hour for those tasks. The flip side to this is, while you’re processing credit cards and packing up your prints, it’s time taken away from creating new images that you can sell. But in the end this is just the cost of starting and running a business.
4. You also need to figure out how much your total out of pocket expenses are for your printer inks, paper, frames, mattes, packaging materials, etc., and then break that down into a per print cost. This number will vary based on the size of the prints you’re creating. If you’re using an outside lab to create your prints, then it’s just a matter of adding in those costs.
This will get you down to the cost of your time and materials to create your product. This is the minimum amount you have to charge to be compensated for the creation of your product. If you can’t sell you prints for this minimum price then STOP here! Unless you want to share your images with the world for fun and the love of it, don’t bother moving forward as it will be a losing financial proposition.
So you’ve figured out a cost for your time and materials and found based on the market research you did, you’ll be able to sell your prints for enough to at least cover those costs. Now you need to figure out the “value” of your product to determine if you can make a profit. Consumers in general don’t have a real understanding of the value of art. Sure they know the paintings hanging on the wall in the museums are priceless but that’s because the artists are dead, right? The consumers “perceived value” of art is what we need to address. What do they think the photo is worth and how much are they willing to pay for it?
Portrait and event photographers are creating images unique to the customer. These images can’t be obtained elsewhere short of hiring another photographer. The customer has a perception of value that these photographic services hold. While photographers wish this perceived value was higher most of the time they are able to justify the costs to them. When you’re selling fine art photography it’s much harder to justify the cost of the prints to the customer. They either get it and are happy to pay or they don’t and won’t pay. Many look at fine art photography as a commodity that’s easily obtained. There are tens of thousands of photographers selling fine art prints online many of which share similar styles and looks. Because of this, selling your prints turns into more of a price battle than a true appreciation of art.

Here are a few questions and thoughts that will help you determine the “value” of your prints.
1. Are your hockey photos of professionals (I’m going to assume they are)? If so, how widely available are similar images? If you are shooting amateur players or youth leagues that’s a whole different story.
2. Are your photos posed portraits or action shots that you took at games? Did the players pose exclusively for you or did you shoot them from behind the boards? Why I’m asking is, if the players posed exclusively for you there is a little more value to the images because they are more unique. If they are action shots from behind the boards that anyone else could have made (and probably did) they are going to be more common and probably not as valuable.
3. Why would a customer buy your print over someone else’s? What makes your image unique and different? Developing a style or look is very important and will make more common shots look extraordinary. They will take on a higher perceived value of art and not that of just a snapshot.
4. Is the market flooded with images of this type? Sports images in general are very popular and available everywhere. You can find images online for free, you can go to your local sports store and find images sometimes signed, they’re in magazines… everywhere.
From the questions above if you determine your images are common to what’s out there then you really will only be able to charge what everyone else is. Prices may vary but even at the highest price of $22 for an 8×10, that’s not a lot of money for “art”. If you goal is to mass produce these prints and try to sell volume then the lower price is fine but you’re not really selling art at that point, you’re selling a widget.
If you want to sell “art” and take it to the next level you need to be different and offer something that no one else is.
1. Maybe you can make a few connections with some players and get them to sign some of your prints. You could sell them as numbered, limited editions that are matted and framed.
2. Develop more of an artsy style. Maybe it’s camera angle, maybe it’s the way you process the images. Make it unique and make it yours.
3. Focus on just one team to photograph and go after the diehard fans. True believers are willing to pay for great wall art to hang in their Man Caves.
4. Connect with charities and offer your art to be auctioned off in a fundraiser. The charity will take them on consignment and if they sell, will pay you the agreed upon price and keep the rest of the money for their cause. It’s a great way to help out a worthy cause and get your name out there at the same time. By the way, sports images sell great at charity golf outings.
These are just a few ideas on how to set yourself apart from the rest. There are many, many more ways, you just have to be creative in your approach.
So how much do you charge for “art” ? At very least you want to price the art at a 100% markup or double what your cost of time and material was to create it. If it costs you $50 to create an 8×10 matted and framed piece, you should easily be able to sell it for $100. The larger the piece the higher the percentage you can mark it up. A 16×20 matted and framed print that cost you $75 to create could easily be sold for $200 or more because the perceived value is higher. A larger piece takes up more wall space. Now if you really want to go big, look into the Gallery Wraps. A 30×20 might cost you $150 to create but you could easily sell it for $300+. The bigger and more unique your images are, the more they will be perceived as art and have a higher value to the average consumer.
View our Grow Your Business section for even more great
tips and ideas to help you succeed in business.

Founder of Current Photographer, co-host of The Digital Photography Cafe Show, Designer, Photographer, and overall tech geek.